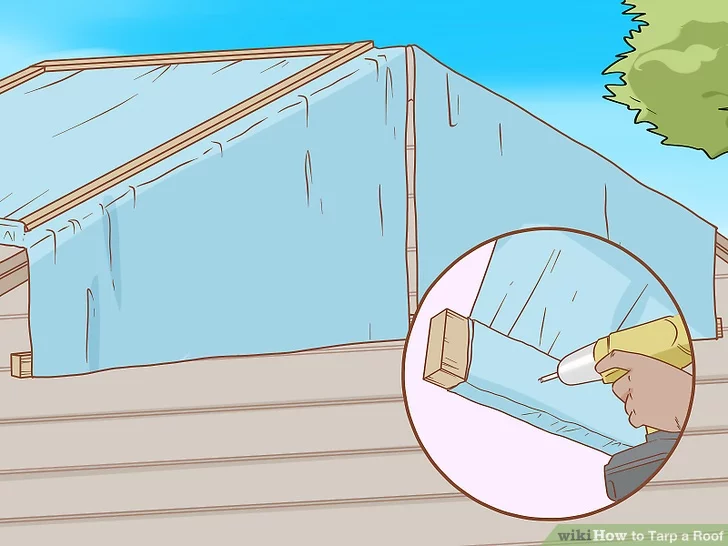
The roof of your Agoura Hills house protects you from the elements, and when something goes wrong, it can be devastating. While regular repairs can extend your roof’s lifespan and give you peace of mind, eventually, roofs must be replaced. An asphalt shingle roof will usually last between 15 and 30 years, but it will change with material and other factors.
The good news is that you can reroof your house yourself, assuming you plan things out properly. However, if you decide to do so, take the proper safety precautions, and do not attempt it if you are uncomfortable getting on top of a roof.
The First Steps
Before doing anything on the roof, you will need to do some prep work, starting with understanding the local building codes and getting the required permits. Additionally, you will have to choose the shingles you want to install, calculate how many you need for the job, and measure the length of a shingle according to the roof.
Check the Local Building Codes
Every area has a unique way of doing things, so you want to check the local building codes before doing any work. For instance, in some areas, the layers of shingles you have on a roof will be regulated. There might also be specific materials that are allowed, as well as different requirements based on climate.
In coastal areas, high winds and severe weather can cause a lot of problems. Because of that, there are requirements where structural design and load are concerned. Moreover, permits become even more important in such areas, which is why you should always make sure to procure the proper permits prior to doing any work.
Procure Permits
Checking for permits is a must, no matter where you are or what kind of work you plan on doing. Local government agencies will have all the necessary information, with the Building Services Department in your area being particularly involved. Common things you will need include the following:
- Proof that you own the property
- Any necessary application paperwork
- A statement of repair saying that you will replace the removed roof
- Construction and elevation drawings
The precise things you need to get the job approved will vary depending on where you are and what you plan to do. However, be prepared to show the proper documentation to get what you need.
Choose Your Shingles
While asphalt shingles are the most common choice, there are quite a few varieties, with some more suitable for certain climates and styles than others. When determining which type to use for your Agoura Hills roof, consider the area, your house, and the style of the project. Some of the popular shingles include the following:
- Asphalt shingles are common and easy to install. Moreover, their durability allows them to last up to 30 years if properly maintained. They are often secured to the shingles above using roofing cement or tar, and they can be reinforced with fiberglass.
- Wood shingles are not as easy to install as asphalt shingles. Not only are they often hand-split shakes, but they require proper spacing to account for expansion. Fortunately, they last up to 30 years, though that is with proper care.
- Slate shingles are heavy and durable, and they last a long time compared to other types of shingles. However, they require specialized tools, experienced professionals, and considerable upkeep if they happen to break. They are a luxury shingle choice.
Another choice is laminated shingles, which look similar to slate without the same price and installation concerns. Installing them is a lot like installing asphalt shingles, so you can achieve a look similar to slate with an install similar to asphalt.
Calculate How Many Shingles Are Needed
Once you have picked out the shingles for your roof, calculating how many you need to buy comes next. Usually, shingles are sold in bundles, and three bundles can cover one square of space, which is 100 square feet. Therefore, you can use the total square footage of the roof to figure out how many bundles to buy.
To properly measure your roof, break it down into sections and get the width and length of each one. Multiply those values together to get the area, which you will add to the area of every other section.
Once you have the total area of your roof, divide the number by 100, and you will know how many squares there are. Finally, multiply the number of squares by three. Also, it is a good idea to get around 10% or so additional material to account for wastage.
Measure the Length of a Shingle According to the Roof
Practical measurements give you a better idea of how the shingles will lay on the roof, so you should measure the length of a shingle as it lies across the roof. A majority of asphalt shingles are around three feet in length, and most roofs will not be perfectly divisible by that. Therefore, you will likely have a partial shingle at the end of each row.
Additionally, the bottom row needs to hang over the edge. If you are working with a wood shingle roof, that means cutting the shingles that you are placing at the edge to make a straight line.
Preparing the Roof
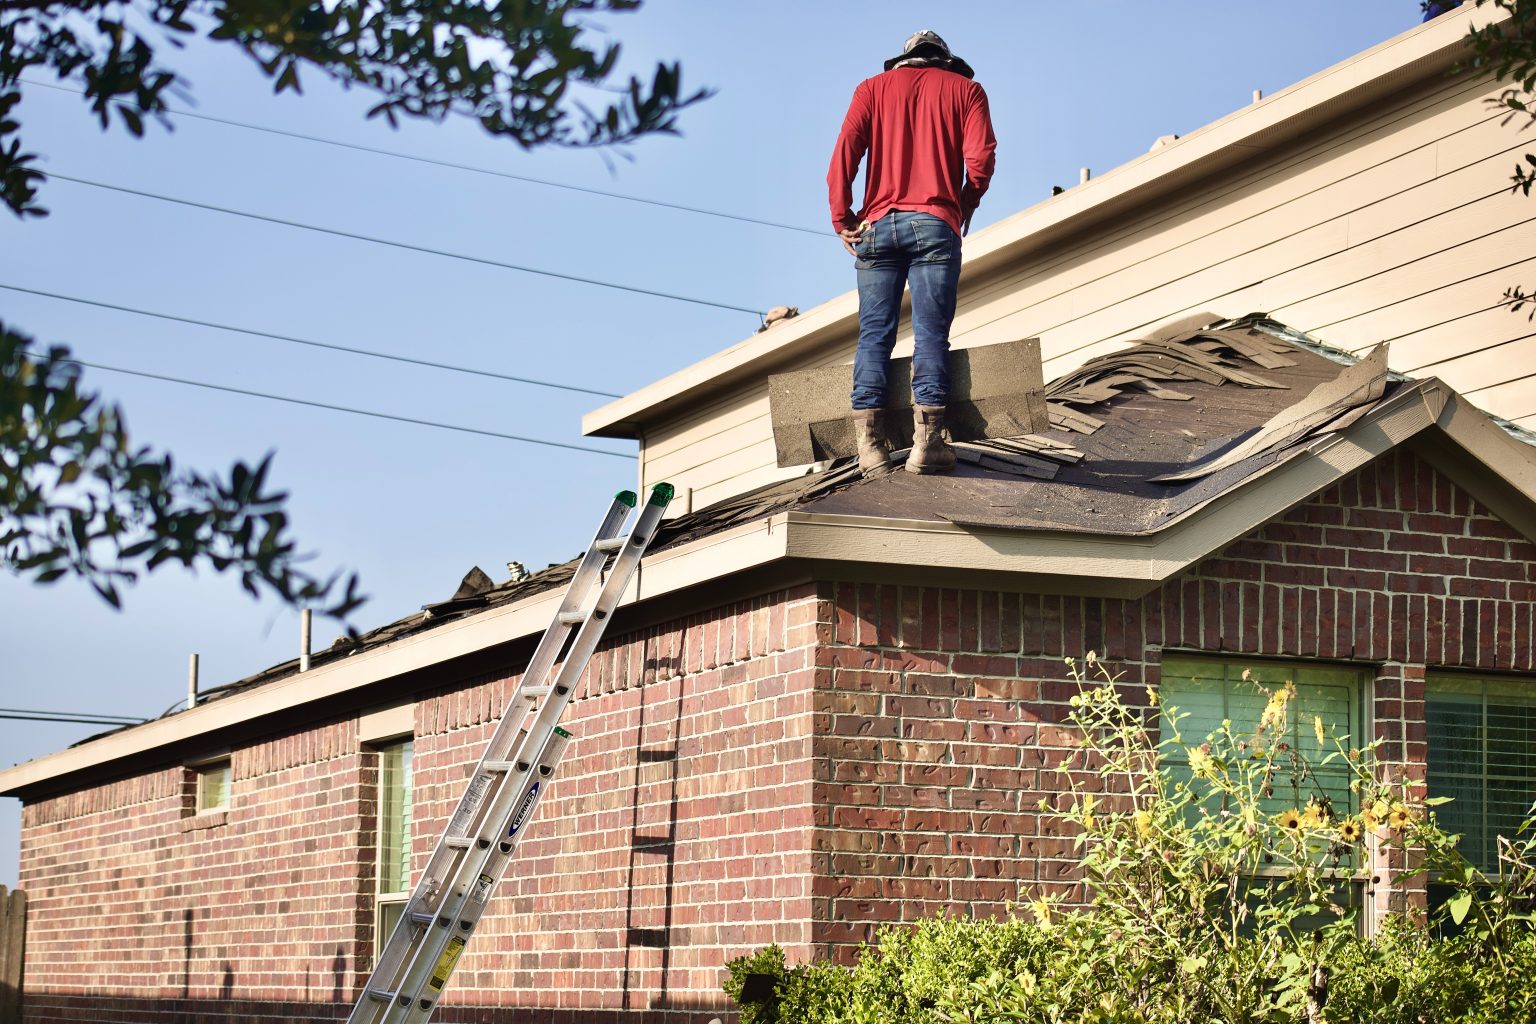
Preparations are key to a successful project, so go ahead and plan ahead of time. That means getting your safety precautions in order, knowing how you will deal with trash, and stripping the shingles off the roof to make way for the new ones. You will also need to remove any flashing, clean away the leftover debris, and prepare the underlayment.
Take Safety Precautions
Safety is incredibly important when you are doing roofing work, especially if the roof has a high pitch. If that is the case, using a harness and roofing jacks is a good idea. When working with jacks, set 2×10 jacks around three feet above the edge of the roof.
You should also get rubber-soled boots for traction and ensure you have proper work glasses and gloves. You might also want to use scaffolding or toe boards, which will stop equipment and tools from falling from the roof.
Plan for Trash
There is a lot of trash when you are reroofing since you have to remove all of the shingles and debris from the roof. While a basic trash container might be okay for a small roofing job, you probably want to go ahead and invest in something larger, such as a dumpster. Not only will it make cleaning up easier, but it will save you time.
Begin Removing Shingles
Removing shingles is the start of the actual roofing work, and when you start, all of the safety precautions should already be in place. Assuming they are, begin working at the peak of the roof, choosing the side farthest away from the trash container you chose. You do not want to walk over areas you have already stripped later.
There are specific tools to deal with the removal of shingles, which are designed to get underneath them and get them off quickly. However, a garden fork also works, and there is always the option to use a hammer if you do not mind going a bit slower. No matter what, make sure to pry up any nails and loosen the ridge caps first. Here are some helpful things to keep in mind as you work:
- You can toss any debris and shingles from the top to the roof jacks if you have them, taking breaks to move debris from the jacks to the trash from time to time.
- Removing the shingles from your roof can be physically demanding, so plan enough time to properly get it done.
- Always consider your footing, and consider working with someone else to ensure nothing bad happens while you are alone.
While you are removing shingles, keep an eye out for nails and other debris. You will also want to check the roofing underneath, noting any potential damage that needs to be dealt with before new shingles go down.
Remove Flashing
After the shingles are out of the way, you can take care of the flashing around things like chimneys, vents, and valleys. Some of it might be salvageable and reusable, so be careful when taking it off. But flashing in valleys is almost always replaced.
Replacing the flashing in the middle of the project is a good idea. Moreover, if there is ever any doubt about the condition of a piece of flashing, go ahead and replace it to be on the safe side.
Clean the Roof
There will always be some debris left behind when you are done, whether it be dirt and dust or some nails that got left behind. Sweep the roof while keeping an eye out for nails, removing anything you see. It is also a good time to secure loose boards to the sheathing, checking once more for damage and replacing anything that looks problematic.
Install the Underlayer
An ice and water barrier and asphalt felt provide superior weather protection that will keep your home protected. When installing the ice and water barrier, make sure to cover any gutter flashing if you have gutters. Otherwise, follow these steps to install the underlayment:
- Hold it in place at the top using staples every couple of feet
- Lift the bottom and peel away the backing before letting it fall into place
- Ensure it properly stuck to the roof
Next, unroll and staple 30lb felt across the rest of the roof, using 5/16-inch staples to prevent it from blowing away or moving when stepped on.
Asphalt roofing paper is a good final touch for “weathering-in” your roof. You can utilize 2-inch tin caps under your roofing nails to prevent tearing, but that is only necessary if you expect wind before the new shingles are applied.
When installing the roofing paper, keep it straight using chalk lines, which you can easily snap on. It is important because using the bottom of the roof as your guide will likely result in crooked paper, which means wrinkles. Additionally, allow the felt to go past the bottom edge of the roof around 1/4 to 3/8 of an inch.
Putting on the Roof
After you have removed the old roofing material and ensured there is no damage, you can start putting on the new roof. That means installing drip molding, adding the flashing, and then getting to the shingles themselves. Just make sure to add chalk lines to make things easier and plan things out ahead of time for a smooth project.
Install Drip Molding
The first step is to install drip molding around the edge of the roof, which can be done by using roofing nails spaced 12 inches apart. It should surround the entire roof and extend 1/4 to 3/8 of an inch past the edge, covering the felt paper installed in the previous section.
Add Flashing
With the drip molding out of the way, begin working on the flashing, particularly the valley areas, which is where two sections join. Use the same method you did to nail down the drip molding.
Usually, valley flashing will come premade, either being bent to fit the area or flat and ready to be cut and placed. There is also the option to use old flashing, though valley flashing is rarely reused, so you will likely just want to replace it.
Place Chalk Lines
Chalk lines keep things in order on the roof. Not only do lines ensure you keep the rows straight, but it provides you an idea of how the layering will go. The space between lines should be six inches, starting from the bottom of the roof and working your way up to the peak.
Lay the Starter Course
It is time to start laying shingles, which means placing down a starter course. You can follow the chalk line, placing them at intervals of six inches. You will want to nail them in place using three nails for each shingle. The nails should be spaced three inches apart from top edge to top edge.
While it depends on what type of shingles you are using, there might be a special starter row or a strip of material that can be cut to fit the length of the roof. If there is, simply follow any instructions provided.
If you happen to be using three-tab shingles, the nails should go around 3/4 of an inch above the cutouts, close to where the tabs meet the upper section of the shingle. You will also want to place a nail two inches from each end, lining up with the other two. That means using a total of four nails per three-tab shingle.
Lay the First Course
The first course will be unique since it will need to have six inches cut off the length to properly join the ends of the first regular row placed over the starter shingles. However, before doing that, you can snap another chalk line above the starter course to act as a guideline.
You can also accomplish the desired results without any cutting. All you have to do is turn the shingles upside down, which will have the tabs facing up. After this row, the rest will be placed full-size.
Lay the Remaining Courses
When you get to the second row, you need to set the first shingle back off the edge of the roof by half a tab, which is six inches. The goal is to stagger the cutout slots, preventing them from lining up. When placed, the bottom of the tabs should just touch the tops of the cutout slots on the shingle below.
Repeat the process for each row, trimming shingles to fit the space left at the end of each row. Additionally, you will want to leave some space around vents, chimneys, and flashing since they will require extra care.
Install Shingles Around Chimneys and Vents
Vents, chimneys, and other protrusions can require some extra time since you need to install flashing. Here are some basic steps you can follow when dealing with a pipe:
- Cut flashing that extends six inches in every direction and has a hole in the center large enough for the pipe to fit through.
- Place the flashing and install shingles over it, using adhesive to hold it in place.
- Cut a special shingle to fit over the pipe.
- Consider using a vent pipe boot, which slides over vent pipes to add protection.
- Also, consider a rubber gasket to keep joints from leaking.
Chimneys are handled a bit differently. Cut strips of flashing that can be bent to create a joint between the wall of the chimney’s outside and edge and the roof. You can then bring shingles to the edge of the flashing, installing over it as normal using adhesive. Make sure you get flashing done properly to avoid leaks down the line.
Install the Ridge Shingles
Installing ridge shingles is the final step, and it can be done in a few ways. First, you can use preformed ridge shingles, which can be installed according to the instructions. Another option is creating ridge shingles by cutting and bending regular three-tab shingles. They can be folded over the ridge and installed normally after being cut to size.
Regardless of how you go about it, make sure to cover the top of any exposed nails with adhesive to prevent future problems.
Finishing Things Up
Once the shingles are installed, it is time to clean everything up since there are bound to be nails and debris scattered about. These things can be dangerous, so you need to check the roof and around the job site, such as in the yard. Clean up anything you find.
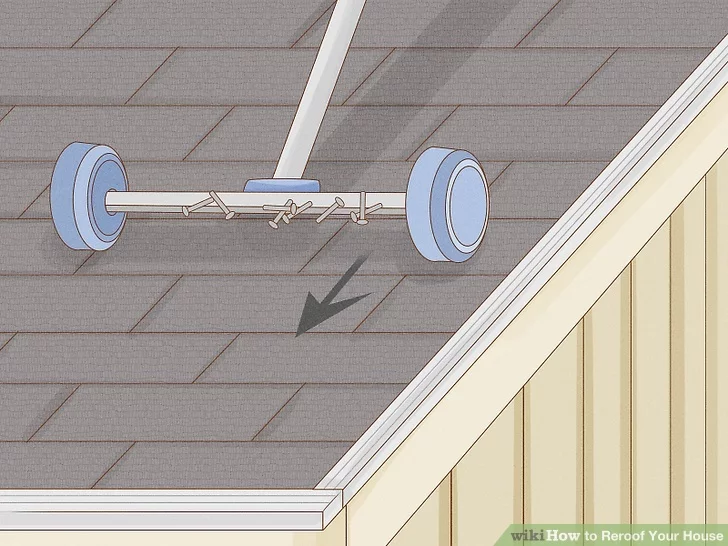
A great tool for finding loose nails is a roller magnet. You simply push it around to find nails, which is especially useful in areas where seeing nails by eye could be difficult. Consider renting or borrowing one to make cleanup easier.
Maintaining Your Roof
Proper maintenance is necessary to achieve the maximum life of your roof. It is especially important when you do your own roof work since it might not last as long as a professional job. That is why regular inspections and repairs are recommended, with the goal being to find and fix problems before they become serious.
Annual Inspections
The timeframe for inspections can differ based on the material and roof type, but it is recommended that you perform annual inspections. It is especially important if you live in an area that experiences severe weather conditions, such as heavy rain and winds. Perform an inspection on a clear day to look for damage, and take a look after rainy days to search for leaks.
Check for Cracks and Rust With Flashing
Cracked caulk and rust are common problems with flashing, which is particularly vulnerable to the elements. These problems can result in leaks, but they can also be easily fixed. Take a quick glance at any exposed flashing for signs of wear, and reseal any areas with cracked caulk.
Search for Curled Shingles
If you notice curled shingles, it is likely due to wear and tear or high winds, but it should not be a problem in the early years if the shingles were installed properly. However, if shingles were left loose during installation, it might happen.
If you see curled shingles, you will want to reattach them, which can be done by hammering in loose nails or adding new roofing nails as needed. Adding a dab of adhesive under the edges is also a great way to prevent curling.
Get Rid of Any Moss
Moss will damage your roof due to the moisture it holds, ultimately decreasing its longevity. Dead moss can be brushed away with a broom, but you can also use a solution to kill moss. You can also try using baking soda, which is a natural alternative. It is also useful to keep moss away.
Look Inside the Gutters
Gutters will inform you if your shingles are nearing the end of their lifespan. You will know because there will be granules that come off the shingles when it rains. If you see the granules, it means the shingles are no longer faring well against UV rays, so it is time to consider replacing them.
Keep an Eye Out for Leaks
Leaks are another problem you want to keep an eye out for, especially when it comes to internal signs. If there is a leak, you want to find the source and fix it as quickly as possible. If it is not fixed, there is a chance of more serious problems, such as structural damage. Keep an eye out for the following:
- Peeling paint
- Damp or dark areas
- Water stains
When it comes to water damage, consider calling a professional roofing contractor since they can tell whether there is any structural damage that needs to be addressed. If you decide to find the source of the leak yourself, keep in mind that the problem might be higher on the roof than it appears in the house.

With over 12 years of construction industry experience, David Bitan specializes in restoring, inspecting, maintaining, and repairing roofs for residential, industrial, and commercial properties.
If you paint your house, you might also want to change the color of your Calabasas roof. A change in color is also a great way to freshen up the look of a home. Of course, you could replace the roof if you want a different look, but a fresh coat of paint can often achieve the same aesthetic result as installing brand-new roofing.
That being said, a coat of paint will not fix cracks or damage, which will need to be taken care of ahead of time. After that, you can quickly get the job done with a paint sprayer, or you can spend some time doing things by hand. Either way, as you proceed, make sure to put safety above everything else, just like with any roofing project.
Inspecting and Cleaning
Before you can apply a new coat of paint to your roof, you need to make sure there is no damage. It is also important to thoroughly clean the roof so that the painting goes smoothly. Therefore, you will want to check for damage and replace any problem areas, then clean the roof and let it dry before doing anything else.
Check for Cracks or Damage
Checking the roof for cracks and damage is a basic step for any roofing project. Start by using a ladder to access the roof, then look for damage like shingles or tiles with cracks or those lifting from the roof. It helps if you have something to take notes with, such as an overview sketch of the roof.
Even though checking the roof is not a terribly risky task, it still requires caution. That is especially true of roofs with a high pitch, which is why you should use safety equipment to avoid falls. Another option is hiring a contractor to look for damage for you.
One other thing to keep in mind when looking for damage is to not cause any additional problems while you are on the roof. Clay and concrete roof tiles can crack if you step directly on them. Instead, step on the top ride or where they overlap.
Replace Damaged Areas
If you see any damage, you are going to need to replace it. The best practice is to start at the bottom of the roof, replacing any damaged shingles or tiles as you work your way to the peak. It is also a good idea to work on a sunny day and avoid getting on the roof if it recently rained to avoid slipping.
Also, be aware that asbestos shingles are carcinogenic, which means you will want to hire a professional to do the work if you have them. Though, even if you do not, you can always hire a licensed contractor to do repair work for you.
Clean Metal or Tile Roofs With a Power Washer
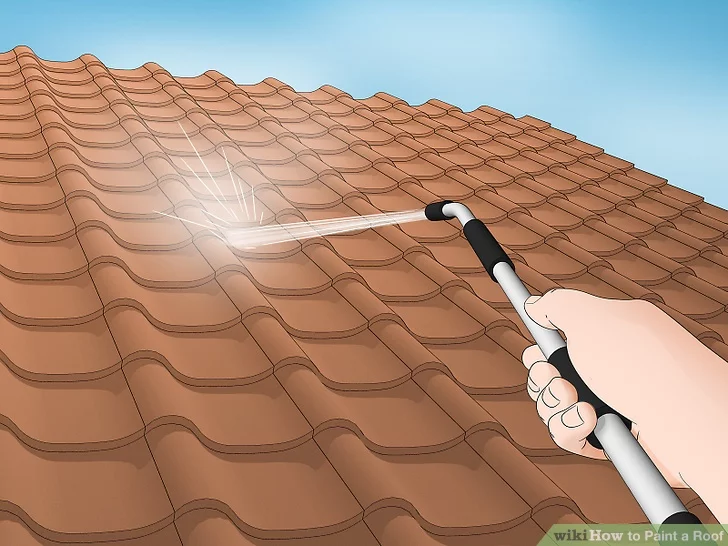
Metal and tile roofing can be cleaned relatively easily using a power washer with a 25° angle wand tip. It should also have a long hose that you can use comfortably while leaving the machine on the ground.
In the case of a power washer, you actually want to start at the top of the roof and work your way down, which will prevent tiles from lifting. If there is moss or lichen on the roof, keep the tip a foot or two away from the roof while spraying it off.
Use a Cleaning Solution for Asphalt Shingles
Asphalt shingles can also have moss on them, but you can take care of it with a cleaning solution of one quart of bleach, a gallon of water, and 1/4 of a cup of heavy-duty cleaner. After mixing the solution, put it into a garden sprayer and spray it onto the shingles. Come back to rinse it off in fifteen minutes with a hose.
Let the Roof Dry
A dry roof is a safe roof. Additionally, moisture can get caught under the paint and cause mold to form, so give it some time to dry before working. On a sunny day, it might only take an hour, but it is a safe bet to give it an entire day otherwise. Some roofs dry faster than others, though, such as metal roofs.
Prepare Equipment and Paint
Purchasing the right equipment and paint can change the time needed to paint a roof from a week to a few days. It is also very important for safety. Therefore, you will want to make sure you buy the right type of paint, proper painting equipment that includes a sprayer, and safety equipment that will keep you secure during the project.
Water-Based Acrylic Paint
There is a lot of paint out there to choose from, but water-based acrylic paint provides the best coverage and protection. Luckily, you can find what you need at almost any paint supply or hardware store. The surface area of your roof will inform you of how much paint is needed.
Consider buying white paint if you want to reflect light and keep the home cooler. Additionally, do not use latex-based paint because it might allow moisture to get trapped below, which can lead to mold or rot.
Procure Painting Equipment
Airless paint sprayers make painting a roof much easier, allowing you to get the job done in a few days. It also helps ensure an even coat, so it is worth renting one. All you have to do is fill the tank with paint, then you can get to work. Just make sure the hose is long enough to work on top of the roof while the machine remains on the ground.
Of course, using brushes and rollers is also an option, but it will take far longer that way. You will need to spend around double the time, if not more, to paint the same area.
Set Up Safety Equipment
No matter how you decide to paint your roof, safety is important. That includes non-slip shoes and a harness. There are boots and shoes with non-slip soles, and buying a pair will make it possible to walk steadily on your roof. But if the pitch is steep, a harness is a must.
If you decide to use a hardness, install the bracket at the peak of the roof. Then, secure the harness around your shoulder and legs. After that, use a rope to connect the bracket and harness, which will prevent you from falling if something should happen. You should also keep the rope taut to avoid letting it touch the wet paint as you go.
Apply the Paint
With all of the prep work done, you can finally move on to painting the roof. That being said, you will still need to cover certain areas that you do not want to get paint on. Other than that, you will be applying primer, laying down multiple coats of paint, and properly painting all of the edges and tight areas.
Make sure to plan how you are going to do the painting. The best choice is to go from top to bottom. You will place the ladder in the middle of the roof along the bottom edge, then you will paint from top to bottom, standing on the ladder below to paint the final section. Then, you will move to the right and do the same thing again, essentially going from top to bottom and left to right.
Cover Certain Areas
Prior to painting, you should cover areas like vents and skylights or anything else you do not want to get paint on. An easy way to do this is by using plastic sheets and painter’s tape, which will help keep any paint from reaching the areas. Just make sure to avoid sticking the tape to any of the roofing materials since it might not stick.
Apply a Coat of Primer
Primer is essential if you want the best final result. Pour a water-based primer into the airless sprayer and spray an even, thin coat over all of the roofing material. After application, give it around two hours to dry, then you can move on to painting. By doing this, you will get better color, especially on shingles and tiles.
Paint the Roof In Strips
Painting is not much different from applying primer. All you have to do is fill the tank and spray an even coat on the roof. To achieve that, hold the nozzle a foot or two away from the roof and pull the trigger, moving it from the peak to an area three or four feet down before releasing.
You will paint in strips of three to four feet, working toward the opposite side of the roof as you do. As you go to the next strip, make sure to overlap the area you painted just enough to get even coverage.
After you have painted from one side of the roof to the other, return to the start and move down your roof, painting another strip of three to four inches this time. Repeat this until you finish the entire roof.
Do not try to use a sprayer when there is a lot of wind since it will blow away the paint. You might also want to consider having someone held with the hose as you go to make things easier.
Put Down a Second Coat
Leave the first coat of paint for a minimum of two hours, ensuring it is set and safe to walk on. Then, start applying another coat, working in the same manner you did with the first coat. You can even add a third coat after another two hours of dry time to achieve a more brilliant color.
Get the Edges and Tight Areas
The last step is finishing touches, which are usually needed at the edges or in tight areas that might be harder to get with a sprayer. That means using a brush or roller and applying several coats, allowing for the same amount of dry time between coats. The key is to make the color appear uniform.
Construction projects rely on accurate measurements to go smoothly, and roofing is no exception. Moreover, taking measurements is often the first step to roofing or re-roofing a home. Therefore, one of the most important skills to master if you want to do your own work is the ability to measure a roof properly.
There are a few ways to get measurements. In fact, you do not need to go up a ladder and get on the roof if you do not want to, though you will get the most accurate measurements that way. Still, if you would rather not, you can do everything from the ground. Both of the methods will be described below.
Staying on the Ground
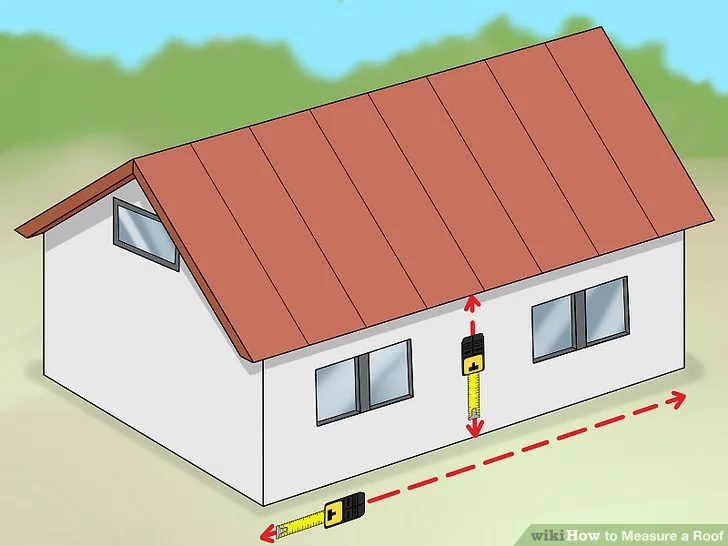
If you prefer not to climb anything and keep your feet planted on the ground, you can easily do it. The steps will involve measuring the exterior walls, calculating the pitch of your roof, using a pitch multiplier table, calculating the square footage, and using the square footage to determine the amount of materials you need.
Measure the Exterior Walls
If you do not want to climb onto a ladder or the roof, then you will need to make some estimates using the exterior walls. Start by measuring the length and width of the walls, recording the values as you do. You can use a tape measure here, going from one end to the other. Make sure to be precise since these measurements will help determine the total square footage later.
After the exterior walls are measured, you need to account for the overhang. Not all roofs have an overhang, but if yours does, do your best to eyeball the length in feet. You will then add the estimation to your measurements.
The process is quick and easy, but it is not as precise as measuring from the roof. Additionally, if you have a roof with an irregular shape, you will not be able to make proper estimates from the ground.

Figure Out the Pitch
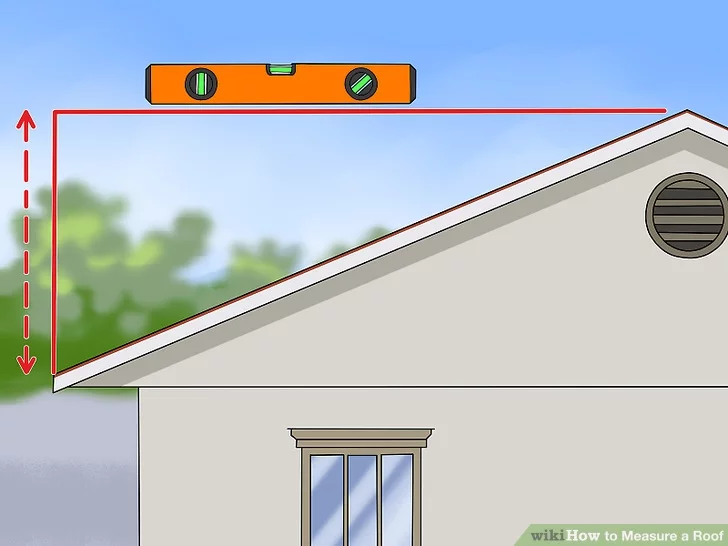
The pitch of the roof is its steepness or slope, and it is determined by the rise over the run. For this step, you need a ladder to reach the roof. Once you are up there, place a level down several feet from the edge so that it is leveled (the bubble is in the center). Once it is leveled, measure the distance between the end of the level to the roof.
You might see the pitch shown as “X/12” or “X-in-12.” In terms of rise over run, they represent an “X” amount of inches of rise for every 12 inches in horizontal movement. So, if the distance from the edge of the level to the roof is six inches, it becomes 6/12 or 6-in-12 inches.
Of course, the above only applies to a 1-foot level. If you have a 2-foot level, you divide the measurement in half, so a 12-inch measurement would also be 6/12 or 6-in-12 inches. This is because the length of the level can be thought of as the run, while the distance from the end to the roof is the rise for that specific run.
Pitch Multiplier Table
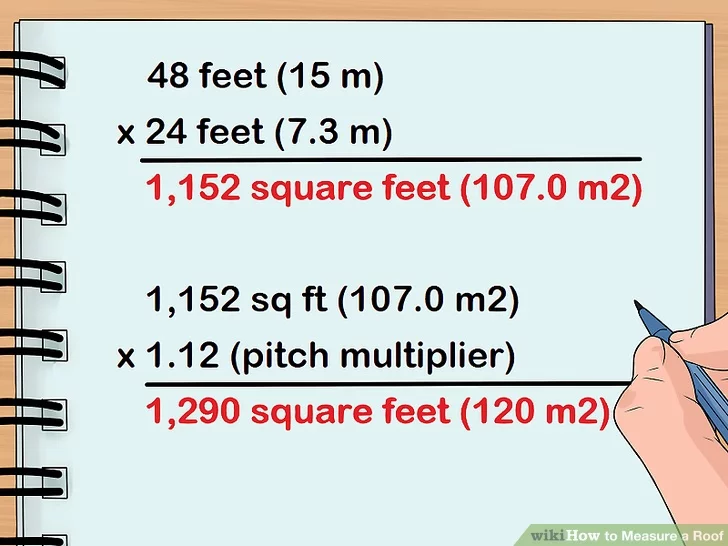
Using a pitch multiplier table is a good way to get the number you need to estimate the square footage of your roof. You can easily find one online, where you should see a list of rises in inches, along with their multipliers. Once you find the right multiplier, you can plug it into your calculations.
In the case of a 6/12 pitch, the multiplier is 1.118, while 7/12 would have a multiplier of 1.158. You can find what you need with a quick search. If in doubt, check a few sources.
Find Square Footage
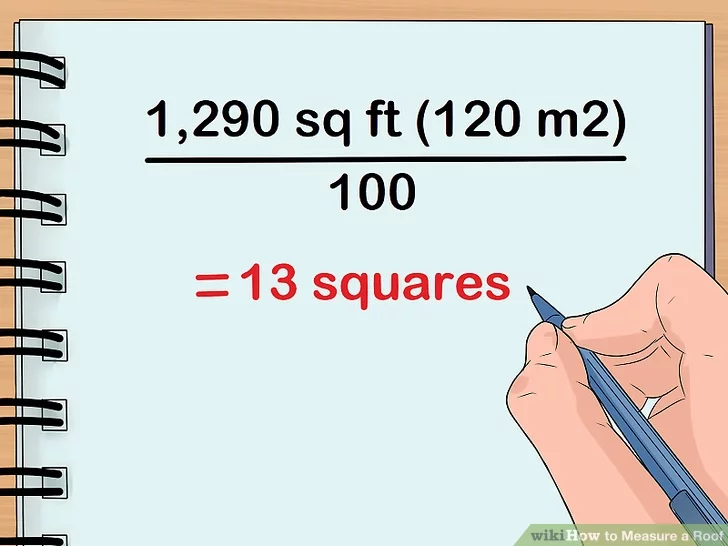
Once you have the measurements and pitch multiplier, it is time to determine the square footage. You can do that by finding the product of the area and the multiplier. That means multiplying the length and width values and then multiplying the result by the pitch multiplier. Doing that will give you the square footage you have to cover.
If you have a roof of 50 feet by 25 feet, then after you multiply them together, you will get an area of 1,250 feet. If you have a pitch of 7/12, the pitch multiplier would be 1.158, which you will multiply by the 1,250 feet to get 1,447.5 feet. And there you have your total square footage.
Estimate Your Materials
Figuring out the materials you need is as simple as some basic division. You want to take the total square footage determined in the previous step and divide it by 100. The method works because bundles of roofing material come with sufficient shingles to go over 100 square feet.
Taking the example from the last step, you would need around 15 bundles. That being said, it is recommended that you purchase about 10% more materials than you need, rounding up. Doing so ensures that you do not run out of materials if something comes up. In the previous example, that raises the total bundles to 16.
Diagramming the Roof
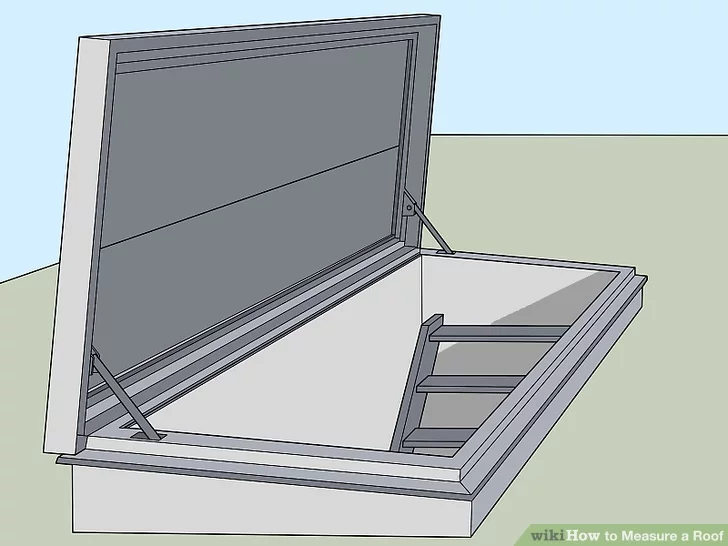
Diagramming is a more precise way to measure your roof, and if you can, you should. That being said, it requires some additional steps, starting with actually getting on top of your roof. From there, you have to measure each side of the main roof, then measure additional sections individually. You will then take your measurements precisely, draw diagrams, and calculate the materials needed as usual.
Get Onto the Roof
Safety comes first when getting onto a roof, so take every precaution as you get up there to start taking measurements. That might mean using an interior window that opens onto the roof or using a ladder. Either way, do not forget to take a tape measure, something to write with, and something to write on.
If you choose to use a ladder, make sure it is on a flat and stable surface. It is best if you have someone else help, having them hold it and keep an eye on you as you are on the roof. That is especially so if you are unfamiliar with this type of work or you have a particularly steep roof. Keep in mind that a pitch of 5/12 or so is the “walkable” limit.
Measure the Main Roof
Many roofs have multiple sections, and you want to take care of them one by one. The best place to start is with the main section of your roof, which is the largest portion from which other sections extend.
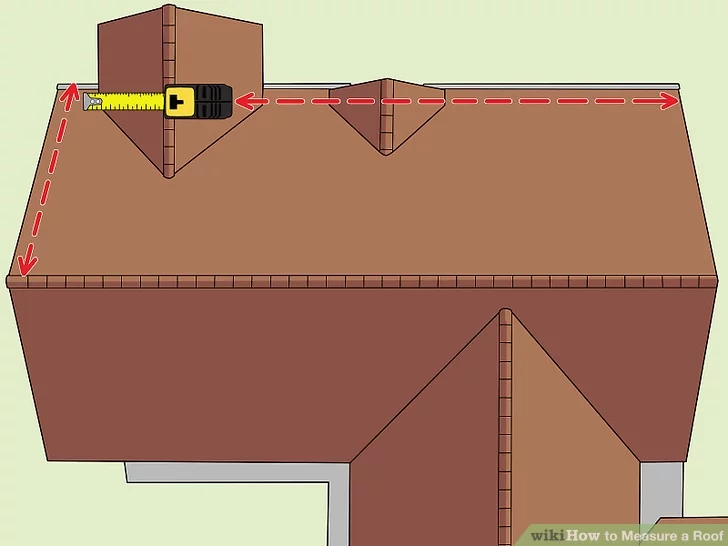
Use the tape measure to get the length and width of the main section in feet, focusing only on the outer perimeter for now. If it is a square or rectangular roof, you only need to do one side, while a sloped sectional roof will require you to jot down dimensions for each plane (flat, continuous section).
Measure the Other Sections
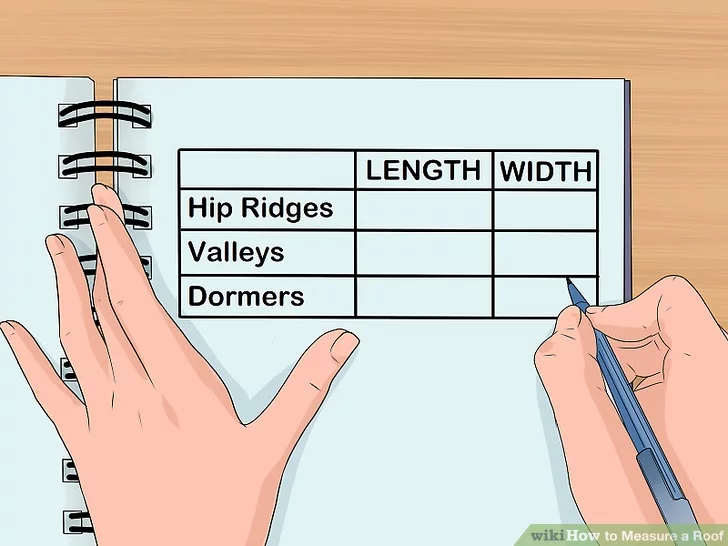
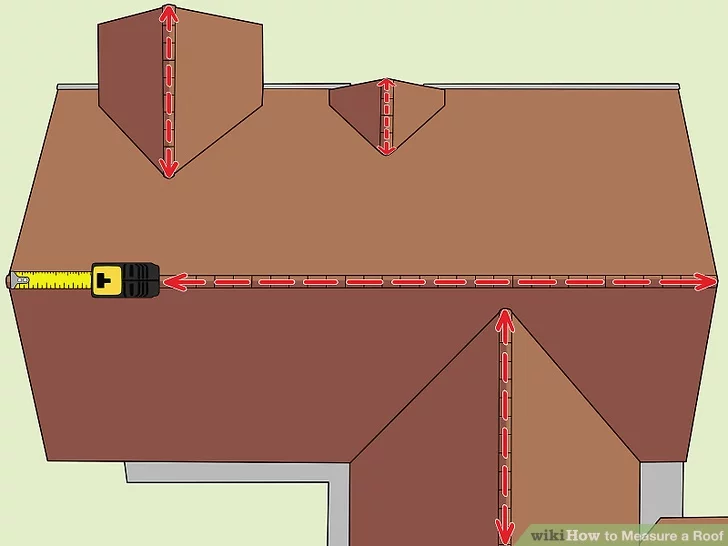
The next step is measuring the other sections of your roof, including ridges, valleys, and dormers, which will need to be added to your calculations. Ridges and valleys are the contours where an individual hip section joins the main section. A dormer is a section that juts out and has a window in it. Get the length and width of everything.
As for the pipes, chimneys, and any other obstacles, you can ignore them for your calculations. They should not impact the quantity of material you need, and whoever works on the roof can work around them when the time comes.
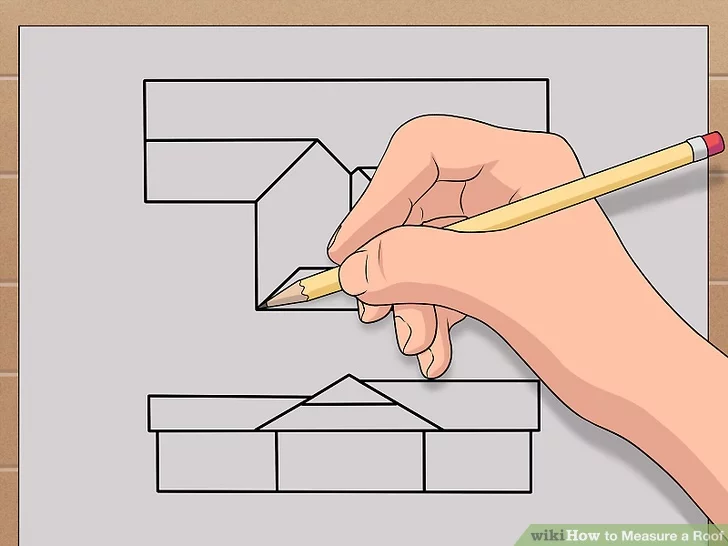
Record Measurements
You should have been taking measurements as you go, but go back and make sure everything is accurate and labeled. That means within the nearest half of an inch, not rounding up or down. Rounding early in the calculation process can cause bigger errors, and you will round toward the end anyway.
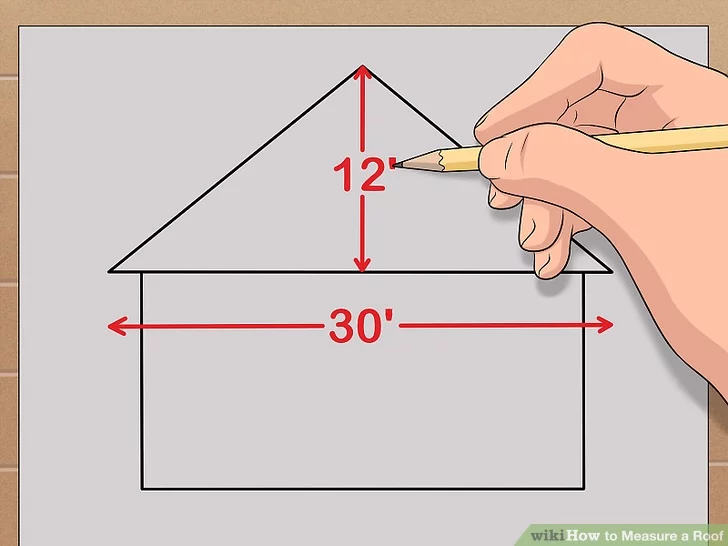
Draw a Diagram and Add Labels
Take a large piece of paper and carefully draw a rough top-down picture of the roof. Start with the basic shape, then add ridges, valleys, hips, and any dormers, making sure you get everything down. Perfection is not the key here. You only need a basic image to add dimensions to so that you can keep up with everything for the calculations.
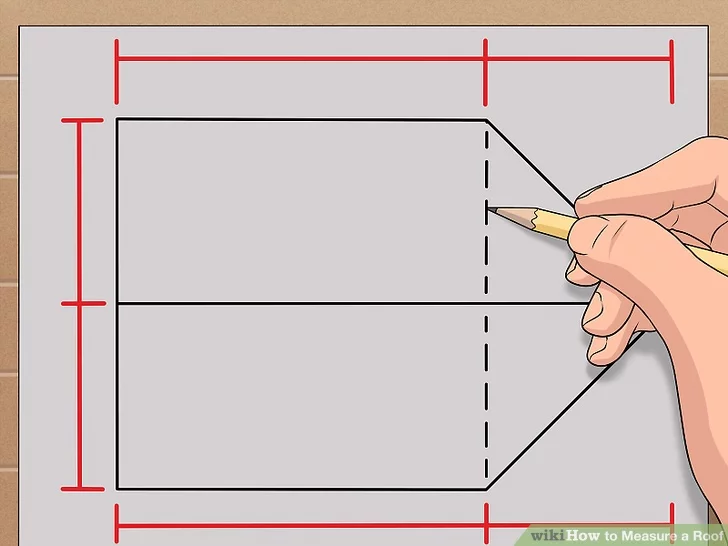
Once you have the sketch done, add the measurements. This part is where the accurate and labeled measurements become important since you will want to put the length and width on the appropriate sections. Begin at the outer edges. Also, make sure to add the lengths of the peaks, hips, and valleys.
Divide the Diagram Into Simple Sections
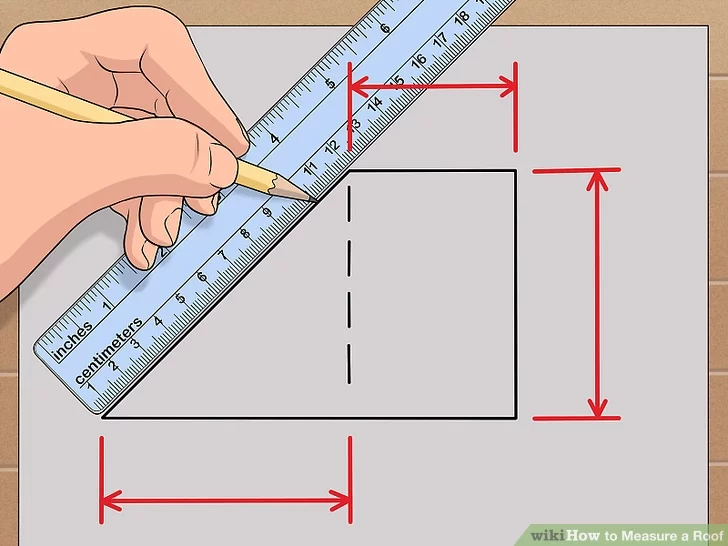
It can help if you divide things into simpler shapes. For instance, with a basic gable roof, you can draw a dotted line to separate the tapered end into two sections, making a rectangle and a triangle. Continue doing this for different parts, lining them off to create geometric sections that include squares, rectangles, and triangles.
It might seem like a lot of extra, perhaps even unnecessary, work. However, it will make the calculations easier and faster, so you will want to spend the time here to keep the mass simple later.
Find the Area of the Rectangular Sections
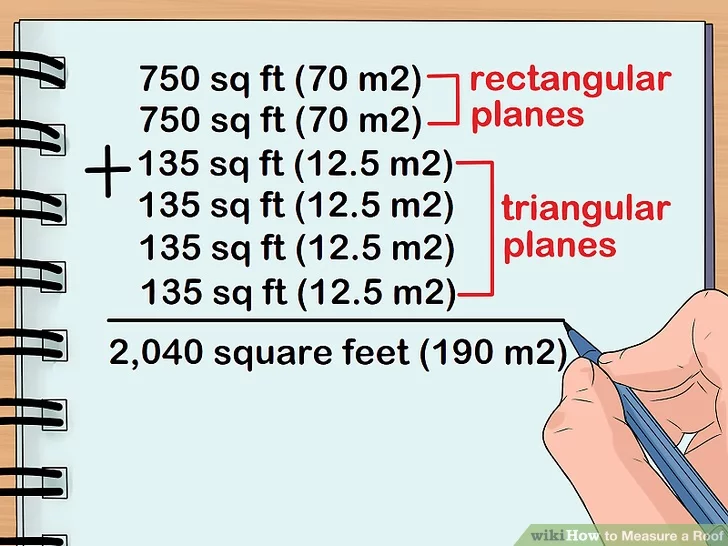
Dealing with the rectangular and square sections is simple, only requiring you to multiply the length by the width. So, if you have a section of roof with a length of 25 feet and a width of 30 feet, that section will have an area of 750 square feet. Do the same for any dormers, filling out your diagram with the areas.
Find the Area of the Triangular Sections
Triangular sections are a bit more involved, but not much, which is why going with easy geometric shapes is a good idea. For triangles, follow these steps to get the square footage:
- Draw a central line between the center of the longest side and the point.
- Multiply the length of the longest size by the length of the central line.
- Divide the product by two.
In other words, half of the base multiplied by the height, which is the distance between the base and the peak in this instance. To demonstrate, if there is a roof section with a base of 20 feet and a height of 10 feet, you would get an area of 100 feet. Upon finishing the calculations, add them to the diagram.
Find the Sum of the Sections and Estimate Your Materials
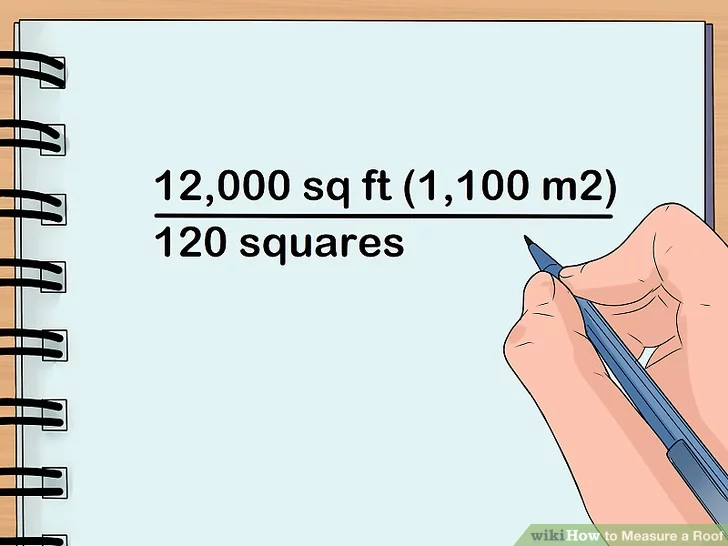
All you have to do to find the sum is take all of the area values and add them together to get the overall square footage. Just make sure not to round up or down and to check the answer once or twice to make sure you did not miss a number the first time.
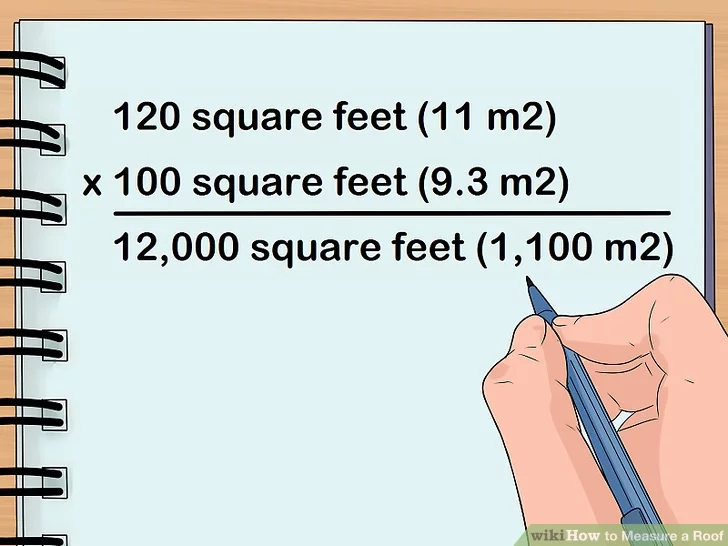
After getting your total square footage, divide it by 100, just like you did in the previous estimation section. If you bypassed that section, the 100 is there because roofing materials come in bundles that cover about 100 square feet. That means the total square footage divided by 100 gives you the number of bundles you need to order.
However, do not forget to add an additional 10% to the total square footage to ensure you will have enough materials after waste. Also, round up on the bundles, never down.

With over 12 years of construction industry experience, David Bitan specializes in restoring, inspecting, maintaining, and repairing roofs for residential, industrial, and commercial properties.
Sheds provide fantastic storage that keeps everything inside dry and protected. But that is all dependent on the roof, so learning how to properly cover the building is vital. It all starts with choosing a style, which will be based on what you need and prefer. Then you can start planning, taking measurements, making cuts, and getting the rafter boards how you want them.
Once the prep and setup are done, laying down the roof is a simple task. All you need to do is put down the plywood sheathing and use the materials you prefer to attain the lasting protection and peace of mind you need.
License: Creative Commons
Plan Things Out
Planning out what you are going to do is an important part of any build and will save you time and effort moving forward. When it comes to building a shed roof, planning means picking out a roof style, figuring out the pitch you want, and marking where the rafters will go.
License: Creative Commons
Pick a Style
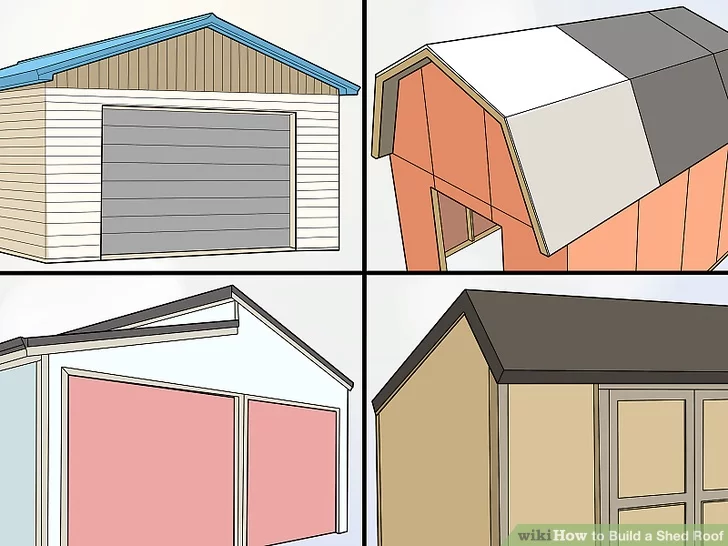
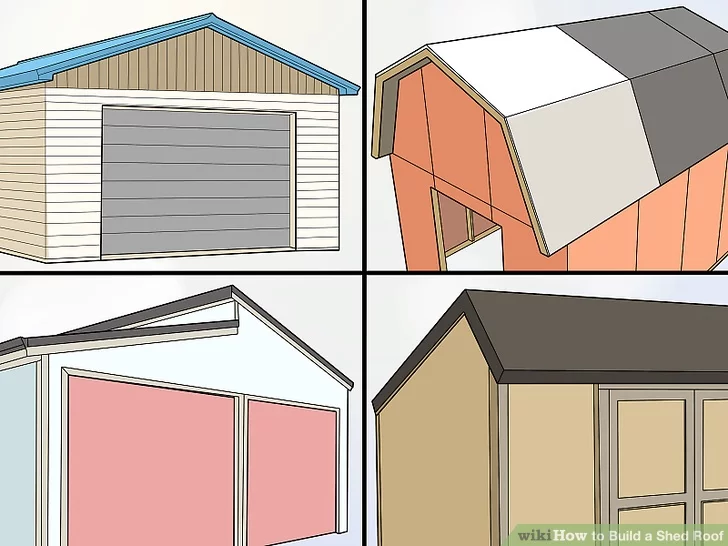
The first step to building a shed roof is picking out the style you want. There are multiple style options, but your choice will primarily depend on what you think looks good. That is because the popular choices are all designed with a slope to allow precipitation to run off. Here are some of the most commonly used styles for a shed roof:
- Gable: It is denoted by a single central peak and is often seen on homes.
- Gambrel: The traditional choice for barns, with both sides having two sloped faces, of which the second is perpendicular or slightly angled to the ground.
- Skillion: A simple style that has a single flat surface with a gradual slope from top to bottom.
- Saltbox: Saltbox is much like the skillion style. However, there is an additional short slope opposite the long one, which can be described as an upside-down check mark.
Of the four above, the saltbox style is not as common as the others, but they are all popular choices. Moreover, they all have a nice slope and will keep the inside of the shed protected from the elements.
License: Creative Commons
Figuring Out the Pitch
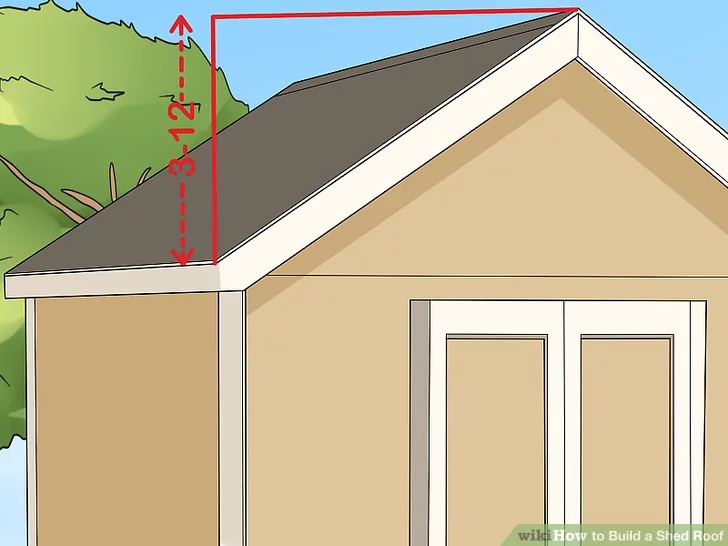
A sloped roof allows water to run off, which is why figuring out the pitch, otherwise known as the slope of the roof, is important. However, you cannot pick any pitch you want. Standardized building codes demand a certain pitch for proper runoff, which is a minimum pitch of 3/12.
The basic formula for determining pitch is rise over run, which points toward how many inches of rise there is after so many inches of run. In the case of 3/12, you have a 3-inch rise and a 12-inch run. That would give you a rise of 3 inches for every 12 inches of length.
Keep in mind that the steepness of the roof impacts how effective it is at deflecting weather and anything else that ends up on top of the roof. Additionally, if you want detailed information on the angle, grade, and rafter length from your desired pitch, you can use an online pitch calculator.
License: Creative Commons
Mark for the Rafters
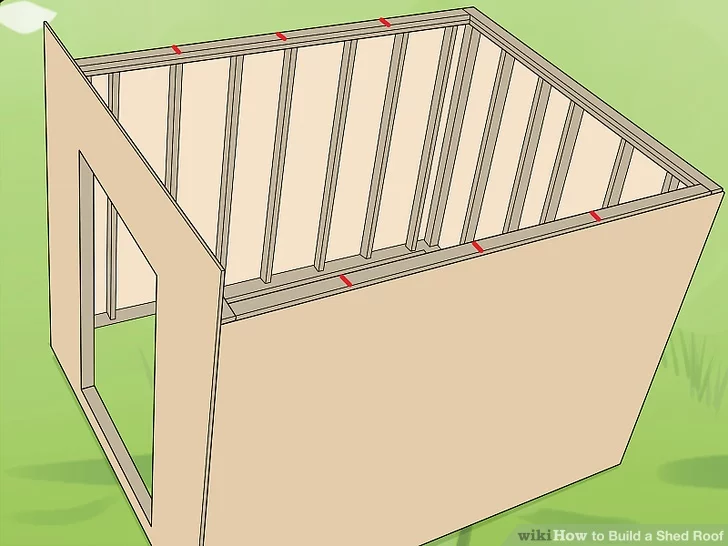
Properly marking the positions for each set of rafters atop the shed is important since spacing matters. Though, it can be made easier by following the spacing of the wall studs. You can use a carpenter’s pencil or felt-tipped pen to leave clear lines on the wall plate timbers at the locations you intend to place each set of rafters. In most instances, the rafters will be separated by around 20 to 24 inches on the center.
Getting the spacing right will give you the maximum support possible without you having to use more materials than necessary. If there are already rafters installed, you can move directly to the part going over the installation of roofing materials.
Fashion and Set Rafters
The fashioning and setting part of building a shed roof will likely be the most time-consuming, but as long as you do it well, the rest is much easier. It starts with measuring boards and cutting them to size, followed by adding notches. Then, you will assemble trusses, attach the end rafters to the frame, and set the rafters into place.
Take Measurements of the Boards
The first thing you need to do is ensure you have rafter boards that are measured to fit your preferences and chosen pitch. The end result will be based on the shed’s size, as well as the style and slope decided on during the planning phase. For example, if you want a steep slope, it will require greater length and additional end cuts than a flatter surface.
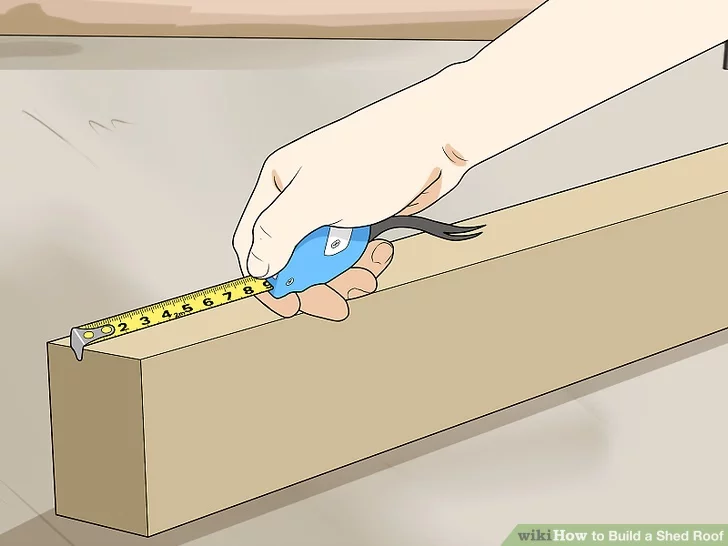
Get the measurements and make markings on your 2×4 or 2×6 boards using whichever writing implement you used when marking for the rafters. Efficiency dictates that you should mark every board at the same time or cut one to serve as a template for the others.
Additionally, when cutting the ends of all of the boards, make sure that you get the right angle so that they fit together at the peak.
License: Creative Commons
Cut and Add Notches to the Boards
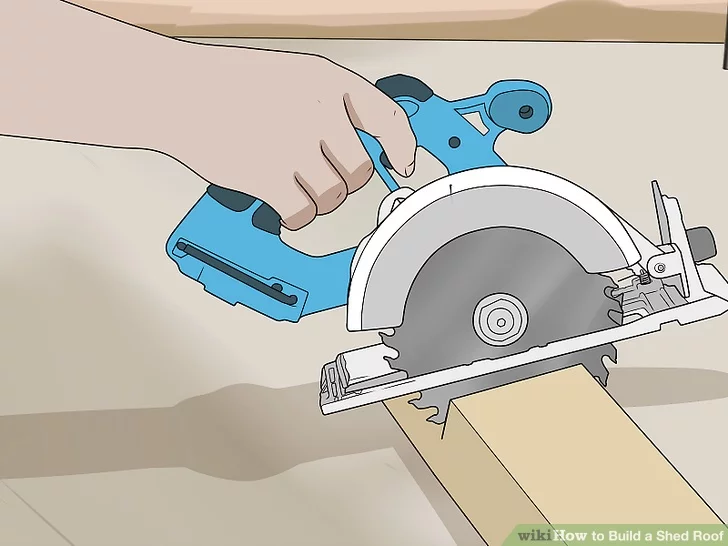
For this step, you will need a circular saw, which you will use to take care of all the boards at the same time. Doing so will allow you to directly start assembling your rafter boards into trusses, which you will then attach to the frame.
To start, move the blade into place over the end of the board, carefully and methodically making each cut. Precision is key. While cutting, you can make adjustments to the settings to match what you need for the length and angle of the rafters.
License: Creative Commons
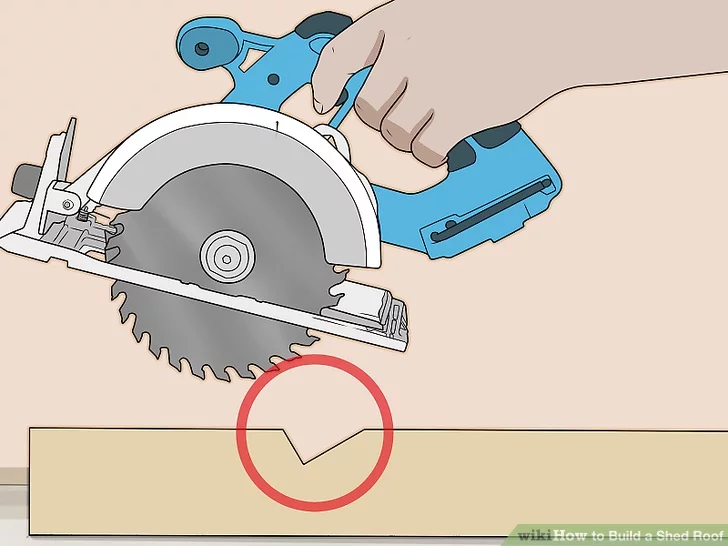
Once the cutting is done, you will add a birdsmouth notch so that things will fit in place. The notch will go at the end of every rafter, allowing it to sit level atop the wall plate. Doing this avoids the need for balancing.
After positioning each board to match the angle of the pitch of the roof, proceed to draw a 90° angle upward from the bottom edge of every one of your boards. The lines drawn will correspond to the height and width of the wall plate, and after cutting along them, you will have the necessary notch.
Keep in mind that if you plan on having an overhang, you are going to have to place the notches higher.
License: Creative Commons
Assemble Trusses
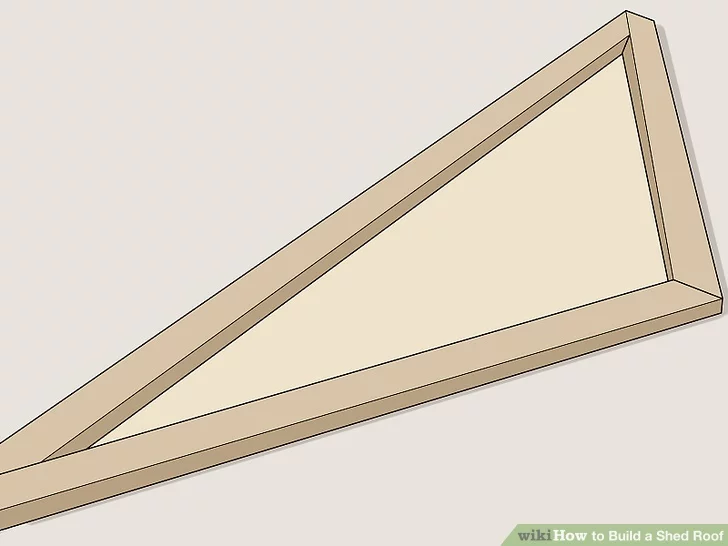
With the boards properly cut and notched, assembling the rafter halves into trusses comes next. Start by tracing the upper eight to ten inches of the rafter peak onto 1/2-inch plywood, followed by cutting out a triangular gusset plate with a skill saw.
Once you have the plate cut out, put a light layer of construction glue on the back. Applying the adhesive to the plywood prevents excess from being on the trusses, though you do not have to be too careful. You can also apply a bit where the rafter boards meet.
Next, you want to align the gusset with where the boards meet and push it into place, followed by securing it with a few nails or screws. Adding the gussets to the rafter boards will strengthen the connection, improving the durability.
License: Creative Commons
Attach the End Rafters
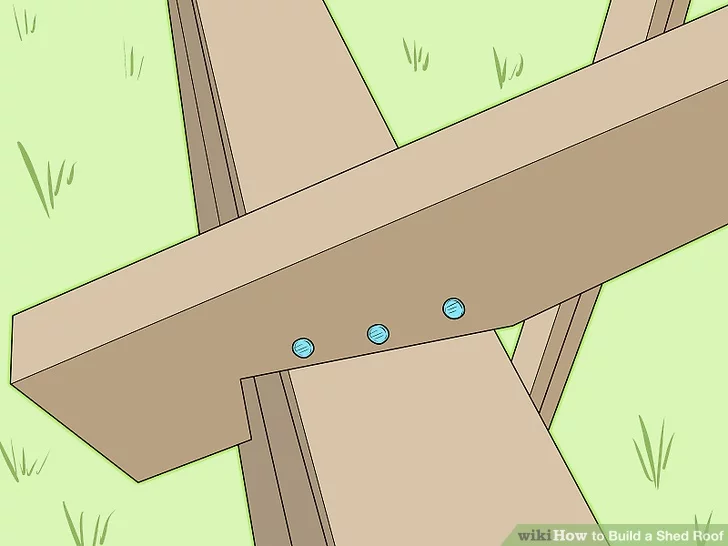
Now that everything is secure and stable, you can start getting things properly in place. The first part of that is attaching the end rafters to the wall plates of the shed’s frame, starting with the first rafter. You will want to lower it down in the front or back, then fasten the truss into place using 8D finishing nails. Make sure to angle it so that the nails go into the boards near the notch and penetrate the wall plate below.
Three nails on both sides should be enough to secure things, at which point you can move on to doing the same thing on the other side of the frame. When you are doing this, ensure the notch is secured firmly to the wall plate and that the truss is directly against the outer edge of the wall.
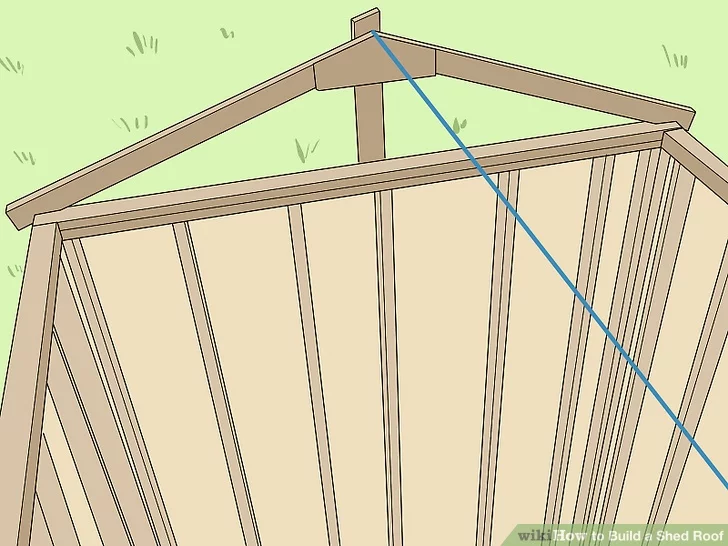
License: Creative Commons
Set Up a Centering String
Sometimes, simple additions make a big difference in getting a job done right. That is precisely the case when dealing with rafters, with an ordinary string making it much easier to keep things centered.
To set this up, run a string from one end truss to the other. By adding a nail to the peaks, you create an anchor, which you can wrap the string around. After tying it to one, pull it taut and wrap it around the nail at the other end. Of course, if you do not want to use nails, you can tie a knot in the string and tuck it into the joints or use whatever other means you can think of to keep it taut and centered.
Now you have a visual representation of the center that will help you with the rest of the rafters. You just have to be careful to pull it taut enough without placing strain on the end rafters.
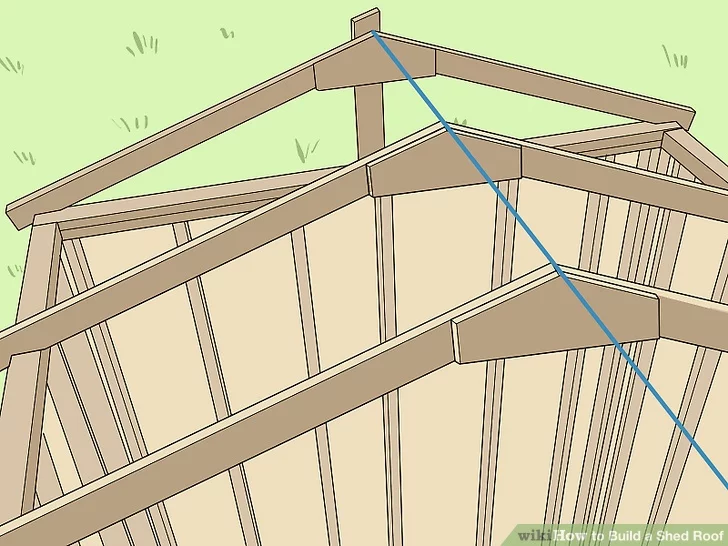
License: Creative Commons
Set the Rest of the Rafters
The centering string makes setting up the rest of the rafters much easier. Proceed to put the rest of the trusses in place, keeping your eye on the string to ensure everything is centered. You will still use the same 8D finishing nails for each of the trusses. Once you are done, you can remove the string and move on to the substrate.
Assemble the Substrate
The substrate of a shed is not terribly complicated, but it is an important foundation for the roofing material that comes after. To properly get it in place, you will cover the trusses with plywood sheathing, ensure there are no gaps, fasten everything into place with nails, and finish the edges with fascia boards.
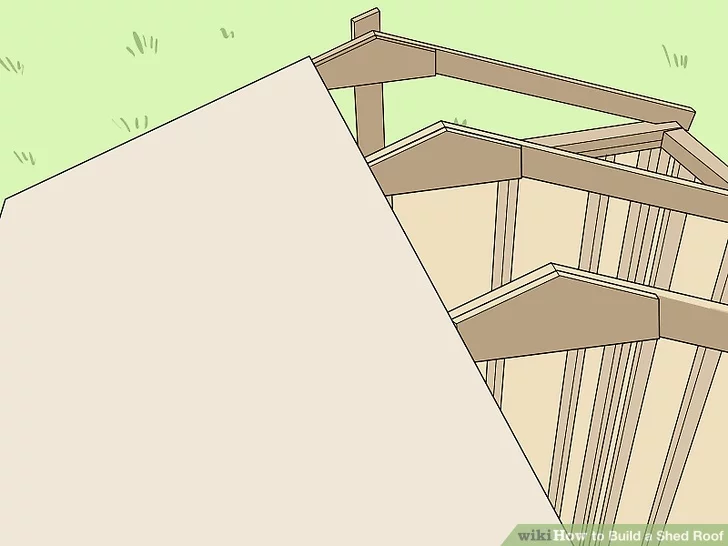
License: Creative Commons
Lay Down Plywood Sheathing
Plywood sheathing is the foundation that supports your new roof, and it also provides a flat surface for the roofing materials you put down after. To that end, most professionals suggest 7/16-inch oriented strand board for smaller projects like this.
Whether you use plywood or OSB, you will put down your first sheet at the corner of one side of the roof, laying it horizontally over the rafters. Make sure the edges are directly touching the end rafters, and then hammer nails into the corners to hold it in place for the time being.
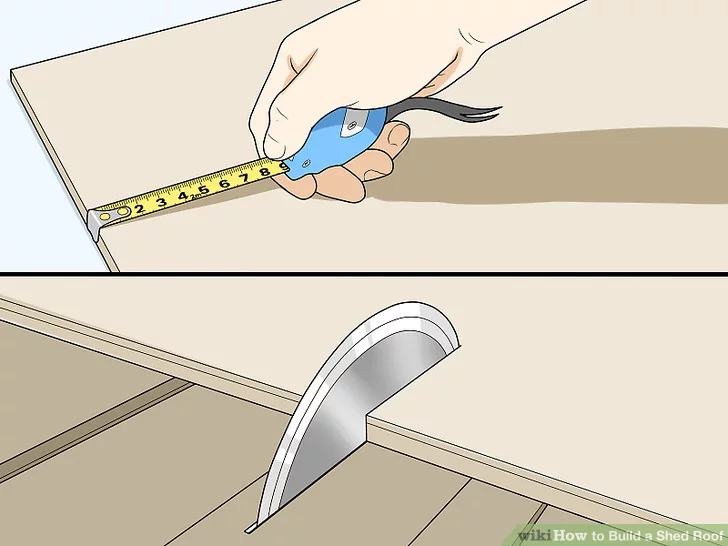
License: Creative Commons
Fill In Gaps
Now that the large piece of sheathing is in place, the next step is filling the gaps. Since plywood comes in large sheets, you will likely have to cut out the sizes you need to cover the remaining space. Try to do this with as few pieces as you can, working your way up from the bottom to the peak.
The plywood should be cut in a way that allows the end of every section to cover half of the width of the rather it rests on. Doing so ensures that it and the next piece fit well side by side and have sufficient room to be nailed into place. Also, make sure the sheathing is oriented the same way for every cut so that the grain pattern is consistent.
License: Creative Commons
Fasten the Sheathing
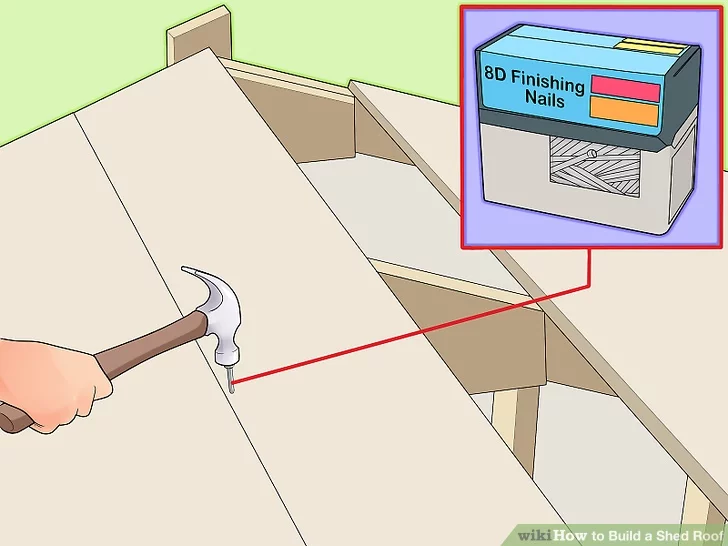
Once again, it is time to turn to 8D finishing nails. Using them, you can fasten the sheathing to the rafters by driving one in every six inches, ensuring each nail goes through the sheathing and into the underlying rafter. As usual, work from the bottom to the top, checking for looseness and adding additional nails as needed.
To remain safe, fasten the sheathing from your ladder as far up as you can, not climbing onto the roof unless things are secure. That being said, properly secured sheathing and rafters can support several hundred pounds of weight.
License: Creative Commons
Cut Fascia Boards
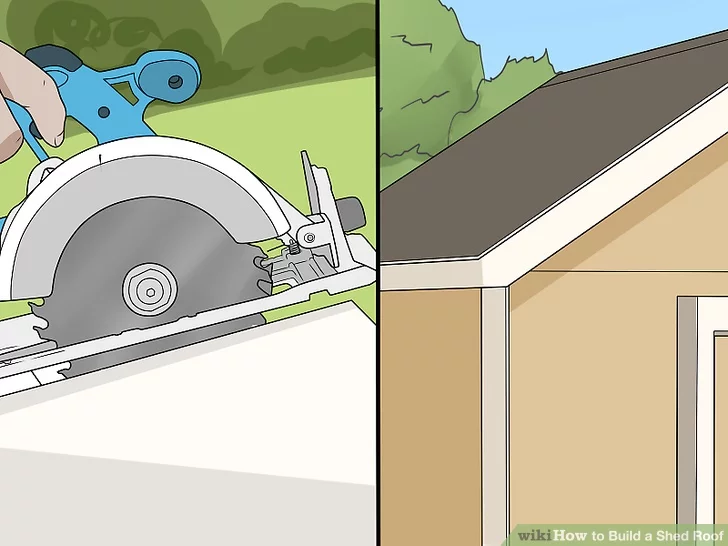
At this point, the ends of your rafters are still exposed. That will be fixed by cutting fascia boards and using them to finish the edges. Do this by cutting 2×4 or 2×6 boards to the same length as that of the shed, then nail the fascia boards to the end face of every other rafter with 8D finishing nails. The lumber should be the same size as that used for the rafters for a perfect fit.
When dealing with slanted roof styles, you will need a fascia board for each sloped edge, meaning a total of two. On the other hand, a flat roof looks better with a fascia board on every side.
Choose and Install Roofing Materials
License: Creative Commons
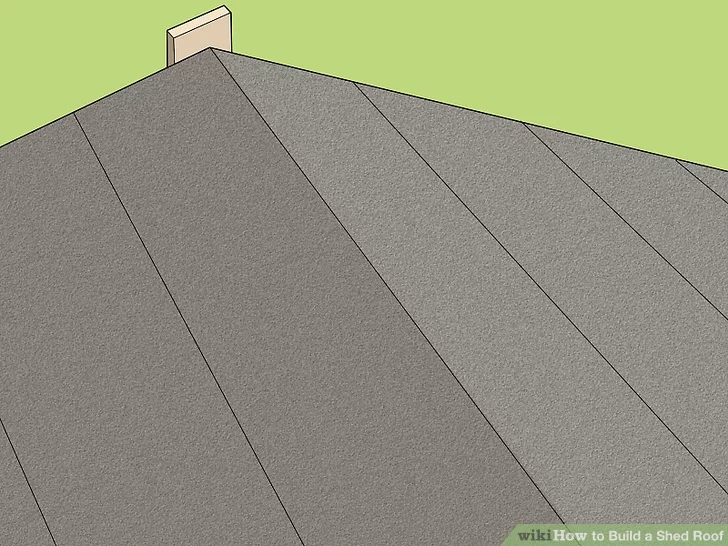
The rafters and substrate are down, meaning the only step left is putting down the roofing materials. While there are multiple types of materials that can be used, a layer of felt roofing paper is a great start for basic protection. After that, it depends on your preferences for finishing things off.
Put Down Felt Roofing Paper
Felt roofing is a great protective layer, and it is not difficult to install. That being said, as you unroll and secure it, make sure to keep the felt straight, flat, and without wrinkles. Keeping that in mind, follow these steps to put down the felt roofing:
- Line up the loose edge at a corner of the roof
- Fasten with around a dozen staples near the center of the strip’s edge
- Unroll while adding staples every few feet
- Cut excess paper from the end of each strip if needed
To make sure every inch of the roof is covered, the bottom edge of each strip should overlap the top of the one underneath it by two or so inches. Additionally, all strip ends should be overlapping by a minimum of four inches.
License: Creative Commons
Asphalt Shingles
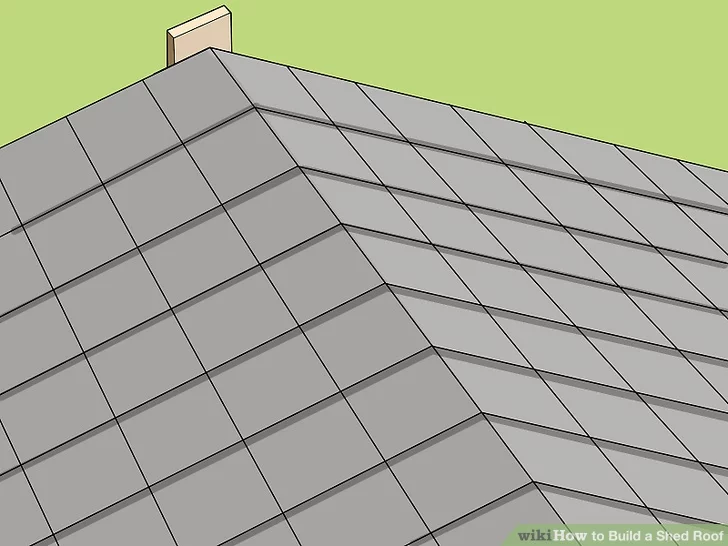
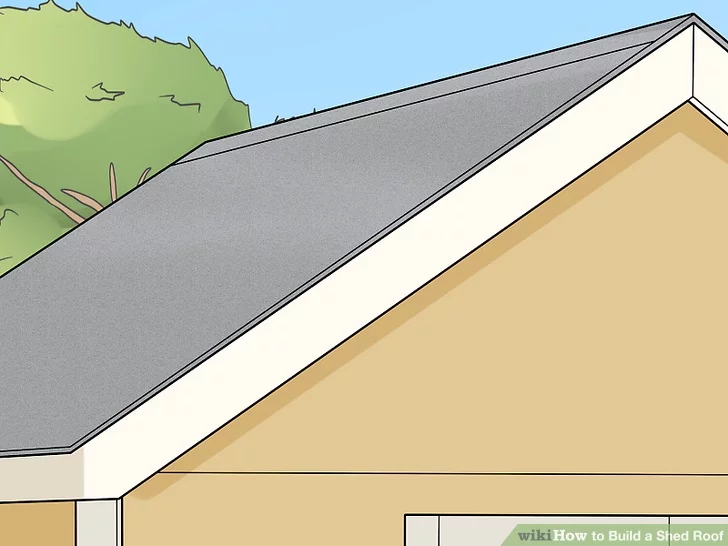
Asphalt shingles are a popular choice, and they are not too hard to put in place. You will start by cutting some of your shingles in half widthwise. When doing this, precise cuts are important, and that is much easier to do if you use a straightedge and utility knife. After that, nail the cut shingles at the bottom edge of the roof.
Once the “starter strip” is secured, install the rest of the shingles from the bottom to the top, offsetting each row by a single tile width. Three 1-inch roofing nails at the top of each shingle will keep it in place.
When laying shingles, use chalk or another method to keep the rows neat and organized. You also want to ensure the top and bottom of each row overlap by two inches.
Corrugated Metal Roofing
License: Creative Commons
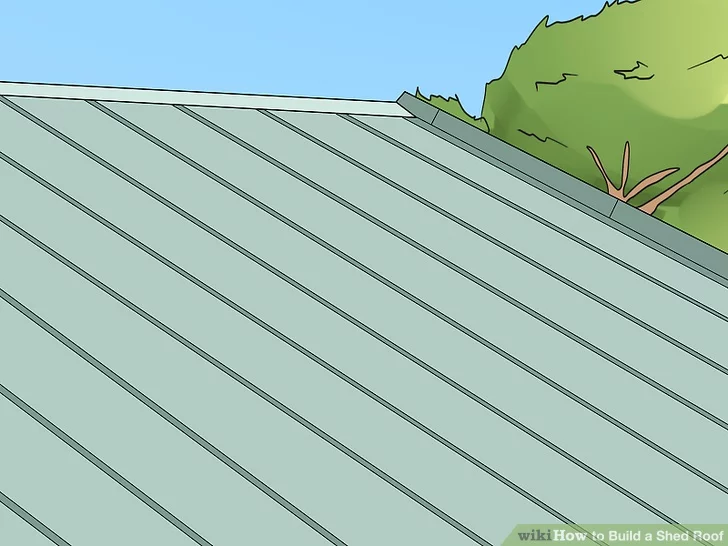
Durability is what you get with corrugated metal roofing, though it also offers plenty of customization. That being said, you will need the right tools to cut the sheets into the right size, such as power shears.
After you make the cuts, place each section vertically, ensuring that the ridges point toward the ground for proper runoff. Then, fasten the sheets with metal roofing screws, doing so on both sides of the ridges down the rafters below.
Roofing is great because it comes in many styles and colors. There are also various materials to choose from. However, rust and corrosion can be a problem, and that means regular upkeep.
License: Creative Commons
EPDM Rubber Roofing
Simplicity and affordability highlight the best parts of EPDM rubber roofing. All you have to do is take a paint roller with strong construction glue and brush it onto the substrate. From there, you can place the rubber sheeting over the area with the adhesive. Repeat the process until the whole roof is covered, trimming any extra material away after.
Of course, you will still need to be careful to keep it flat, possibly even smoothing out the surface after, but it is a very easy process. But even if that part is a bit tedious, it is an inexpensive and quick way to put a new roof on your shed.

With over 12 years of construction industry experience, David Bitan specializes in restoring, inspecting, maintaining, and repairing roofs for residential, industrial, and commercial properties.
The rainy season has arrived in Los Angeles with normal precipitation predicted during December and heavier rain predicted in February. In expectation of heavier rains, here are some tips and advice you can read about to prepare, prevent, and repair leaking roofs.
Roofs experience significant wear and tear, and when they eventually have problems, it needs to be addressed quickly. In part, that is because it can lead to more serious damage if left unattended. The good news is that most minor problems can be solved without the need for a roofing professional
The general way to take care of a leaky roof is to find the origin of the leak, then do simple repairs depending on the type of roof. For shingles and shakes, you will want to replace those with serious damage. Rolled roofing will require you to patch it, while problems with joints will mean sealing or replacing based on the severity of the problem.
That being said, if you notice a lot of damage across the entire roof, you will want to contact Bumble Roofing. The same is true if you see structural damage or are dealing with a roof over 20 years old, which might require more extensive work.
Asphalt Shingles
Asphalt shingles are used on a majority of homes today, in part because they are a very affordable option that lasts up to 30 years if taken care of properly. Moreover, they are not difficult to install and repair if you know what you are doing.
When dealing with a leaky roof composed of asphalt shingles, you should first check for damage above water stains visible within the house. You can then look for signs of wear and tear on the roof before moving on to straightening and reattaching any curled shingles.
If the issue is a crack, it can likely be repaired with sealant. On the other hand, broken or missing shingles will need to be replaced, which is a more involved repair than other issues.
Check for Damage Above Water Stains
There are a few ways to pinpoint the source of water damage from the inside. The first is to check for damage above water stains on your ceiling. However, you can also wait for it to rain and get an idea while it is actively leaking. Either way, it means going into your attic if you have one and looking for stains or mold.
Once you find signs of damage, take note of the location and look for the corresponding area on your roof. Just keep in mind that it will not always be accurate. If you have a slanted roof, you will want to look higher than the signs of damage since the water will run down.
Another option is to have someone help, with one of you running a hose and spraying water onto the roof for several minutes at various sections. The other can stay inside and watch for signs of water to narrow down the problem area.
Look for Signs of Wear and Tear
Once you have the area narrowed down, you can start looking at the roof for signs of wear and tear, including curled, cracked, or missing shingles. You will also want to check for gaps where the roofing meets vents or chimneys.
If you notice widespread issues that go beyond repairing a few shingles or sealing minor gaps, you might want to consider a larger fix. Patches of failing shingles and wear over large portions of the roof might mean you need to replace it, especially if it is more than 20 years old.
You might also run into moldy or rotten boards or trusses in the attic, which can be indicators of structural damage. If you see widespread damage in these areas, consider bringing in a professional as soon as possible.
Straighten and Reattach Curled shingles
Assuming you do not see widespread damage that requires a bigger fix, you can start taking care of minor problems yourself, such as curled shingles. As time passes, an asphalt shingle might curl at the corners, but you can fix it rather easily.
To fix a curled shingle, smoothen it out before adding a bit of roof sealant beneath the corners using a caulk gun. After that, push it down and use a trowel to cover the edges with roofing cement.
One thing to take note of is that asphalt shingles are flexible and easier to work on when it is warm, but they are brittle in the cold. Therefore, if you are having a hard time due to brittle shingles, try warming them up using a blow dryer. Just do not use anything hotter to avoid damaging them.
Repair Clean Cracks Using Sealant
Cracked shingles do not always need to be replaced, especially if the crack or tear is clean. If that is the case, you can place a bead of sealant beneath the damage using a caulk gun and press it down. After that, add another bead atop the crack and spread it over the edges of the crack using a putty knife.
If you want to mask the repair and make it look as natural as possible, you can collect some asphalt granules. You can find the granules on the roof or in the gutter, and they can be sprinkled on top of the sealant to match the color of the rest of the roof.
Replace Broken/Missing Shingles
While curled and cracked shingles can be repaired quickly, broken and missing shingles take a bit more doing. The first thing you need to do is buy matching replacement shingles. Once you have what you need, use a pry bar to lift the front of the broken shingle, then do the same to the one above it.
Once both shingles are loosened, get the pry bar up under the one you are replacing, making sure to reach the nails keeping it secure. Apply pressure to loosen the nails before using the pry bar or a hammer to remove them. When removing the nails, keep in mind that you will have to remove those in the one above as well since they will run through both.
After you get rid of every nail, pull out the broken shingle and scrape the space below to get rid of the remaining roofing cement. If you are having trouble, remember you can use a blow dryer to soften any stiff shingles around the one you are replacing.
With the shingle removed, you will want to replace it with a new one. One thing you can do to make it easier is round the back corners with a utility knife, which will make it easier to slide in. Either way, push it into place and hammer nails into the corners, followed by replacing the nails in the shingle above.
Use 1 1/4-inch galvanized roofing nails for securing the shingles. You will also want to apply roofing cement with a trowel atop the nails and around the edges of the newly-installed shingle.
Rolled Roofing
Rolled roofing is a great choice if you want inexpensive roofing that is easy to install. However, it is prone to cracks and blisters over time, which you will want to repair since they will leak. While some problems can be fixed with roofing cement, you will need to use new roofing if the situation calls for it.
Search for Cracks or Blisters
Follow the same process as you would for any other leak, looking at the damage inside and finding the corresponding spot outside. Do not forget that a slanted roof could mean the damage is located higher up on the outside of the roof than what you see indoors.
Cracks are a common problem seen with rolled roofing, including tiny cracks around objects on your roof, like chimneys and vents. You will want to carefully look at joints and other objects as well. Small gaps and cracks under 1/4 of an inch in these areas can be mended with roofing cement. Bigger problems require patching.
You also want to look for open splits in the roofing and blisters or bubbles, which indicate that there is water or air collecting below. These problems will also require more extensive repairs, such as patching.
Cut Bubbles or Blisters
If you notice bubbles or blisters, you will want to release whatever is underneath. To do that, get rid of any debris around the area and then cut through the center of the bubble with a utility knife. When doing this, be careful not to affect the layers beneath the rolled roofing material, only cutting through the top layer.
If there is water within the bubble, absorb it and allow the area to dry for 12 to 24 hours. You can always use a dryer to speed up the process, but you will want to ensure it is absolutely dry before doing anything else.
While blisters and bubbles are common when there is a leak in rolled roofing, they will not always be present. If you do not see any, do not worry and simply move on to dealing with the tear.
Spread Roofing Cement for Splits
Before you begin repairing a split or crack, check the condition of the roofing substrate below. If it shows signs of damage, it will need to be replaced before anything else. Otherwise, use a generous layer of roofing cement beneath the edges of the tear. The goal is to get the cement as deep as possible without further tearing the rolled roofing.
Once you have the cement where it needs to be, push it down. Then, secure the material further using 1 1/4-inch galvanized roofing nails on both sides of the mended tear in 3-inch intervals.
Replace Roofing Substrate
As mentioned above, any damaged roofing substrate will need to be replaced before you can make repairs to the roofing. Look for rot or holes, removing any section that appears damaged with a straightedge and a utility knife. The cut should be square or rectangular to make cutting a replacement piece easier. Additionally, look for and remove washers and screws that secure the substrate to the structure underneath.
When you are sure that everything is in order, cut a new piece to fit the space, which can be done using the removed piece as a guide. It should be made from high-density fiberboard, and you will want to secure it into place using 1 1/2-inch roofing screws with built-in hex washers.
Cover Repairs With New Roofing
If there was no need to repair the roofing substrate, patching is simple. Start by cutting a patch of your roofing material that is 12 inches wider and taller than the mended tear. Then, spread roofing cement across the tear and place the patch on top of it, pushing it down lightly. Finally, hammer in 1 1/4-inch galvanized roofing nails in 3-inch intervals.
On the other hand, if you had to replace the roofing substrate, you will first need to place layers of rolled roofing until it is even with the roofing around it. From there, it is the same process that involves cutting out a patch of rolled roofing 12 inches larger, securing it with cement, pushing it down, and then hammering in roofing nails.
Apply Additional Roofing Cement
While the above repairs are great, you want to make sure no water will get through. To do that, use one final layer of roofing cement, which you will place around the entire repaired section. That means applying cement to the perimeter of the patch and over any nails, followed by feathering it to extend the coverage and make it smooth.
In the case of your rolled roofing being asphalt, use a layer of asphalt gravel on top of the cement to protect the roofing as it dries.
Wood Shakes
If you have a wood shake roof and notice leaking, the first step will still be finding the source of the leak. However, the process of removing and installing new shakes can be a bit more involved. You will have to split damaged shakes, use a hacksaw to cut any nails, and then cut and install a new shake.
Inspect the Roof for Damage
Like any other leak, you will track down the source of the damage by looking for the water stains inside. You can then use the location of the stains to estimate where the problem is on the roof above. When searching for damage on the roof, look for broken shakes, gaps around flashing, and the usual wear and tear.
Split Damage Shakes
For the following step, you will need a hammer and chisel, which you will use to carefully split the shake. To do that, place the chisel into the shake you want to split and give it a controlled strike. Avoid damaging the surrounding shakes, and remove the pieces with a set of pliers.
Use a Hacksaw to Cut Nails
There should now be a space where the removed shake used to be. Take a look, identifying the nails that secured the previous shake before sliding a hacksaw blade beneath the shake above. Once you have it in position, saw through the nails from where they stick out to make room for the new shake.
Cut a New Shake
Find a shake that matches the ones used on your roof, then cut it to fit the gap. You will need to measure the space left after removing the damaged shake and cut accordingly using a utility knife or fine-toothed saw. The shake should be around 3/8 of an inch thinner than the width of the gap, which will allow it to expand as needed.
Slide In the New Shake
After cutting the shake to size, it should be easy enough to slide it into place. However, you cannot immediately push it into place and hammer nails in. Instead, you have to push it most of the way in, leaving around an inch of its final position. Once you do that, you can drive two galvanized wood nails into it at an upward angle right beneath the edge of the shake above.
After the nails are in, take a wooden block and push it against the shake before striking it with a hammer. Doing this will push the shake into place while putting the nails beneath the shake above. Alternatively, if the above method proves difficult, simply install the shake and hammer nails right beneath the shake above.
Seal Exposed Nails
The last thing you want to do is seal any exposed nails. The method to hide nails beneath the shakes above makes it unnecessary, but if any part of a nail head is showing, you want to cover it with roofing cement. After applying it, smoothen it using a trowel.
Additionally, if your shakes were bonded by a layer of sealant that broke during the removal, use sealant or cement around the edges of the new shake to finish things off.
Leaky Joints
Aside from checking the roofing material when you have a leak, you also want to look where surfaces join. That includes areas like chimneys and valleys, which are common problem areas for leaks. Fortunately, while there can be some larger problems at play, most issues can be easily fixed as long as you identify them.
Inspect Where Surfaces Join
In areas where surfaces join, gaps in caulk, sealant, or metal flashing can lead to leaks, so you should take a look at all areas of intersection and where objects come up from the roof. Fortunately, if you find something, it should be a simple fix. For small gaps, you can simply reseal them, while larger issues can be solved through patching or replacement.
Apply Sealant or Cement
Small gaps are those less than 1/4 of an inch, and they can be easily filled using sealant or cement. Larger gaps will require a more significant fix. If the gap is small, start by scraping away any old sealant or cement and wiping the area clean of debris. After that, dry the area and apply the new sealant or cement.
When dealing with small cracks around joined surfaces, try using a putty knife to work in the cement. Meanwhile, when working on a crack on the collar of an exposed pipe or vent, use a bead of waterproof silicone caulk.
Repair Rusted or Loose Flashing
Metal flashing is usually aluminum or steel, and it can be found on chimneys, valleys, siding, and walls that touch the roof. If it is loose, apply a bead of roofing cement beneath it and push it down. On the other hand, handle rusted flashing by sliding new steel flashing underneath the problem spot and sealing it after using roofing cement.
Sometimes, the shingles next to the flashing will be loose. If that is the case, do not nail the shingles near the flashing and opt to bond the shingles and flashing with roofing cement. Doing this prevents nails from puncturing the flashing.
Replace Flashing If Needed
There are times when a quick fix does not do the trick, leaving you no choice but to replace the flashing. In these cases, it is necessary to pry away the flashing and cement, which can be done with a chisel or pry bar.
Once the old flashing is disposed of, measure the joined area and cut a bit of pre-bent flashing to be placed at that joint. Just make sure that the flashing overlaps the joint by around four inches on both sides.
After the new flashing is cut and ready, place ice-and-water barrier strips at the joint prior to installation. If the object protrudes from the roof, place the strips four inches up its height. After that, seal the flashing using roofing cement or caulk while also hammering galvanized roofing nails into any empty nail holes in the flashing.
There is nothing worse than a leaking roof. It not only causes water damage to your home, but it makes you feel nervous and insecure in the place you are supposed to be the most comfortable. Tarping your roof is a good measure to protect your home until you can get a permanent fix in place. Moreover, it can provide protection for around three months, giving you the time and peace of mind you need.
There are three basic steps when you are tarping your roof. The first is to figure out how much damage has been done. Once you have done that, you can start positioning, getting everything unrolled and in place. Finally, you will secure it to your roof, finishing up the process until you can take care of the repairs.
Figure Out the Damage
License: Creative Commons
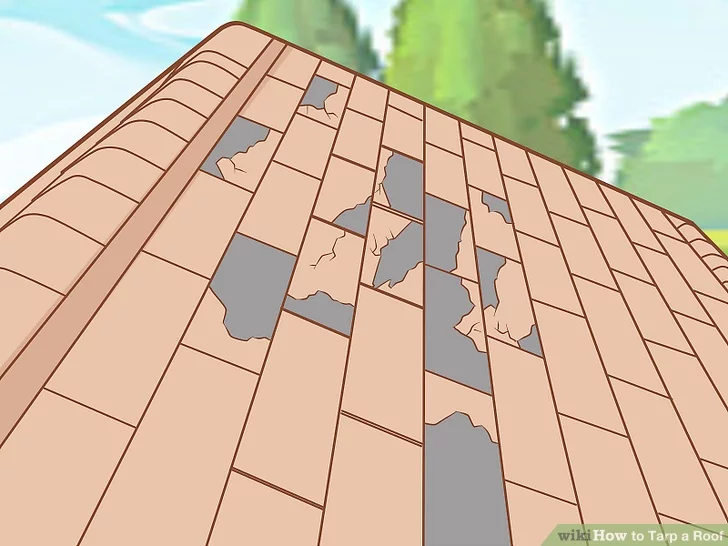
Step one, figuring out the damage done to the roof. This step is important for a few reasons. One, it informs you of the right tarp for your project. Secondly, you can use the information you get here when you are planning or contacting someone for the permanent fix. It starts with finding the source.
Find the Source of Damage
In order to figure out where the damage occurred, you will need to get on your roof. It might require a ladder, or you might have direct access. Either way, get up there and take a look, remaining on the ladder if you are not comfortable standing on top. If you have tiles, look for damage. You can also search for debris.
Keep in mind that there might be multiple points of damage. You might also have luck searching for damage inside, which can be detected by water stains or debris inside the house.
Take Precise Measurements
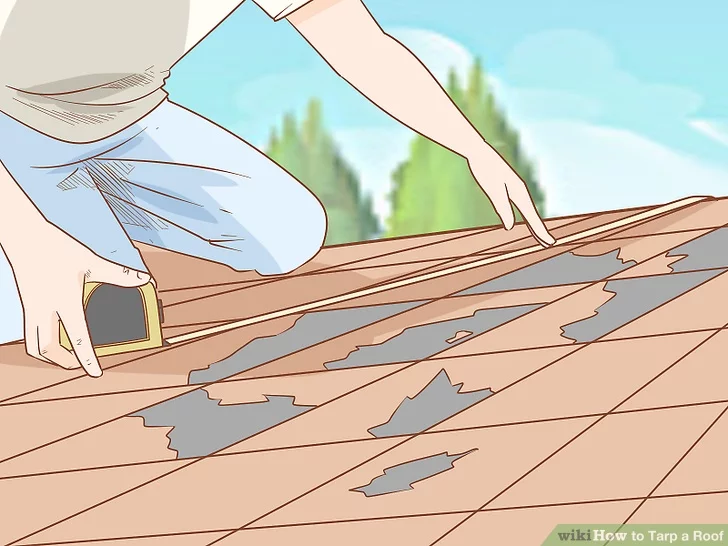
Proper measurements are important. You will want to try to go up and take a look if you can, kneeling beside the damage. Then use a tape measure to get exact measurements everywhere you see damage. Additionally, get some measurements of the roof as a whole since they will come in handy later.
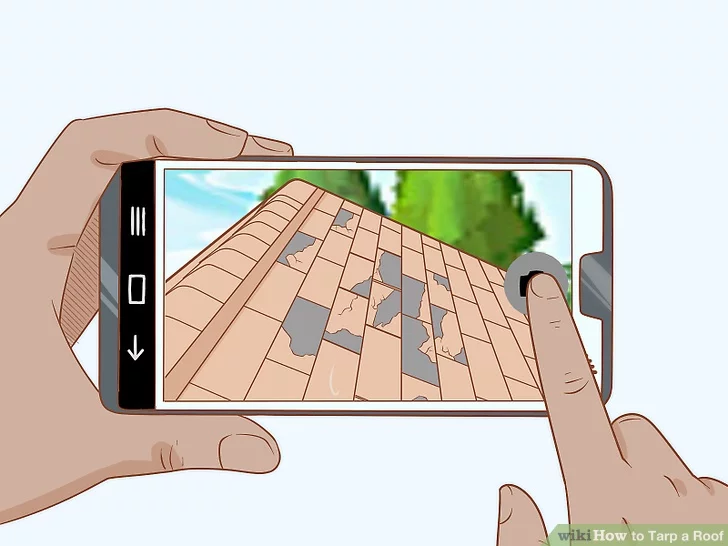
Get Video and Photo Evidence
It does not matter what you use to do it — a phone will work — but get some evidence of the damage. Not only will it come in handy if you need to describe the damage to someone, but it will help with home insurance and making a plan. Moreover, once you have the tarp down, you will not have easy access to the damage.
Buy the Tarp
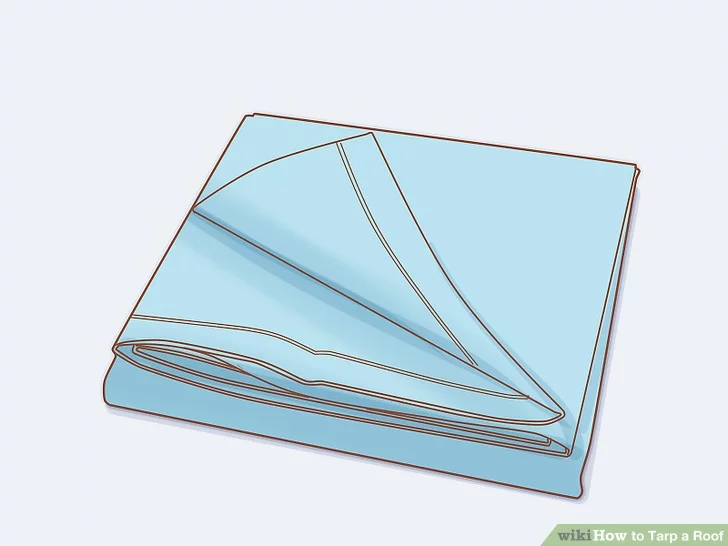
The photos and measurements will come in handy here. You want to get a tarp that is the right size for the damage. On the other hand, without proper images or measurements, you will have a difficult time finding one that is just the right size.
A good rule of thumb is to purchase a larger tarp than you need. That is especially important if you do not have precise measurements to estimate. You can always ask for help if you are in doubt.
Put Safety First
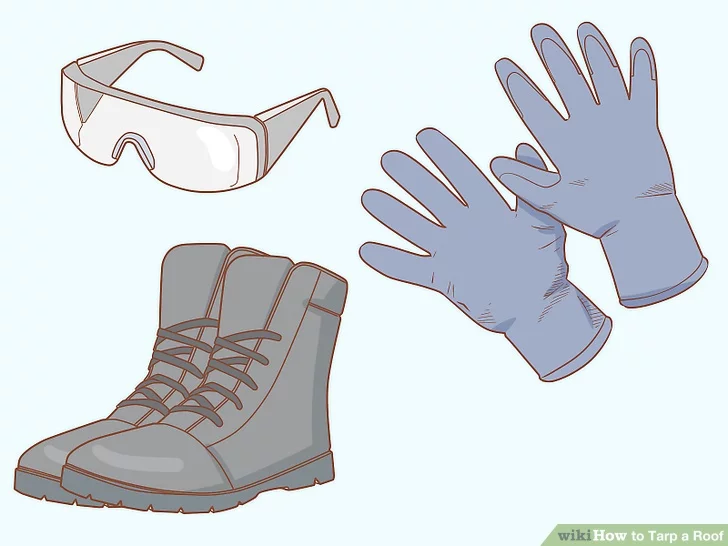
Anything that involves being on a roof can be perilous, which is why many people trust professionals to do roofing work. When doing it yourself, the right safety equipment is necessary to minimize the danger. Consider the following items when preparing to tarp your roof:
- Boots or roofing shoes
- Protective gloves
- Stable ladder
- Safety glasses
- Hardhat or helmet
When it comes to roofing shoes or boots, you want to buy a pair with soft soles. That prevents damage from being done to the roof as you walk on it. Additionally, you might want to consider a vest, preferably one that makes you easier to see. When you have everything you need, it is time to set up the tarp.
Get the Tarp In Place

The next step is to get the tarp in place. That probably means finding some helpers since it will be an arduous task alone. Friends or family work fine, so long as everyone is careful. The more important aspect is to have an extra pair of hands to help with the process, which includes clearing the area, unrolling the tarp, and laying it out flat.
If you decide to go about things alone, try not to do it when you are home alone. If it is an absolute must, take further safety precautions in case of an emergency.
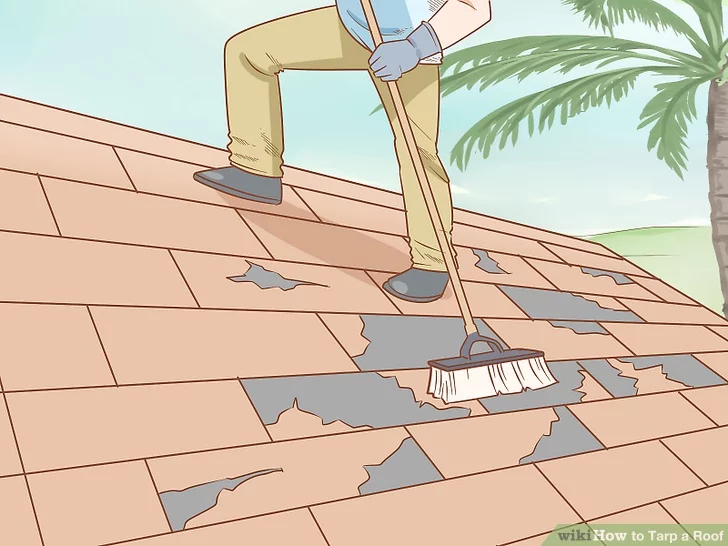
Clearing Away Debris
The tarp needs to go down flat, which means you need to clear the area. That includes branches, leaves, and anything else that might get in the way. You can do this with a brush. It is also a good idea to do so on a dry day since that will make things go more smoothly and increase safety.
If the damage was caused by a fallen limb, it might be heavy and difficult to move. Trying to lift it alone might cause you to lose your balance or damage the roof further. So, if that is the case, find someone to help.
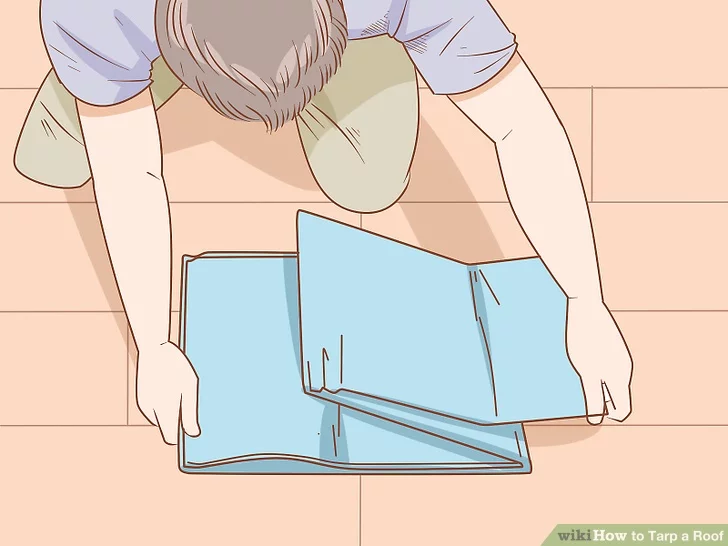
Unroll the Tarp
It might sound like a simple step, but it is not something you want to take lightly. You will want to unroll the tarp on top of the roof. Moreover, make sure that you are careful since it can be difficult to deal with, especially if there is a lot of wind. While the actual unrolling or unfolding, depending on how it is gathered, is simple, do not force anything. Find a way to do it so that it unfolds naturally to make things easier and safer.
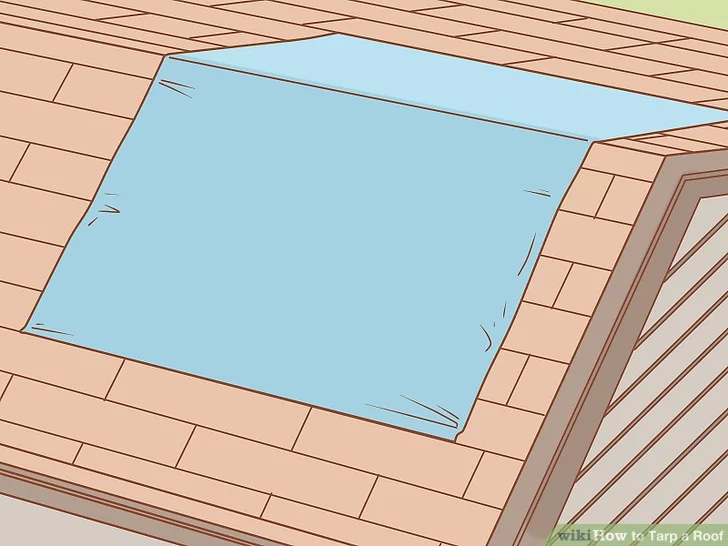
Place the Tarp Flatly on the Roof
To ensure the tarp is in a good position, you will want to get it down flatly on the surface of the roof. You also want to lay it down in such a way that around four or five feet are on the sloped portion of each side of the roof (peak). The remaining tarp should hang from the lower border overhanging the wall (eave).
When you are placing the tarp, it is best to go with a dry day to avoid any water being trapped between it and the roof. You also want to avoid windy days if possible and never risk putting it in place during a storm. Additionally, never walk on top of it.
Making Things Secure
Placing the tarp across the damaged roofing is a great start, but securing it in place is the most important step. Moreover, to do it properly, there is quite a lot of work involved. For starters, you need the right equipment, which will be discussed in each of the steps below.
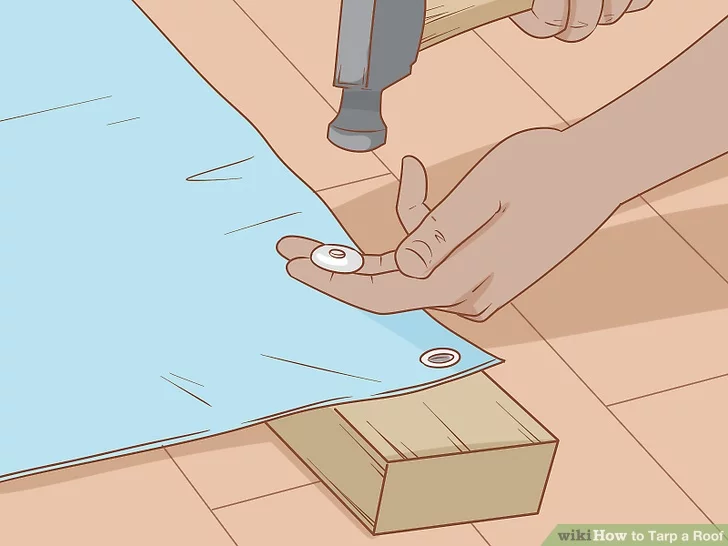
Secure 2×4 Boards to the Tarp
Boards are a great way to secure things, and you will need four of them. The boards will be secured to the peak ends of the tarp. Here are the steps you can follow to properly secure the boards:
- Place a board under a peak end.
- Keep two feet sticking out on both sides.
- Attach the board and tarp using a hammer and cap nails, hitting them through the tarp and into the wood below.
Once you have attached one peak end, move on and follow the same steps for each of the other three peak ends.
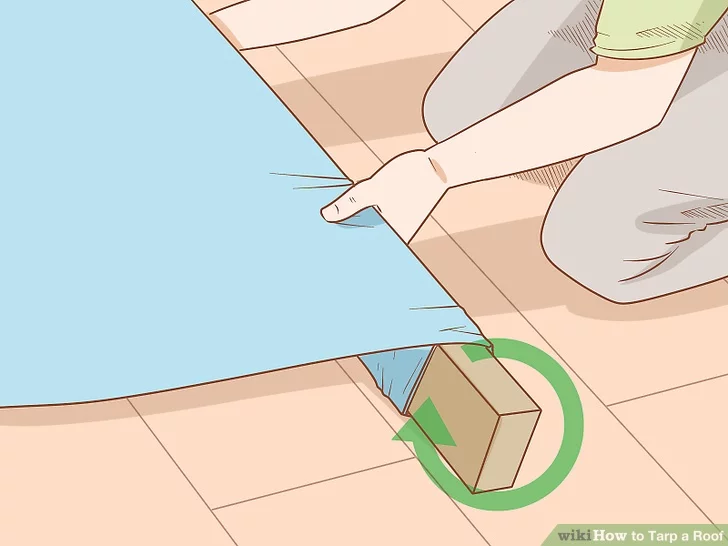
Wrap the Tarp Around the Boards
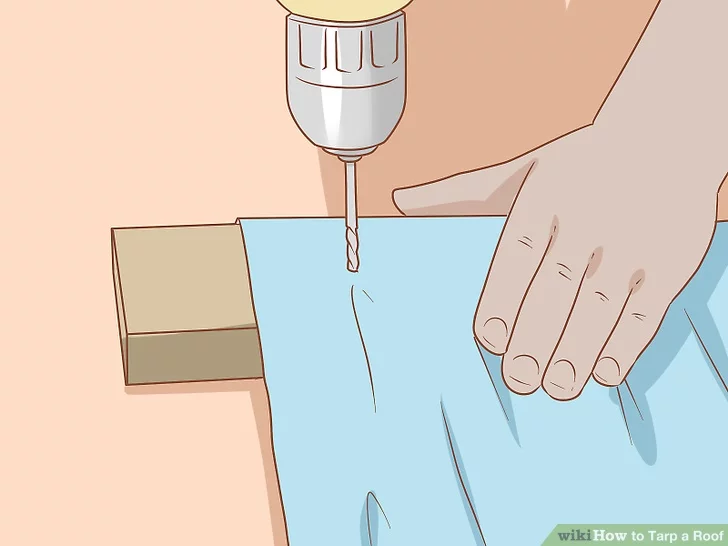
Just nailing them together is not enough to properly secure things. You will want to take things to the next level by wrapping the tarp around the board until it is covering every side. The best way to do this is picking it up while wearing gloves and turning it counter-clockwise. Once done, place it back down and do the same for the other boards.
Secure Boards and Tarp to the Roof with Screws
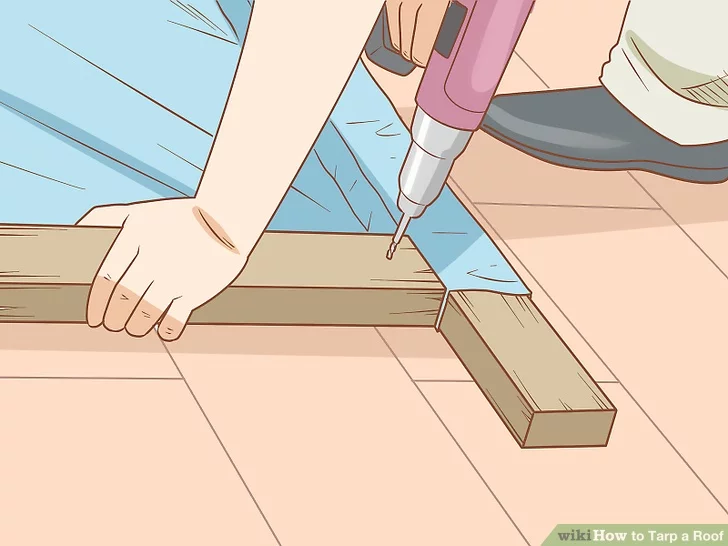
You will need a drill and two-inch screws for this step. What you want to do is pick six or so spaces on each board, with equal spacing. After that, drill through the tarp and board and into the roof, securing the board and tarp to the roof. Do the same for each board, and you will be closer to securing the tarp to withstand harsh weather.
Secure More 2×4 Boards Perpendicularly with Screws
You want to get four more boards, which you will place perpendicular to the boards already secured with screws. The difference here is that you want the boards to go on top of the tarp, with the short ends resting against the long side of the secured boards.
Once you have all the boards in place, follow the same procedure to screw them in. Remember, equal spacing. Also, it should go through every layer, from board to tarp to roof.
Use Additional 2×4 Boards with the Overhanging Tarp
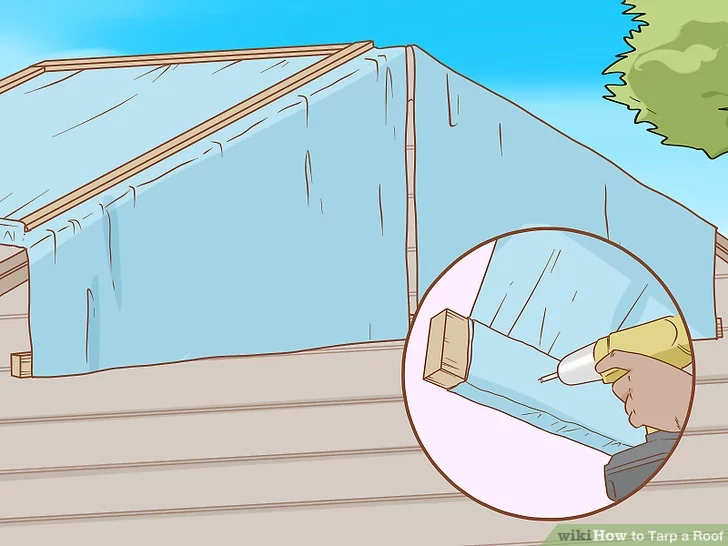
The peak is firmly in place, but the overhanging portion of the tarp is still flapping in the wind. To fix that, you will use two more boards. To start, pull the overhanging tarp to the roof to give yourself a stable place to work. After, place the boards, leaving a few feet sticking out like before, and nail them together.
Once the tarp is secured to the board, let it hang over the eave. Once you have a good position, likely using a ladder, roll the tarp so it is wrapping the boards and place it firmly against the base of the eave. You will want to continue to wrap the boards until there is no slack. At that point, use your two-inch screws to connect the tarp and boards to the wall.
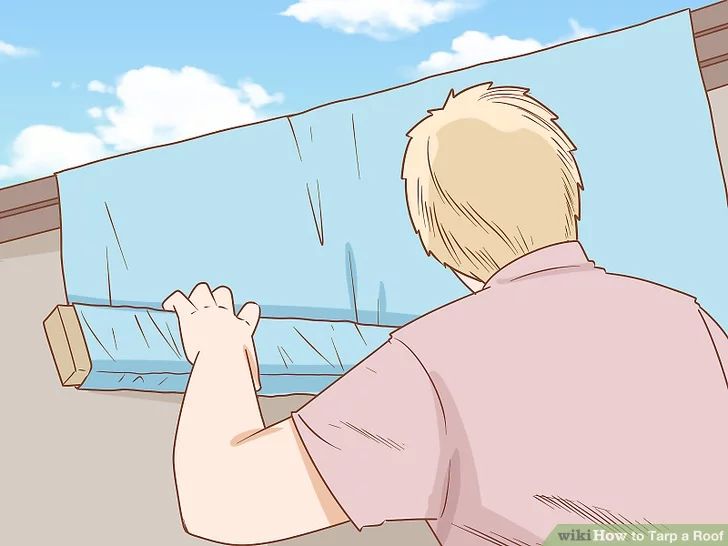
Use Your Judgment to Add Boards
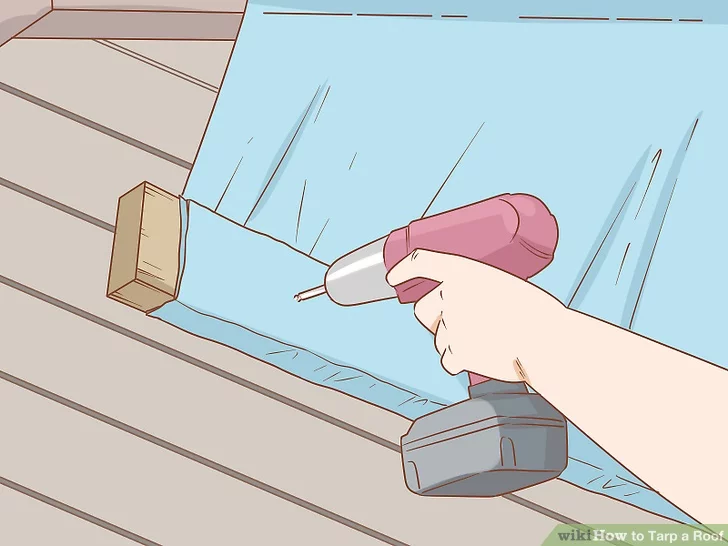
While the above will cover many situations, you might need to add additional boards. The boards that attach the tarp to the roof are called “anchor boards,” and if you feel they are not enough to secure things properly, lay as many as you need and secure them with screws.
Lastly, make sure you do not leave the damage unattended for too long. While a tarp will protect you for months, it is not a permanent fix.

With over 12 years of construction industry experience, David Bitan specializes in restoring, inspecting, maintaining, and repairing roofs for residential, industrial, and commercial properties.
Claim Your Free Roof Inspection Today.
Roof issues are a buzzkill, but not with Bumble Roofing on your side.
Fill out the form, and our expert team will assess the condition of your roof to advise on the best course of action to maintain the health and longevity of your roof.
