How to Measure a Roof in Thousand Oaks
Construction projects rely on accurate measurements to go smoothly, and roofing is no exception. Moreover, taking measurements is often the first step to roofing or re-roofing a home. Therefore, one of the most important skills to master if you want to do your own work is the ability to measure a roof properly.
There are a few ways to get measurements. In fact, you do not need to go up a ladder and get on the roof if you do not want to, though you will get the most accurate measurements that way. Still, if you would rather not, you can do everything from the ground. Both of the methods will be described below.
Staying on the Ground
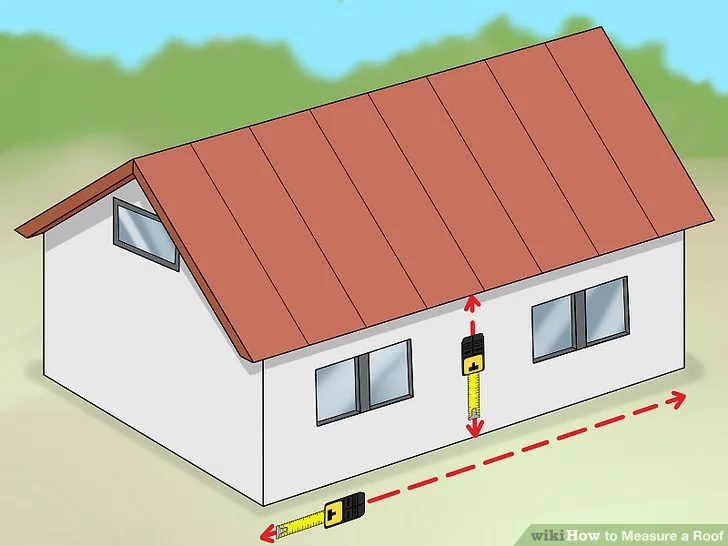
If you prefer not to climb anything and keep your feet planted on the ground, you can easily do it. The steps will involve measuring the exterior walls, calculating the pitch of your roof, using a pitch multiplier table, calculating the square footage, and using the square footage to determine the amount of materials you need.
Measure the Exterior Walls
If you do not want to climb onto a ladder or the roof, then you will need to make some estimates using the exterior walls. Start by measuring the length and width of the walls, recording the values as you do. You can use a tape measure here, going from one end to the other. Make sure to be precise since these measurements will help determine the total square footage later.
After the exterior walls are measured, you need to account for the overhang. Not all roofs have an overhang, but if yours does, do your best to eyeball the length in feet. You will then add the estimation to your measurements.
The process is quick and easy, but it is not as precise as measuring from the roof. Additionally, if you have a roof with an irregular shape, you will not be able to make proper estimates from the ground.

Figure Out the Pitch
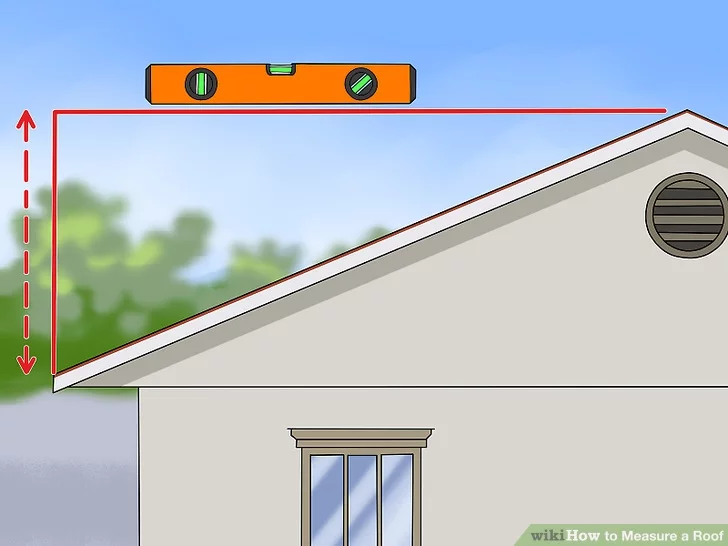
The pitch of the roof is its steepness or slope, and it is determined by the rise over the run. For this step, you need a ladder to reach the roof. Once you are up there, place a level down several feet from the edge so that it is leveled (the bubble is in the center). Once it is leveled, measure the distance between the end of the level to the roof.
You might see the pitch shown as “X/12” or “X-in-12.” In terms of rise over run, they represent an “X” amount of inches of rise for every 12 inches in horizontal movement. So, if the distance from the edge of the level to the roof is six inches, it becomes 6/12 or 6-in-12 inches.
Of course, the above only applies to a 1-foot level. If you have a 2-foot level, you divide the measurement in half, so a 12-inch measurement would also be 6/12 or 6-in-12 inches. This is because the length of the level can be thought of as the run, while the distance from the end to the roof is the rise for that specific run.
Pitch Multiplier Table
Using a pitch multiplier table is a good way to get the number you need to estimate the square footage of your roof. You can easily find one online, where you should see a list of rises in inches, along with their multipliers. Once you find the right multiplier, you can plug it into your calculations.
In the case of a 6/12 pitch, the multiplier is 1.118, while 7/12 would have a multiplier of 1.158. You can find what you need with a quick search. If in doubt, check a few sources.
Find Square Footage
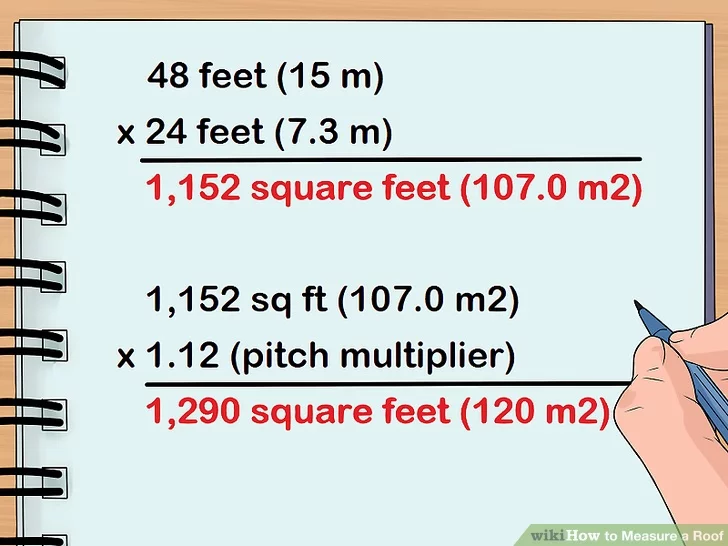
Once you have the measurements and pitch multiplier, it is time to determine the square footage. You can do that by finding the product of the area and the multiplier. That means multiplying the length and width values and then multiplying the result by the pitch multiplier. Doing that will give you the square footage you have to cover.
If you have a roof of 50 feet by 25 feet, then after you multiply them together, you will get an area of 1,250 feet. If you have a pitch of 7/12, the pitch multiplier would be 1.158, which you will multiply by the 1,250 feet to get 1,447.5 feet. And there you have your total square footage.
Estimate Your Materials
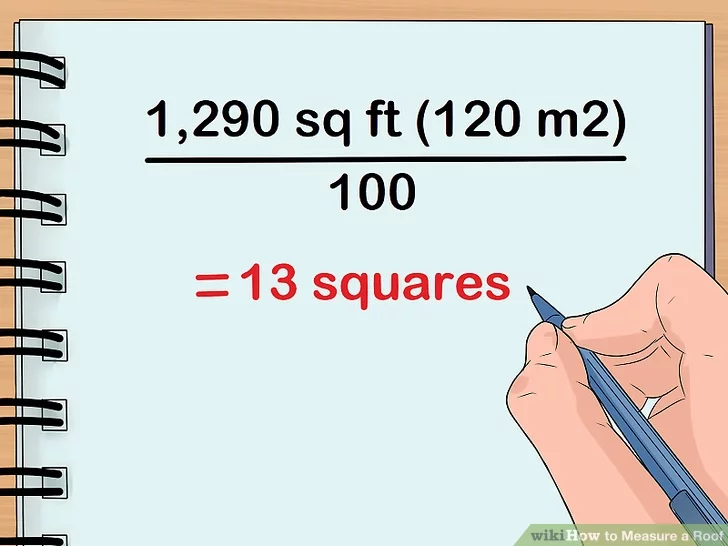
Figuring out the materials you need is as simple as some basic division. You want to take the total square footage determined in the previous step and divide it by 100. The method works because bundles of roofing material come with sufficient shingles to go over 100 square feet.
Taking the example from the last step, you would need around 15 bundles. That being said, it is recommended that you purchase about 10% more materials than you need, rounding up. Doing so ensures that you do not run out of materials if something comes up. In the previous example, that raises the total bundles to 16.
Diagramming the Roof
Diagramming is a more precise way to measure your roof, and if you can, you should. That being said, it requires some additional steps, starting with actually getting on top of your roof. From there, you have to measure each side of the main roof, then measure additional sections individually. You will then take your measurements precisely, draw diagrams, and calculate the materials needed as usual.
Get Onto the Roof
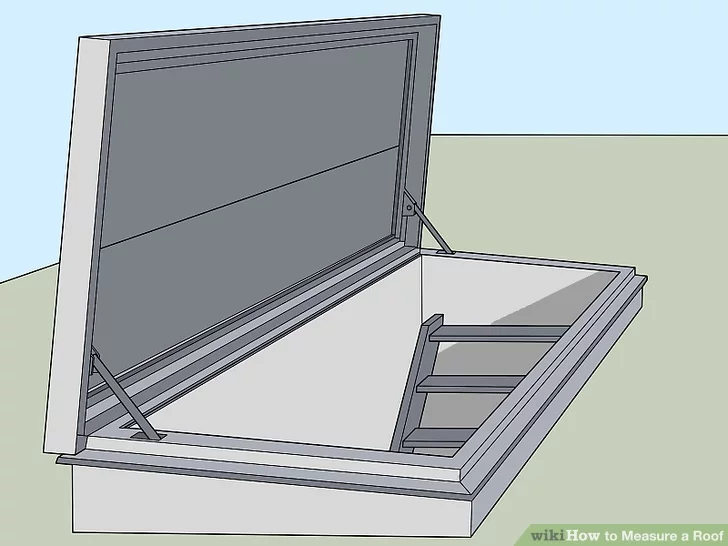
Safety comes first when getting onto a roof, so take every precaution as you get up there to start taking measurements. That might mean using an interior window that opens onto the roof or using a ladder. Either way, do not forget to take a tape measure, something to write with, and something to write on.
If you choose to use a ladder, make sure it is on a flat and stable surface. It is best if you have someone else help, having them hold it and keep an eye on you as you are on the roof. That is especially so if you are unfamiliar with this type of work or you have a particularly steep roof. Keep in mind that a pitch of 5/12 or so is the “walkable” limit.
Measure the Main Roof
Many roofs have multiple sections, and you want to take care of them one by one. The best place to start is with the main section of your roof, which is the largest portion from which other sections extend.
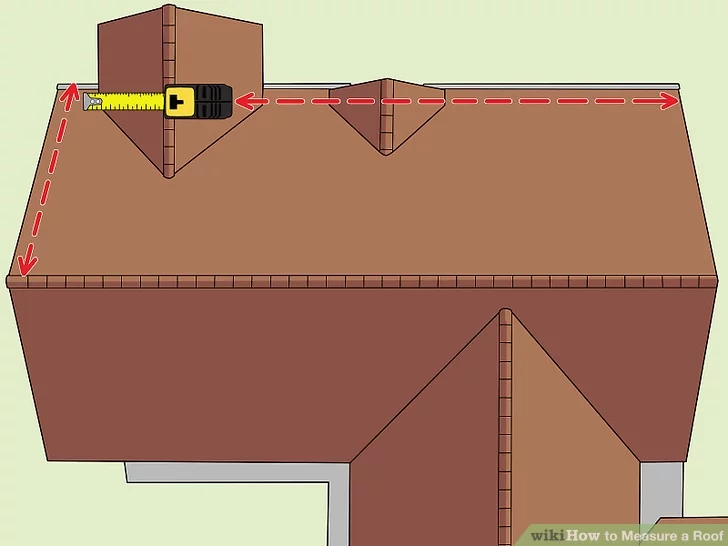
Use the tape measure to get the length and width of the main section in feet, focusing only on the outer perimeter for now. If it is a square or rectangular roof, you only need to do one side, while a sloped sectional roof will require you to jot down dimensions for each plane (flat, continuous section).
Measure the Other Sections
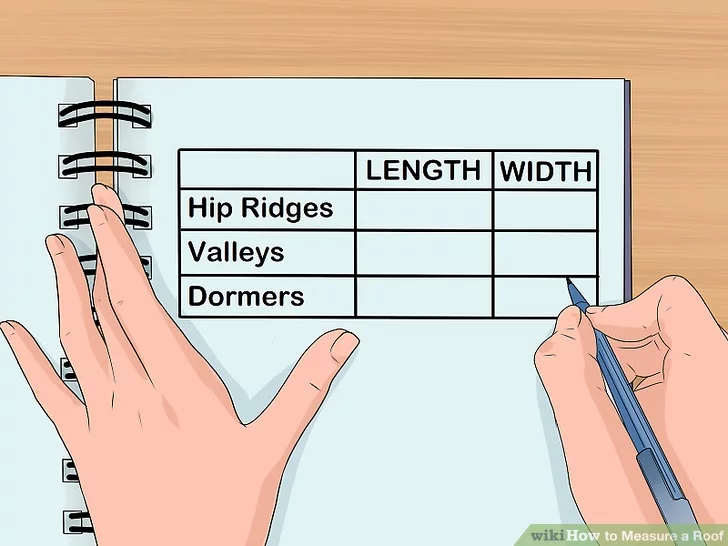
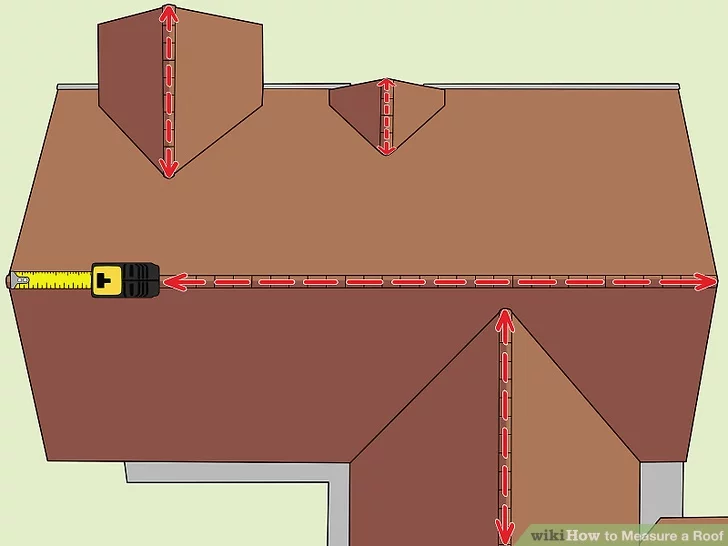
The next step is measuring the other sections of your roof, including ridges, valleys, and dormers, which will need to be added to your calculations. Ridges and valleys are the contours where an individual hip section joins the main section. A dormer is a section that juts out and has a window in it. Get the length and width of everything.
As for the pipes, chimneys, and any other obstacles, you can ignore them for your calculations. They should not impact the quantity of material you need, and whoever works on the roof can work around them when the time comes.
Record Measurements
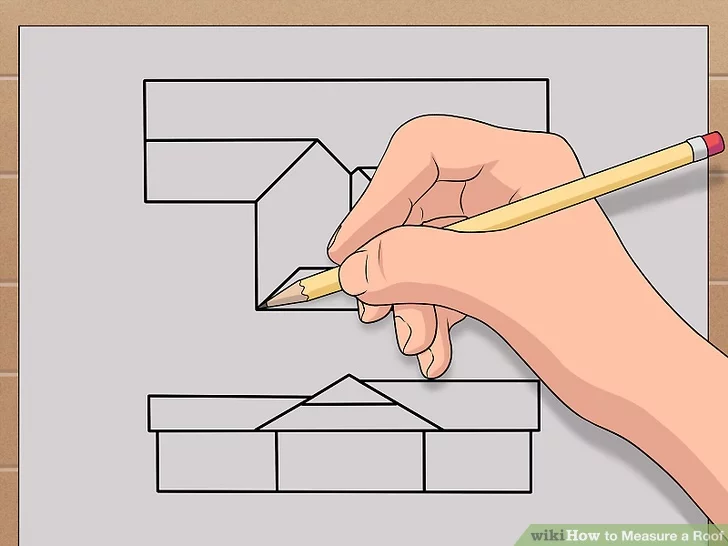
You should have been taking measurements as you go, but go back and make sure everything is accurate and labeled. That means within the nearest half of an inch, not rounding up or down. Rounding early in the calculation process can cause bigger errors, and you will round toward the end anyway.
Draw a Diagram and Add Labels
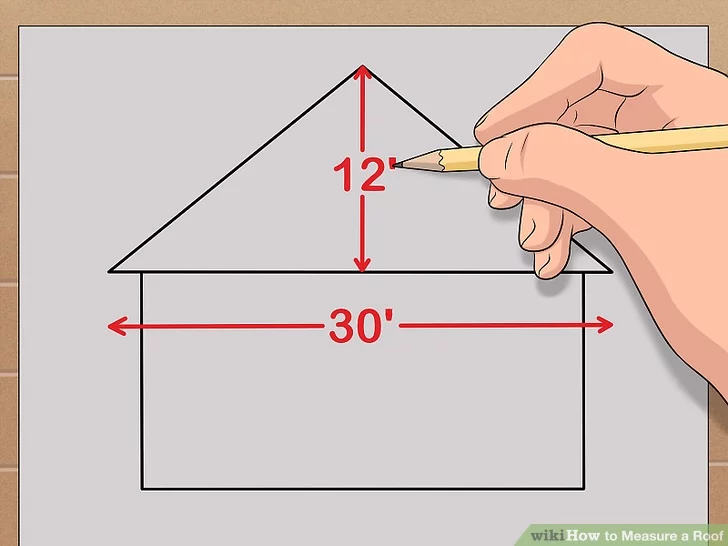
Take a large piece of paper and carefully draw a rough top-down picture of the roof. Start with the basic shape, then add ridges, valleys, hips, and any dormers, making sure you get everything down. Perfection is not the key here. You only need a basic image to add dimensions to so that you can keep up with everything for the calculations.
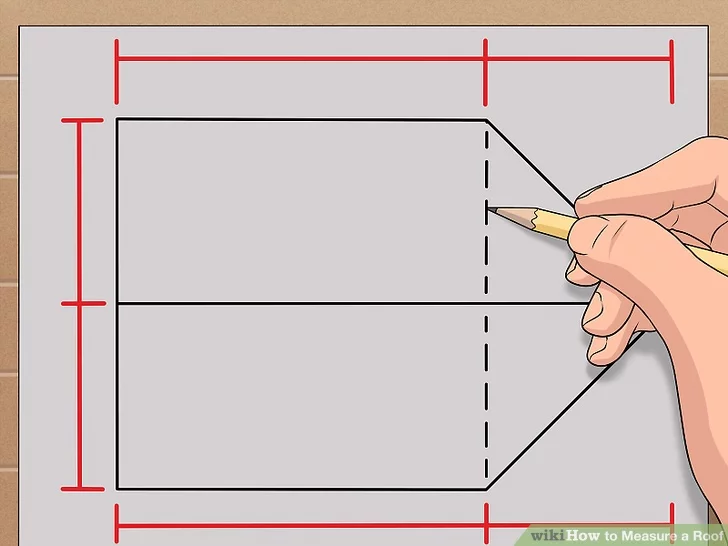
Once you have the sketch done, add the measurements. This part is where the accurate and labeled measurements become important since you will want to put the length and width on the appropriate sections. Begin at the outer edges. Also, make sure to add the lengths of the peaks, hips, and valleys.
Divide the Diagram Into Simple Sections
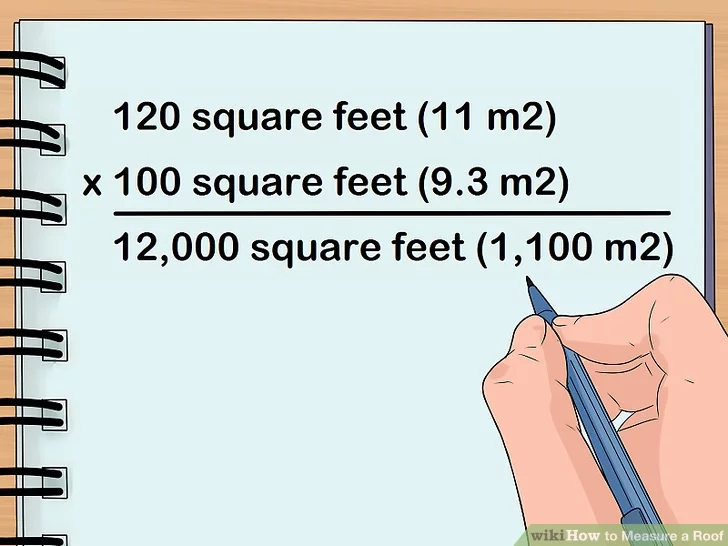
It can help if you divide things into simpler shapes. For instance, with a basic gable roof, you can draw a dotted line to separate the tapered end into two sections, making a rectangle and a triangle. Continue doing this for different parts, lining them off to create geometric sections that include squares, rectangles, and triangles.
It might seem like a lot of extra, perhaps even unnecessary, work. However, it will make the calculations easier and faster, so you will want to spend the time here to keep the mass simple later.
Find the Area of the Rectangular Sections
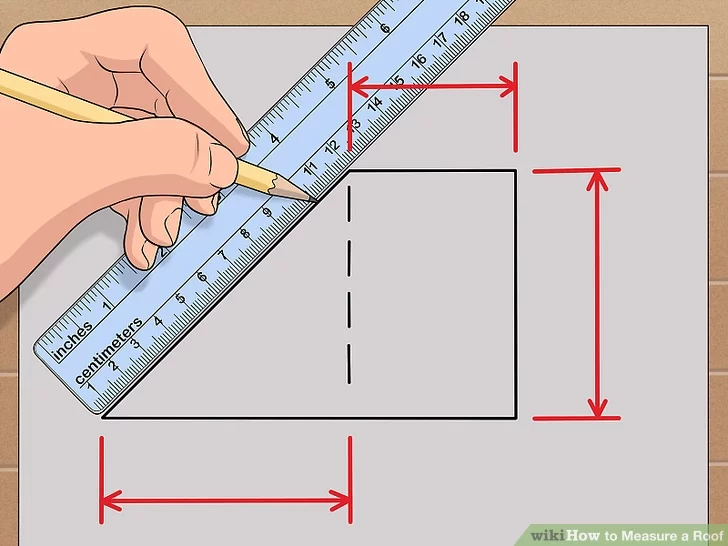
Dealing with the rectangular and square sections is simple, only requiring you to multiply the length by the width. So, if you have a section of roof with a length of 25 feet and a width of 30 feet, that section will have an area of 750 square feet. Do the same for any dormers, filling out your diagram with the areas.
Find the Area of the Triangular Sections
Triangular sections are a bit more involved, but not much, which is why going with easy geometric shapes is a good idea. For triangles, follow these steps to get the square footage:
- Draw a central line between the center of the longest side and the point.
- Multiply the length of the longest size by the length of the central line.
- Divide the product by two.
In other words, half of the base multiplied by the height, which is the distance between the base and the peak in this instance. To demonstrate, if there is a roof section with a base of 20 feet and a height of 10 feet, you would get an area of 100 feet. Upon finishing the calculations, add them to the diagram.
Find the Sum of the Sections and Estimate Your Materials
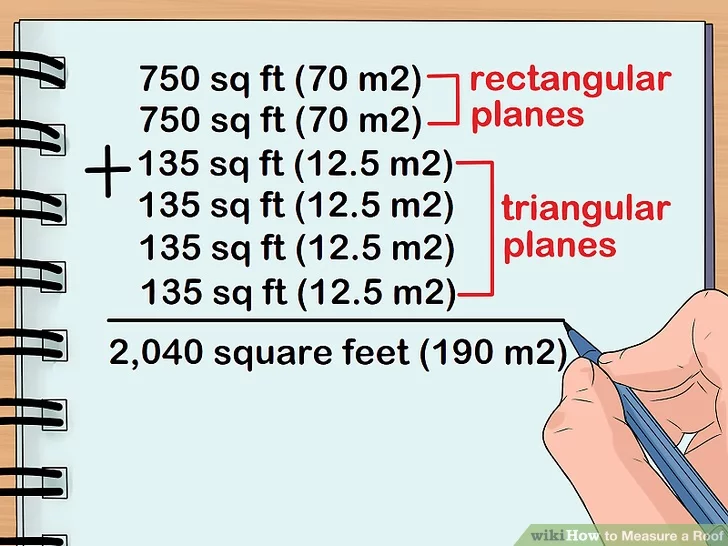
All you have to do to find the sum is take all of the area values and add them together to get the overall square footage. Just make sure not to round up or down and to check the answer once or twice to make sure you did not miss a number the first time.
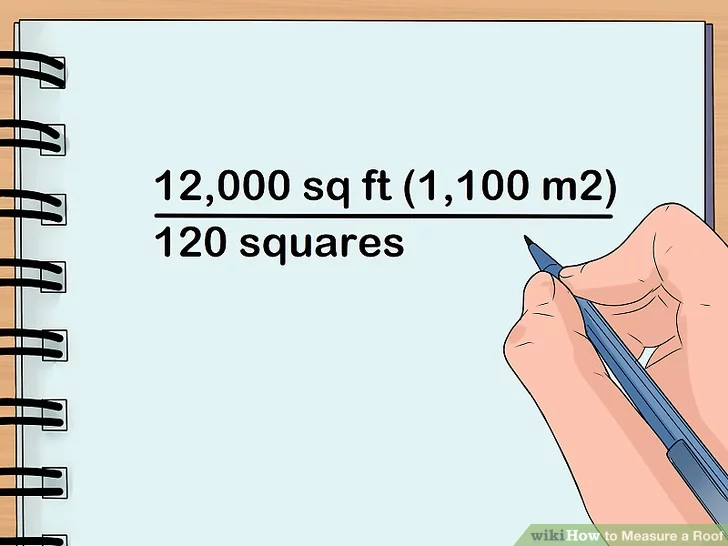
After getting your total square footage, divide it by 100, just like you did in the previous estimation section. If you bypassed that section, the 100 is there because roofing materials come in bundles that cover about 100 square feet. That means the total square footage divided by 100 gives you the number of bundles you need to order.
However, do not forget to add an additional 10% to the total square footage to ensure you will have enough materials after waste. Also, round up on the bundles, never down.

With over 12 years of construction industry experience, David Bitan specializes in restoring, inspecting, maintaining, and repairing roofs for residential, industrial, and commercial properties.
We Turn Every Project Into A Hive Of Excellence
-
Masterful Craftsmanship
Our skilled team merges art with function to ensure every roof is a testament to expert craftsmanship and quality.
-
Fast & Efficient
Time is of the essence, and we value yours. Count on our prompt and efficient service for all your roofing needs.
-
Guaranteed Satisfaction
Happiness is our benchmark. Experience peace of mind with our 100% Satisfaction Guarantee on every project.

Our mission at Bumble Roofing is to set new standards in quality by ensuring clients receive top-tier service, world-class materials, and an enduring roof over their heads.


