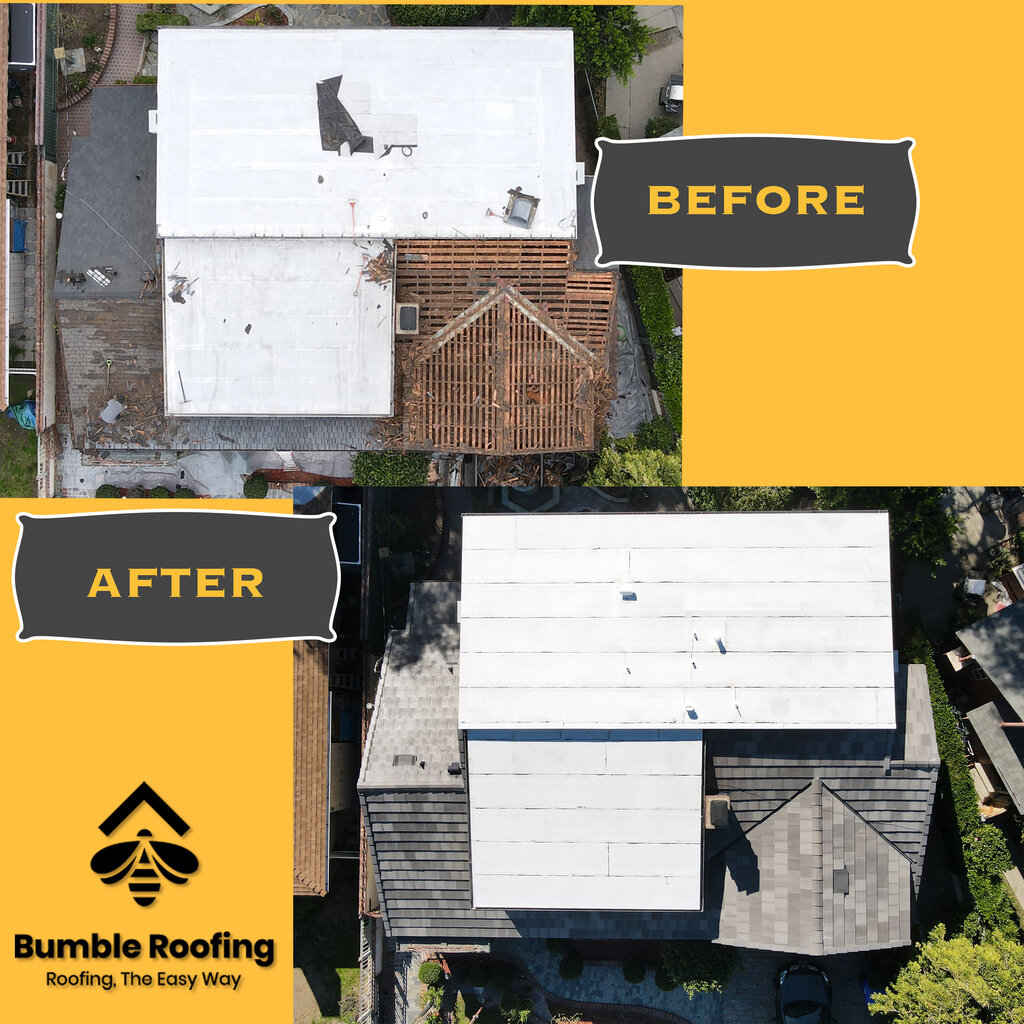
How to Build a Roof
Having a good roof over your head comes with a lot of benefits, such as protecting you from the elements. It will also stop moisture from getting inside and wreaking havoc. Additionally, it ensures water is drained and provides insulation that ensures comfort, regardless of time of the year.
On top of the practical, a roof is a decorative addition that can change the look of a home, depending on the style. But there is more to picking out the best type of roof than appearance alone. Other things you will want to consider include the structure and the climate and precipitation in your area.
The following article will provide you with the basics of how to build a roof. The topics covered here include choosing a style and materials, preparing for the build, and a walkthrough on building a basic gable roof.
Choosing a Style and Materials

License: Creative Commons
When it comes to choosing a roof type for your home, you have hundreds of options, with each type having its own purpose and allowing for different materials. However, you will also need to consider things like climate and location if you want to build the perfect roof for your home. Starting with the style will make things easier.
Choose the Style
Flat and pitched are the two major categories you need to know, but the shape of the building will ultimately determine the style of roof you choose. Consider a square building. If you want to build a round roof on a square building, it will not be easy.
While it is a simple example, the shape of the building is equally important for more complex buildings and roof styles. Therefore, allowing the building shape to guide you to the best roof is often the best choice. Below are some common roof styles:
- Gable: The gable roof is the most popular roof style in North America, and it is also the easiest to build. It looks like an inverted V, though there are variations suited for more complex buildings. That includes the saltbox roof to join walls of different heights.
- Flat: The flat roof is mostly flat, but it does have somewhat of a slope, albeit slight. The slight slope allows for drainage, preventing damage to the roof while still allowing outdoor roof gardens or living space.
- Pyramid: The pyramid roof is meant for use on square buildings. It is also a popular roof type in North America. Moreover, it is easy to install. Though, it does require more material than a gable roof.
- Hip: The hip roof is elongated and meant for use on rectangular buildings. Much the same as the pyramid roof, it is a popular roof type that is easy to build but requires more materials.
- Gambrel: The gambrel roof is often referred to as a barn roof, and the purpose is to maximize the space in a roof or attic.
- Shed: The shed roof is perfect for sheds, porches, and home additions because it has a greater slope.
What type of roof style and material you choose comes down to what you want and what best fits the needs of your home. However, there is more to think about than the shape of the building. Taking a look at the climate in the area before making a decision is a must.
Consider the Climate
License: Creative Commons
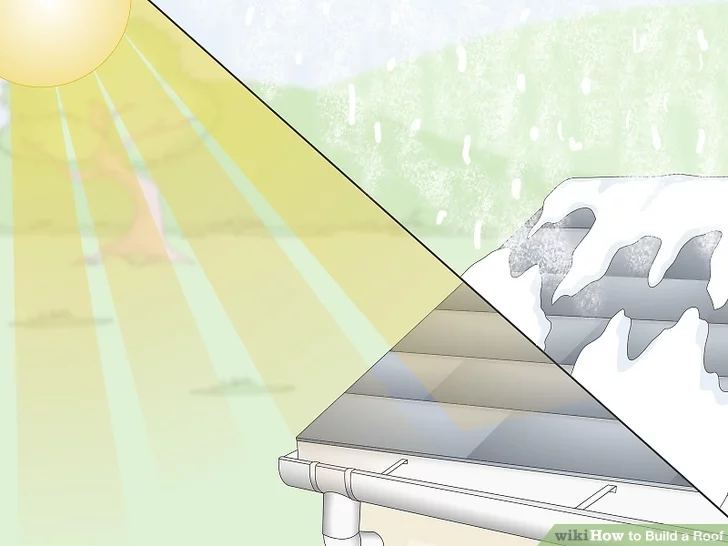
Environmental factors are major considerations for any building project. For roofs, it is all about suitability. Some roofs are more suitable in some climates than others, such as the fact that gable roofs are not great in areas with high winds. On the other hand, a hip roof is great in an area with high wind conditions.
The temperature is another concern to keep in mind. Flat roofs are not the best choice when there is high precipitation, but they perform well in hot, dry climates. Pitched roofs are better for high precipitation environments, with the optimal pitch varying based on the amount of rain or snow expected.
Simple pitch roofs are also great when it comes to temperate climates that experience all of the seasons. You do not have to worry about leaves or needles getting stuck, and snow and rain will run right off.
License: Creative Commons
Pick the Materials
License: Creative Commons
The many types of roofs out there can be built in different ways with various materials. But some materials are more suitable when used with particular styles. Likewise, there are styles with versatility in the materials used. Some examples include:
- Pitched roofs can have metal or wood frameworks. They can also use a variety of outer materials, such as wood or asphalt shingles. Other choices include clay or concrete tiles and metal sheeting. However, it is important to match the outer material with a framework (truss) that can support its weight.
- Flat roofs can utilize various materials for their exteriors, including asphalt, metal, fiberglass, or polyvinyl. But despite the versatility, shingles will not work.
Material choice might also be influenced by the climate. Algae-resistant asphalt shingles are great for humid areas, while you can choose clay tiles for humid environments. Moreover, durability is important if there is heavy snowfall to prevent collapses. Overall, metal and asphalt shingles are seen more than other exterior materials.
Location, Location, Location
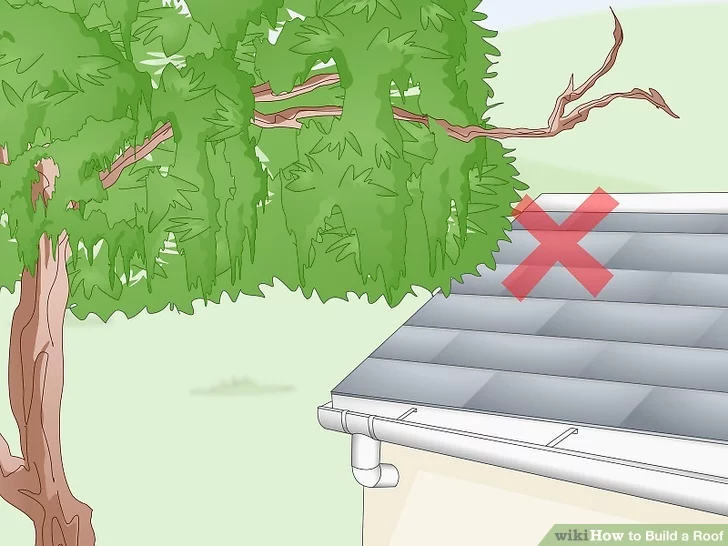
While the location might be inevitable, it is still something worth considering as you go to build a roof. For instance, building the roof under a tree. Heavy branches can cause serious damage, especially if they fall on less durable material.
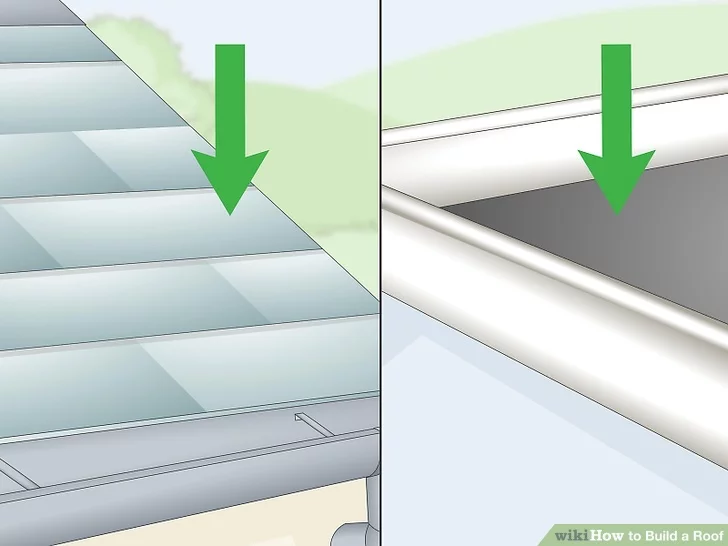
Drainage is also worth considering. You do not want the water running off directly into the yard. That means your roof needs to be designed and equipped with a way to properly drain precipitation.
Additionally, if you live close to another home, you might need to consider certain things. One example is needing to build a roof with a smaller eave.
Preparing to Build Your Roof
License: Creative Commons
Preparation is key for a successful, stress-free build. That includes determining the pitch, measuring the roof, planning things out, and securing your materials. And to get things started, you will need to determine the pitch and get your measurements.
Determine the Pitch and Measure
License: Creative Commons
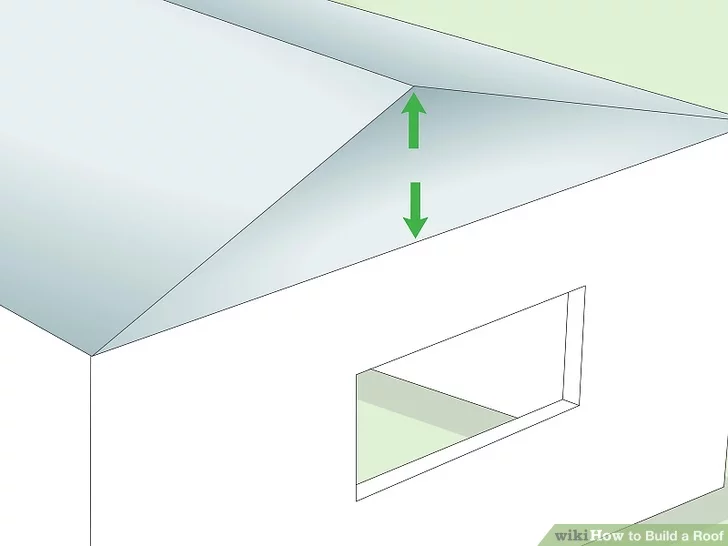
The pitch refers to the rise over the run of a roof. That can be put in terms of the vertical angle and horizontal measurement. It can range anywhere from 2:12 to 12:12 and denotes how many inches a roof rises over 12 inches of horizontal distance. So, at 2:12, the roof rises by two inches for every 12 inches it goes horizontally. People can still walk on a roof up to 5:12, or five inches for every 12 inches it goes horizontally.
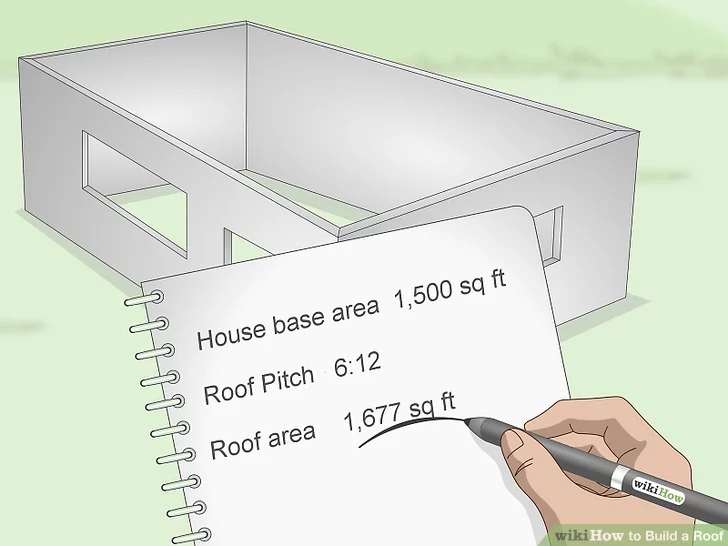
After determining the pitch, you will need to measure the roof to ascertain material quantities. You want to pursue accuracy to avoid overspending, so try using a roofing calculator. It will help you determine the necessary roof area using the base area and pitch of the roof you want to build.
License: Creative Commons
Plan and Purchase
License: Creative Commons
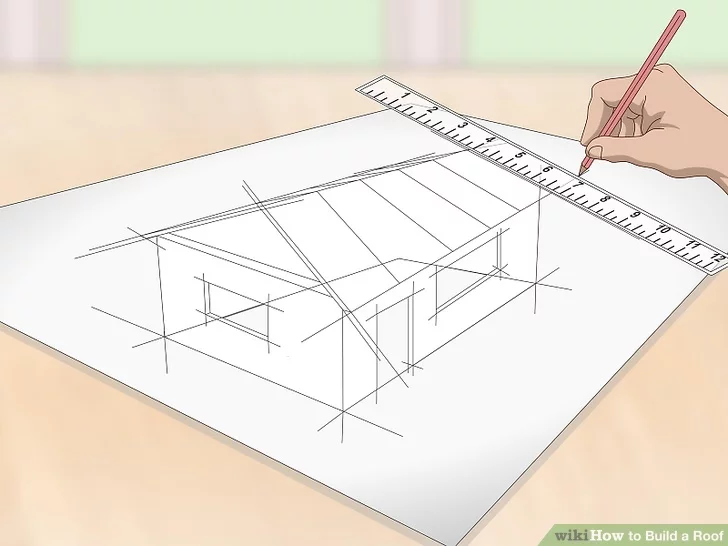
Creating a plan is a mandatory step that ensures you have a clear direction for the build to come. You want to have a diagram that includes style and shape, as well as the measurements, materials, and truss spacing. Details matter when planning, so include as many as possible before purchasing materials.
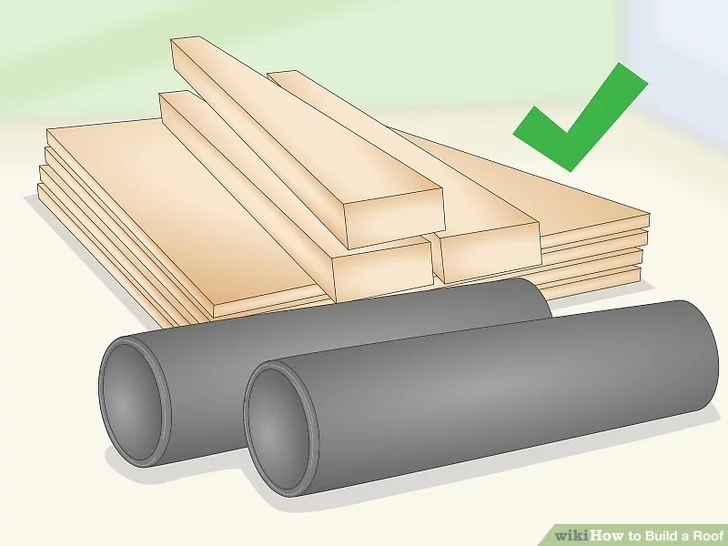
With the pitch and measurements in hand, you can buy your materials. You will likely be using fabricated trusses since they are the fastest and easiest way to create a frame. In fact, most roofs are built with fabricated trusses these days. Additionally, the rafters and ceiling joist are built into each truss.
Aside from fabricated trusses, some of the other things you might want when building a basic gable roof include the following:
- Sheathing material
- Underlayment
- Roof covering
- Roofing nails
The materials and tools will depend on the roof, the shape of the building, the climate, and more. For sheathing material, expect something like plywood or fiberglass. The underlayment will include tar paper and maybe an additional barrier for cold environments. As far as coverings go, the materials are numerous and include shingles, tiles, and metal.
Building a Basic Gable Roof
License: Creative Commons
Even a basic roof can be a complicated project that requires precision and a methodical approach. But as long as you do it well, you will have a new roof that will last anywhere between 20 and 50 years.
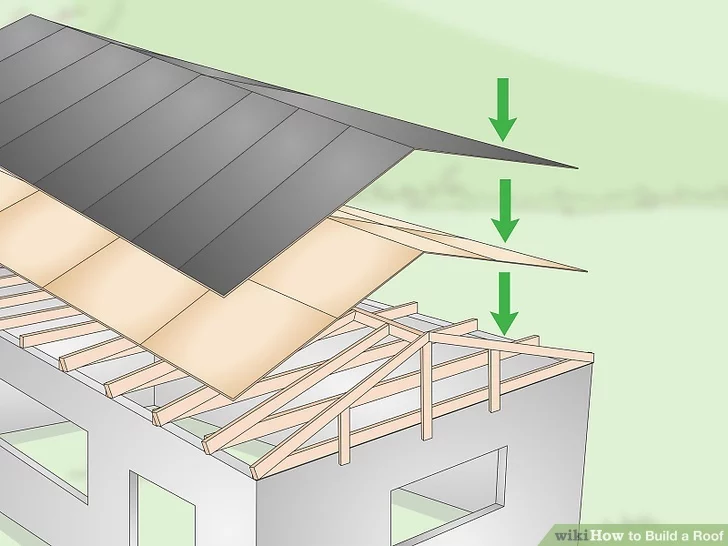
Before jumping into things, it is important to understand the process, which has four main steps:
- Framing: Construct and install the roof frame, which you can do using premade trusses.
- Sheathing: Lay down a layer of material atop the frame to provide the surface of the roof.
- Underlayment Installation: Install a protective layer covering the sheathing. It can also involve an additional step of putting down an ice barrier layer atop the underlayment.
- Roof Cover Installation: Install a layer on top of the underlayment to protect the roof from the elements.
Throughout every step of the build, make sure that you wear proper fall equipment. Additionally, you should adhere to local building codes and secure the proper permits before building begins.
License: Creative Commons
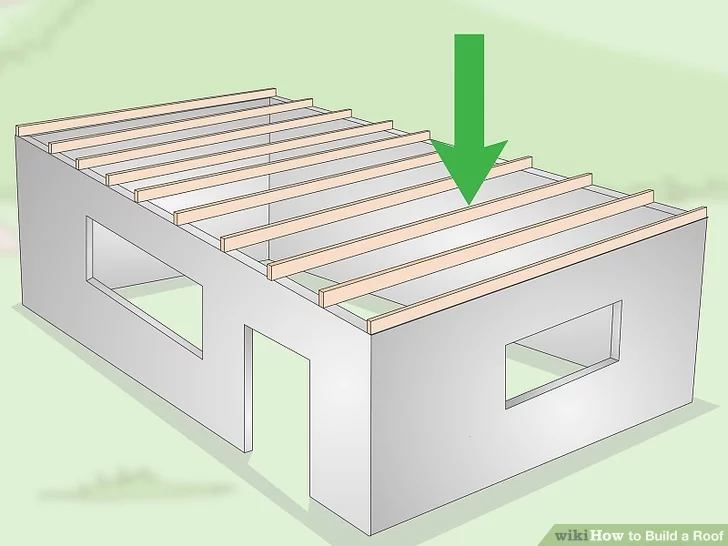
Mount the Trusses
The first thing you want to do is mount the trusses. However, before you do so, the wall frames need to be level, plumb, and square. You must then hoist the trusses onto the roof with a crane or multiple people. Additionally, if the building is still a frame, you can use a ladder or scaffolding for this part.
Keep in mind that the spacing between trusses will depend on the building codes and how much weight they need to support, which is impacted by snow and other factors. Generally, they will be 12, 16, or 24 inches apart.
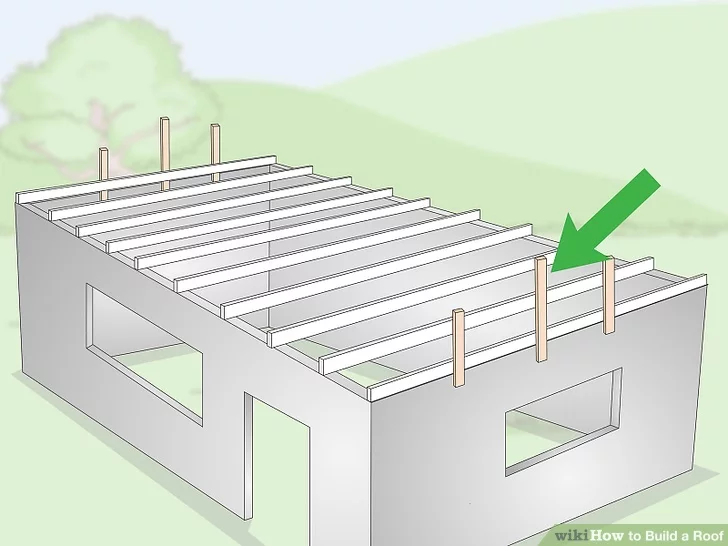
Install Temporary Braces
License: Creative Commons
You cannot immediately install the trusses once they are mounted. Instead, you must fix temporary braces to keep them in place while you get sheathing and permanent bracing installed. To start:
- Go to the back wall and find the center.
- Grab a 16-foot two-by-six board.
- Nail the bottom half of the board to the top of the outside wall.
The top half of the board should go past the top of the roof, allowing you to fasten it to the initial truss. When installing the temporary braces, make sure you fasten them to a stud.
With the first brace in place, take another board of the same type and length and nail it six feet to the left of the center brace you just installed. There should also be one placed six feet to the right. Once you have those secured, it is time to do it again, repeating the steps for installing the temporary braces, this time at the front.
License: Creative Commons
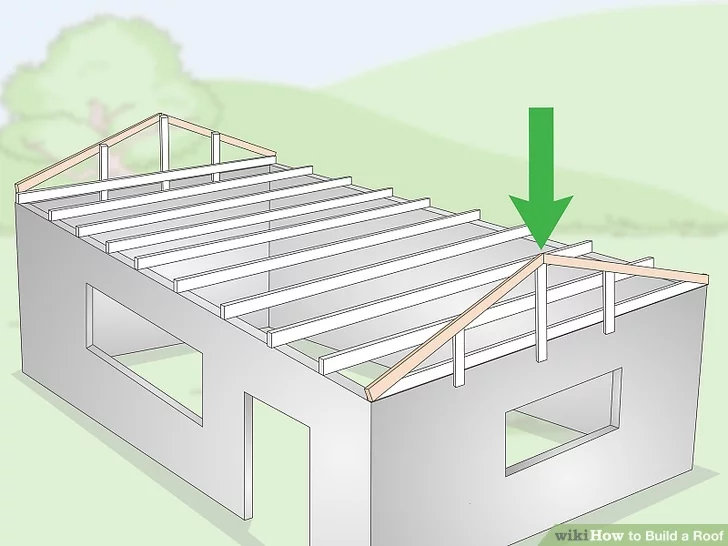
Install the End Trusses
At this point, the temporary braces should be in place. With that done, you can start installing the end trusses. Like the temporary braces, it will be done at the front and back of the building. Get started by following the manufacturer’s instructions and affixing them to the temporary braces.
After the end trusses are installed, get a batten. It should be a bit longer than the distance between the trusses. At the back of the building, nail it to the end truss. When done properly, it will stick out perpendicular to the front of the building. It can then act as temporary bracing for the next truss. Now you can move on to the standard trusses.
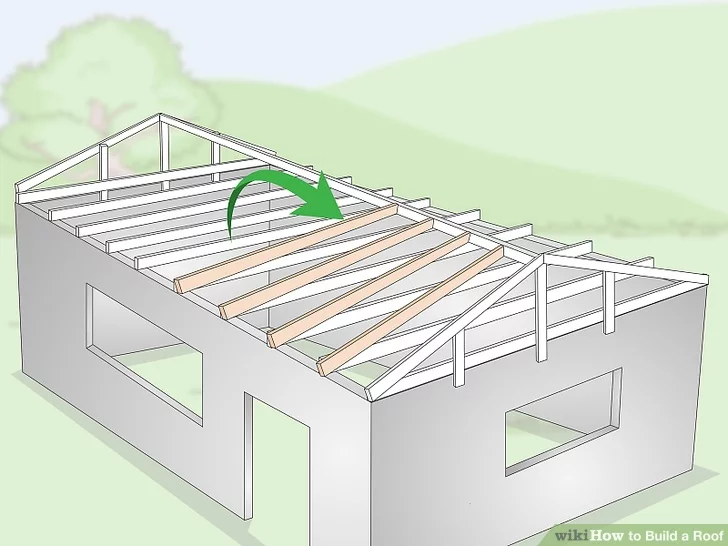
Install the Standard Trusses
License: Creative Commons
You will once again be working from the back to the front of the building. During this step, continue following the manufacturer’s instructions, getting the first standard truss in place. Then, nail it to the batten from the first truss. After that is done, grab another batten and nail it to the end truss and first standard truss. The length of the new batten should be able to attach to four separated trusses.
Once the new batten is in place, continue to install standard trusses, spacing them based on your plan. If you run out of space on the batten, install longer batten ties until the batten reaches from one end truss to the other. Each batten should roughly be long enough to handle around four truss lengths.
Keep in mind that some building codes require you to attach your roofing system to the structure below using steel connector plates or hurricane clips. Do your research and always make sure you are going by the book.
Once all of them are installed, it is time for permanent bracing. Detailed information can be found in the truss manufacturer’s instructions.
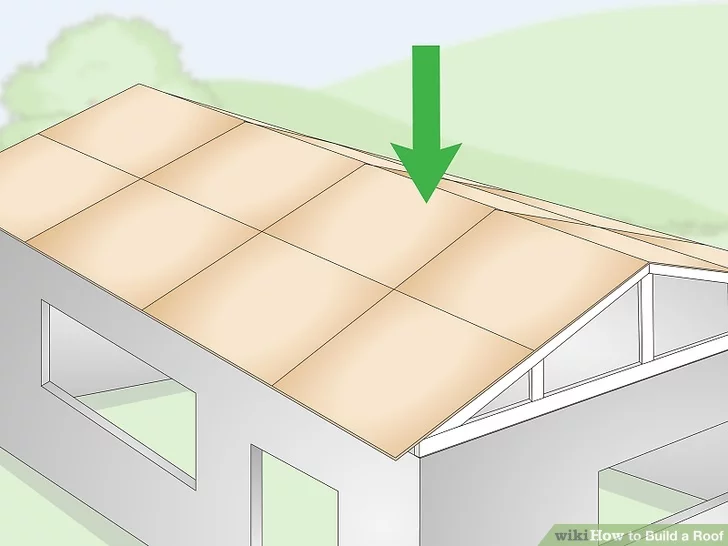
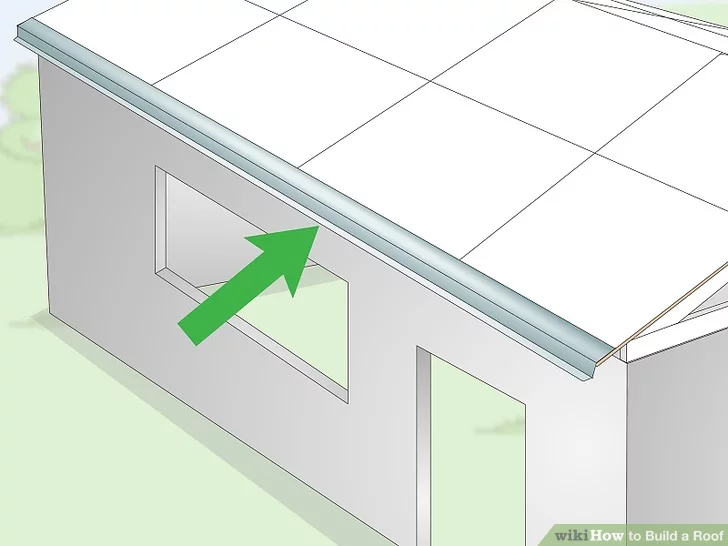
Begin the Sheathing Process and Install the Drip Edge
License: Creative Commons
Now that you have properly anchored trusses and permanent bracing, you can start the sheathing process. You will install the sheathing lengthwise, going from the bottom corner and installing it at the bottom first. After moving up a row, start at the same side and stagger it by a half sheet of sheathing.
License: Creative Commons
When placing sheathing, you must join panels over supports, keeping them 1/8 of an inch apart. During the process, keep these things in mind:
- Use 8D common or deformed shank nails to fasten sheathing to the frame
- Keep fasteners 3/8 of an inch from the edges
- Space fasteners six inches apart around the edges of each panel
- Space fasteners 12 inches apart within each panel
Repeat the above for each side of the roof, then install the drip edge. It is a simple metal flashing meant to protect sheathing from the elements. Particularly, it is used to protect against rain. It will direct it into a gutter if one is present or send it away from the house.
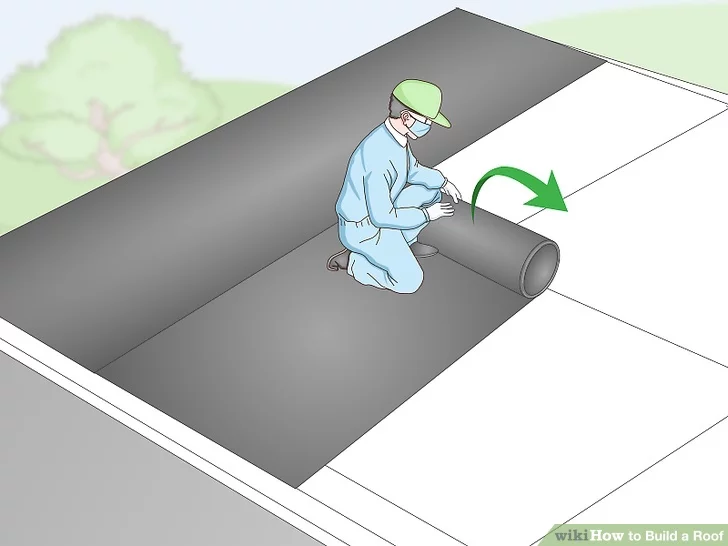
Install the Underlayment and Roof Cover
License: Creative Commons
Underlayment is incredibly important when building a roof since it serves as a waterproofing measure. Usually, roofing felt will be used. It uses asphalt instead of the tar found in tar paper. To properly install the underlayment, follow these steps:
- Start at the same place you did with the sheathing. Then, roll it out flat. You want to go lengthwise over the sheathing, stapling everything securely as you go.
- Roll out the second layer toward the ridge of the roof, overlapping it with the first by around six inches. Continue the process until you cover both sides of the roof.
- Roll the last layer over the ridge. You want to ensure that it overlaps the underlayment on both sides by eight inches or more.
License: Creative Commons
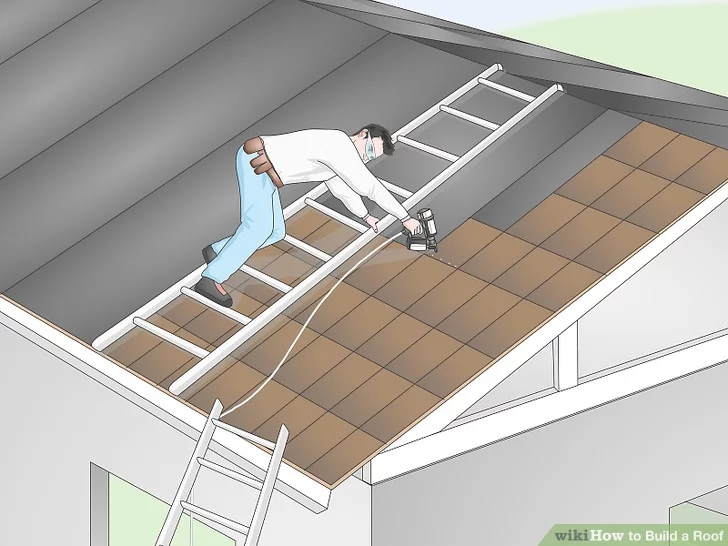
Once the underlayment is down, you can start installing the roof cover. It should be installed from the bottom up, lengthwise, just like the underlayment and sheathing. If you are using shingles, stagger them like sheathing, making sure they overlap. Additionally, make sure you finish things off with ridge cap shingles.

With over 12 years of construction industry experience, David Bitan specializes in restoring, inspecting, maintaining, and repairing roofs for residential, industrial, and commercial properties.
We Turn Every Project Into A Hive Of Excellence
-

Masterful Craftsmanship
Our skilled team merges art with function to ensure every roof is a testament to expert craftsmanship and quality.
-

Fast & Efficient
Time is of the essence, and we value yours. Count on our prompt and efficient service for all your roofing needs.
-

Guaranteed Satisfaction
Happiness is our benchmark. Experience peace of mind with our 100% Satisfaction Guarantee on every project.

Our mission at Bumble Roofing is to set new standards in quality by ensuring clients receive top-tier service, world-class materials, and an enduring roof over their heads.