How to Repair a Flat Roof
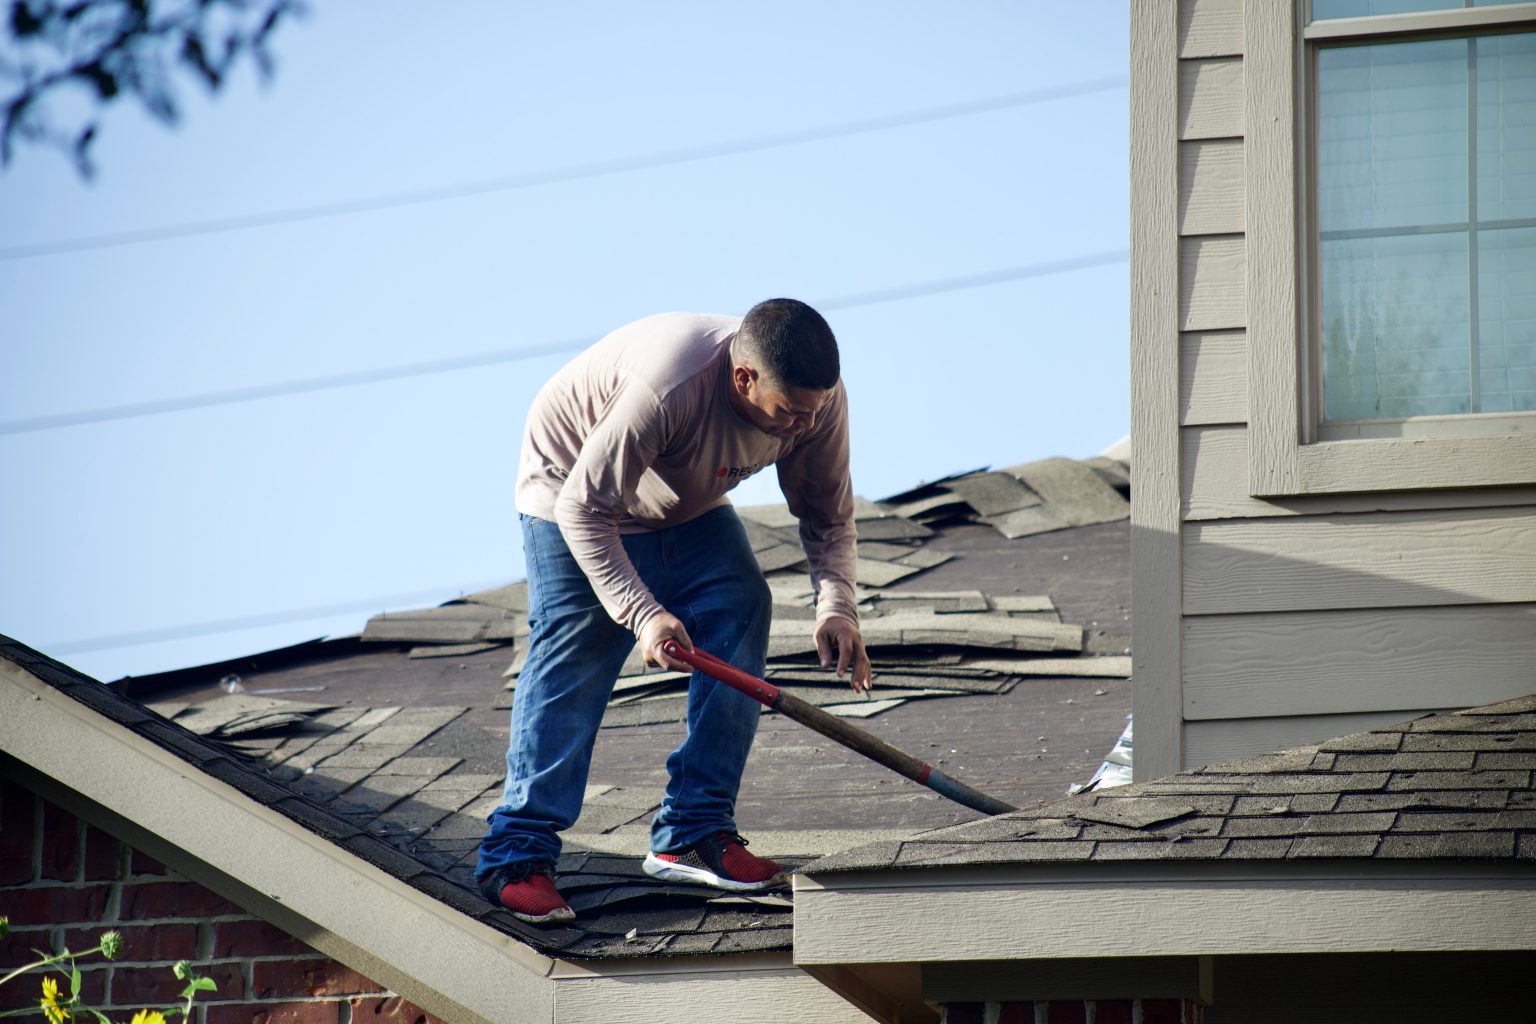
While called a flat roof, such roofs are only mostly level, having a slight slope to drain water. However, because the slope is small, it requires different materials to stay watertight. Usually, you do not have to worry about them, but every once in a while, you need to look for cracks and other types of damage to stop a leak before it happens.
You might see a flat roof on older houses or in arid areas, and they are usually made of asphalt, rubber, PVC, or similar synthetics. These materials are quite simple to fix, and with regular maintenance to prevent significant damage, you can easily extend the lifespan of the roof.
The article will cover some of the important parts of repairing a flat roof, which include finding the damage, sealing small cracks and holes, using roof patches, and resealing a flat roof.
Find the Damage
Because water usually drips a bit before you can see it, finding where a leak is can prove troublesome. To locate the damage, you will start by estimating the location from the inside, searching for signs of a leak that will point you toward the location of the damage on the roof above. Then, you will identify any damage and look at the seams, followed by clearing up any debris and drying the area for the work ahead.
Use the Closest Walls to Estimate the Location
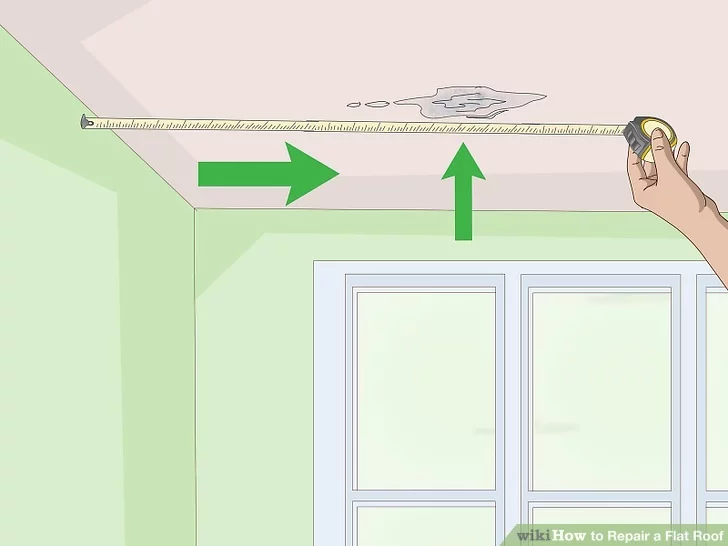
It will likely be difficult to find the leak if you immediately head to the roof to look. Instead, you want to go inside the house and use the closest walls to estimate its location. But first, you need to find areas that are wet or discolored due to water damage.
Once you find the spot or spots, grab a tape measure and use it to get an approximate positioning beneath the roof. Essentially, if you find a spot that is 12 inches from one wall and 25 inches from another, check the same area on the roof.
There is also a chance the first sign will be a damp, wet smell inside after it rains. In that case, it might be more difficult to track, but it is important to fix it as soon as possible to prevent damage.
Check the Slope Above the Measured Area
Make your way onto the roof, being careful as you do, especially if there is a chance of ice. Once you are up there, go to the area above the leaking area inside the house and look around. See if you can observe the slope to figure out how the water could flow into the rooms below.
Remember that most, if not all, flat roofs have a slope. It is meant to drain water, but it also means water can get into damaged spots higher on the slope and end up leaking through at a lower spot.
If you believe there are risks, make sure to have someone else with you as you get on the roof. You can also use a harness to secure yourself.
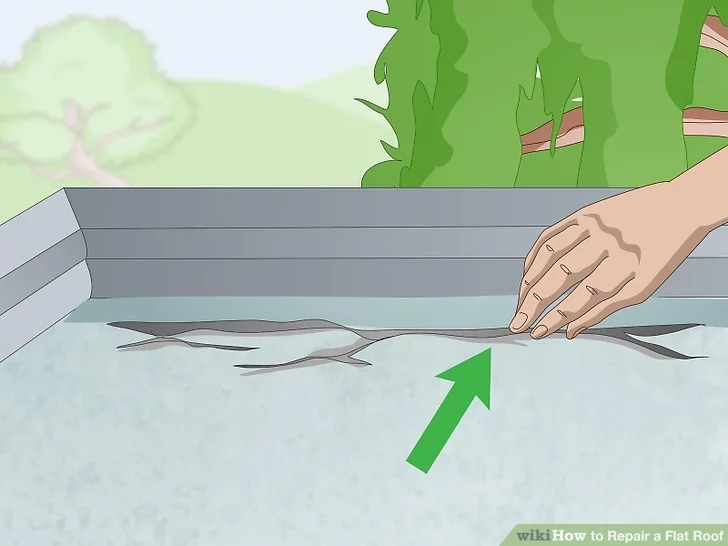
Identify Any Damage
Punctures, tears, and cracks are usually pretty easy to notice, so you want to look around and observe the state of the roof. Any area that looks worn might be the culprit, whether they be large or small. While large areas of wear or damage are the most urgent, small spots can quickly turn into additional headaches.
One of the reasons even small spots are problematic is that any water, no matter how little, will drain down into the wood framework underneath. That will lead to rotting and instability that could result in more serious problems later.
Assuming you do not let problems become serious, your roof can last around 25 years before it needs to be replaced. That means patching and repairing problems immediately, even the small ones.
Look at the Seams
The seams of a roof can be trouble areas, with obvious signs being cracks and holes. In fact, if the surface of the roof seems fine, the seams are another likely cause of a leak, so you will want to look around the edges. If you find a problem, patch it much like you would a leak in the membrane.
Additionally, make sure you do not overlook other potential sources of a leak, like flashing, vents, chimneys, and other areas with space for water to get in.
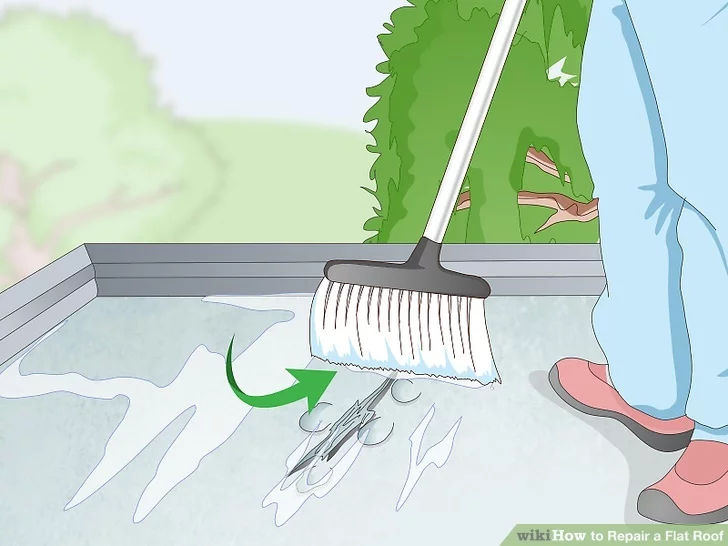
Clear Up Debris
It is important to clear away any debris or water from areas showing damage. Water and debris might stop what you use to repair the damage from properly bonding to the roof, meaning you will do the work for nothing. Plus, clearing it away makes it easier to see the damage. If you are unsure of what to use, grab a tough broom and clear away as much as possible.
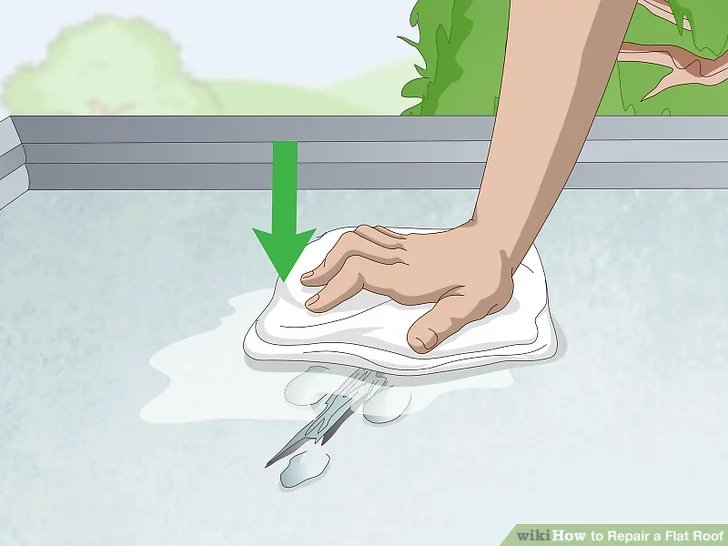
Dry the Area
Using a tough broom will take care of the debris and most of the water, but it will not completely dry the area. Always make sure to thoroughly dry an area before making repairs, though it is only a necessity in the areas you plan to use cement or sealant.
Effective drying methods include paper towels for small areas or a propane torch, though the latter carries risks of starting a fire if you are not careful. Another great method is letting the sun dry the roof, which is almost mandatory for large spots or when you plan to work on the entire roof. In that case, give it a few days to dry by itself.
Sealing Small Cracks and Holes
Small cracks and holes are common, and you can seal them in a few steps. To start, you will have to slice open blistered spots, followed by flattening the membrane. Once the area is smooth, you will apply roofing cement, lay out a fiberglass mesh layer, and add a final layer of cement. Lastly, you will use gravel to prevent sun damage.
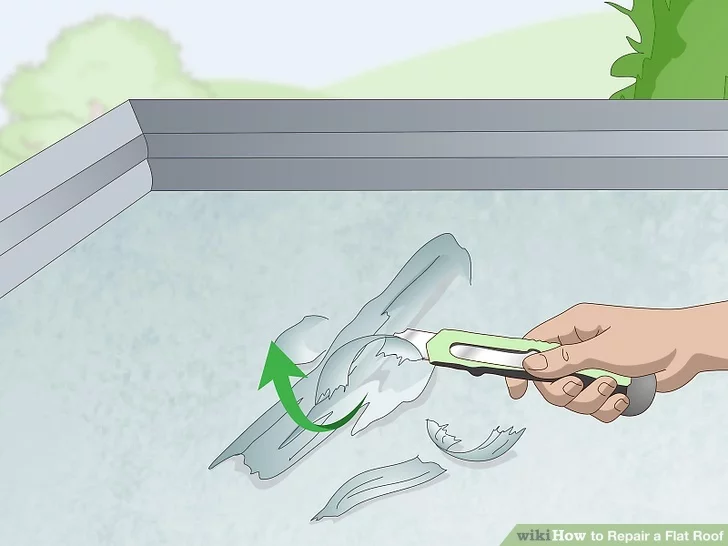
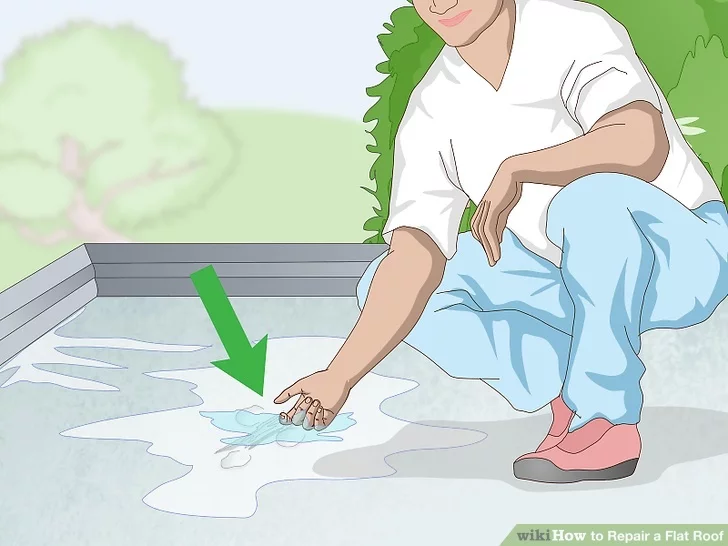
Slice Open Blistered Spots
Blistered spots are areas with little bubbles on the roof caused by trapped moisture and overheating. You will want to cut them open using a utility knife. Start by popping each of the blisters with a shallow cut, being careful not to go deeper than the damaged portion. Once you have done that, scrape off the damaged material.
After scraping away the damaged material, make sure the revealed roofing is dry. Only once it is dry do you want to try to repair it.

Flatten the Membrane
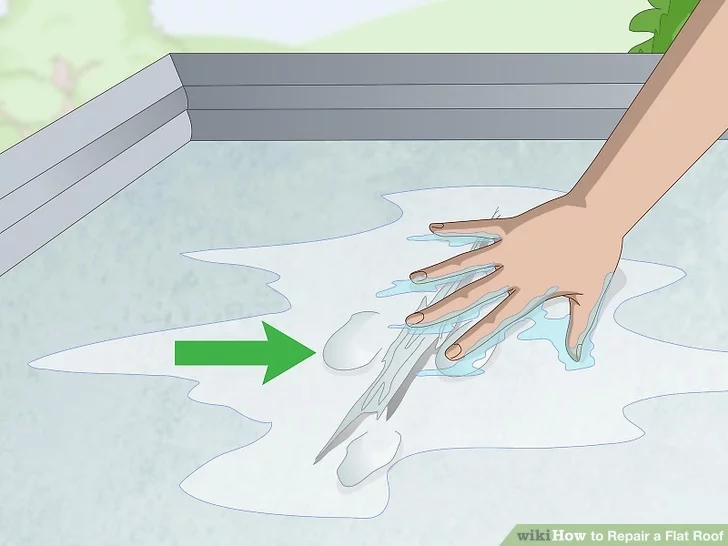
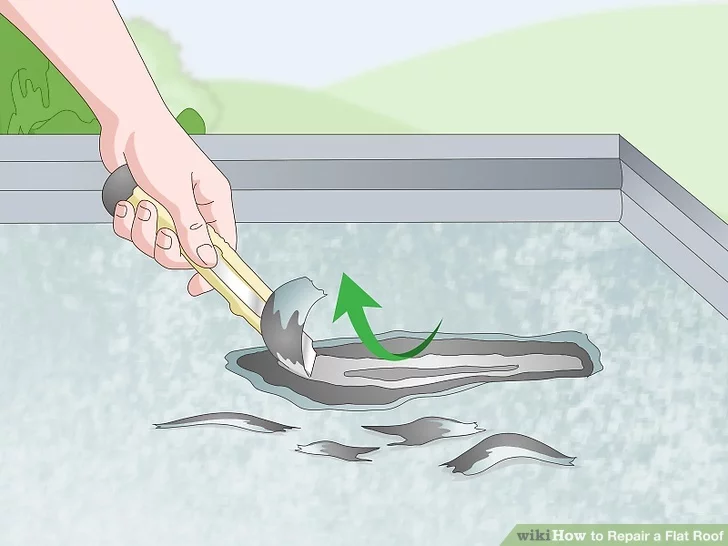
While you can fix small cracks and holes by pushing the sealant inside, it is not always easy. Another way to go about things is flattening the area using your utility knife, which involves making a cut and removing the material around the cut. When doing this, you have to be careful not to damage the layers below the damaged spot.
Keep in mind that the damaged portion of the roof can be used as a guide that tells you how deep to cut without puncturing the rest of the material. You can also use a trowel to lift cracked areas.
Spread Roofing Cement
The same trowel that can be used to lift cracked areas is a great way to spread roofing cement. The roofing will fill in gaps and provide waterproofing, and it works on many types of roofs.
The layer should be 1/8 of an inch thick, and it should be pressed into the damaged area. You also want to spread it approximately six inches past the damage and smooth it out, ensuring you can no longer see the crack when you are done.
Roofing cement is often found in cans, but some sealants will come in tubes for a caulk gun, which can make application easy. In fact, caulk can be used directly to seal small holes or cracks less than an inch in width. However, if you want to add a waterproofing layer, cement is a better choice.
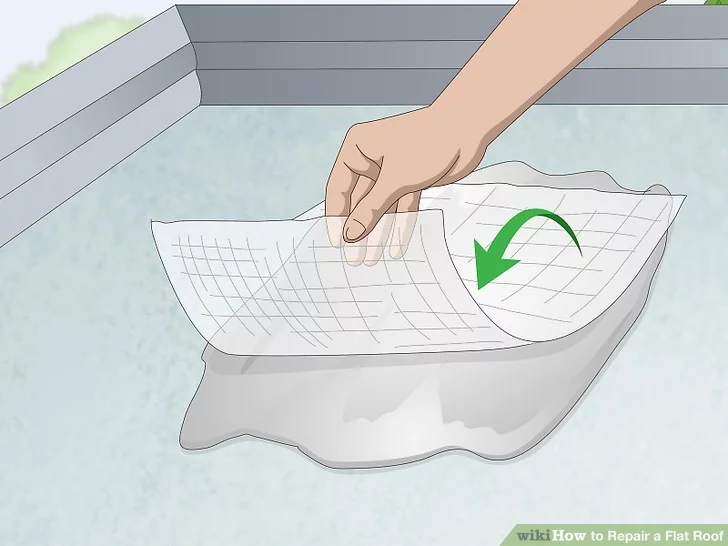
Lay Out Fiberglass Mesh
Fiberglass mesh is a useful addition to add a waterproofing layer to the damaged area. Moreover, it is an easy step that involves nothing more than cutting it to size and laying it on top of the cement layer. The only tool you will need is a sharp pair of scissors.
There is also something called fiberglass scrim, which is a light tape that serves as an alternative to the mesh. It is preferable for long, straight cracks and goes over caulk or cement.
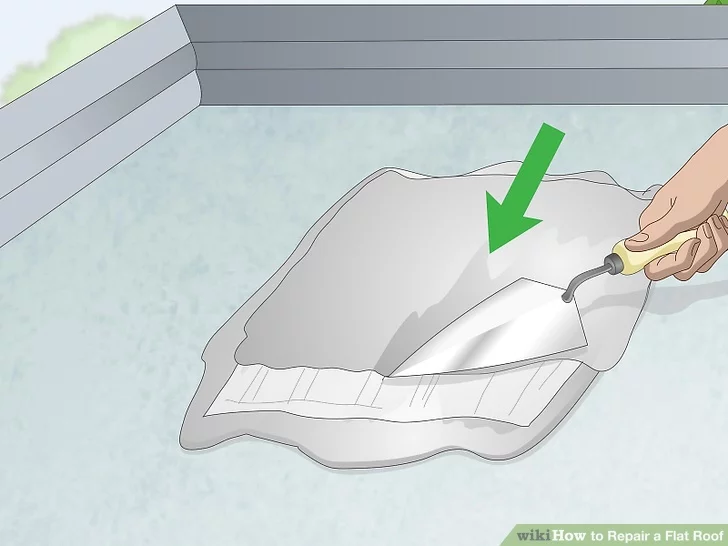
Cover the Mesh With Cement
Once the waterproofing layer of fiberglass mesh is down, cover it with another layer of cement. The cement should cover the entire piece of mesh and be around half an inch in thickness. When you look, you should not be able to see any traces of the mesh whatsoever.
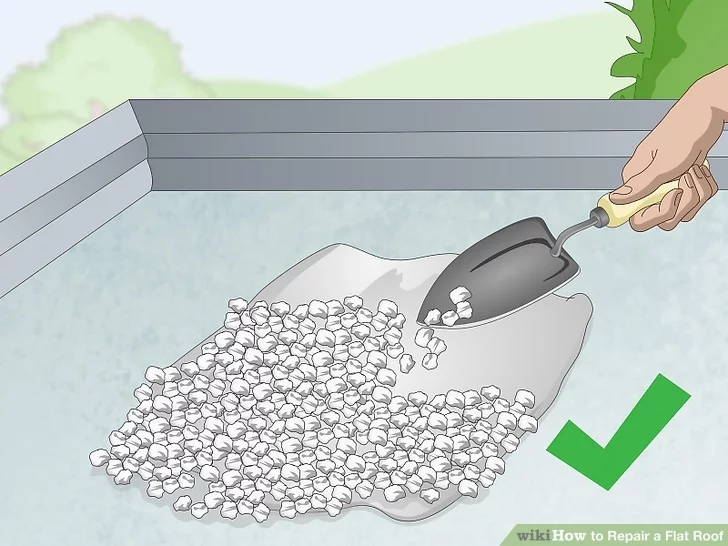
Layer Some Gravel
Sun damage is a potential complication with flat roofs, but it can be prevented with a layer of gravel. All you have to do is place the rocks evenly over the area to the point that the layers below are not visible. You might also consider adding them across the entire room if they are not already.
While it might seem like an odd step to take, covering a flat roof with gravel stops the sun from breaking down the bonds in the material, meaning a longer-lasting roof. Of course, you can also use a reflective coating.
Using Roof Patches
Roof patches are another great tool you can use to repair a flat roof. In fact, they come in kits that make things even easier. Once you have a kit, you will cut the damaged area, fill the hole with cement, apply a patch, cover it with cement, cut another patch to size, and add a final layer of cement on top of it to finish things off.
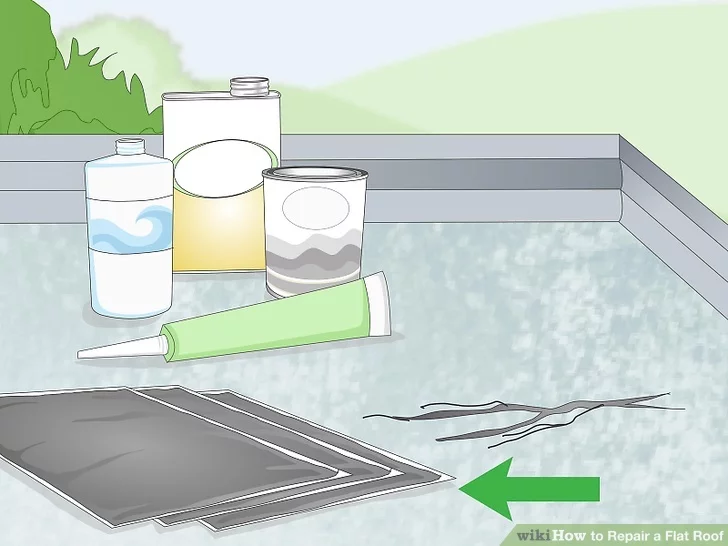
Get a Repair Kit
Roof repair kits will have everything you need to get the job done, with many including caulk for small areas and patches for larger areas. If you are looking for a simple way to get started, repair kits are the way to go. Just make sure you get patches that work for the type of roof you have. Examples include:
- SBS – Asphalt with a rubber-like consistency. Torch the patch during the repair.
- EPDM – Synthetic rubber that requires an EPDM patch for repairs.
- TPO – White rubber coating that requires a TPO patch for repairs.
Once you have the right type of kit, you can begin the repairs, which follow a similar pattern to the previous instructions to seal small cracks and holes.
Cut Out the Damaged Area
Using a utility knife, cut away the damaged area, starting at about an inch deep before slowly going deeper until you have removed all of the damaged material. You will want to cut a rectangle around the damaged part. Also, just like before, be careful not to damage the material beneath the damaged portions.
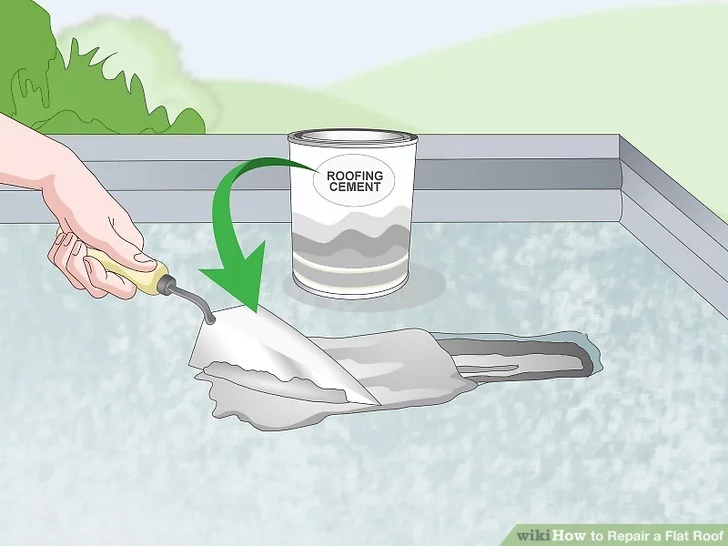
Fill the Hole
First, get a can of roofing cement that will work with the material of your roof, then fill the hole you cut with the cement. You want a layer around 1/8 of an inch in thickness, which you will smooth out with a trowel until it is level. Make sure to spread it beyond the damaged area by a minimum of two inches.
Also, do not try to use caulk if you plan on applying patches, as it is not meant to be an adhesive. That means that the repair will not last as long as it would with cement.
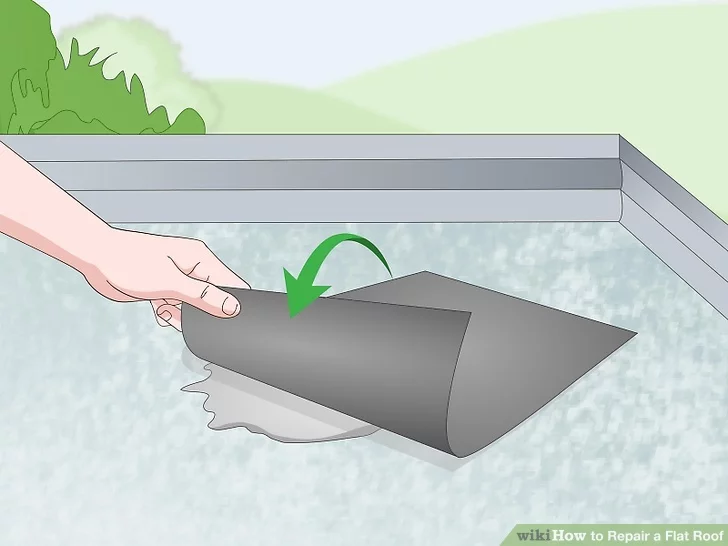
Apply a Patch
With the cement in place, place a patch over it. The patch should be the same material as the roof, and while it does not need to be cut to size, you can use a utility knife to do so if you wish. After it is in place and even with the rest of the roof, push it down into the cement until it sticks.
If you have a patch with an adhesive backing, you will not need to hold it in place to make it stick, though you still can for added security.

Cover the Patch Using Cement
Apply another layer of cement over the damaged area, spreading it to give the new patch a sticking point. It should be 1/8 of an inch thick and spread six inches beyond the damaged area. It should be level with the rest of the roof and spread further than the previous layer.
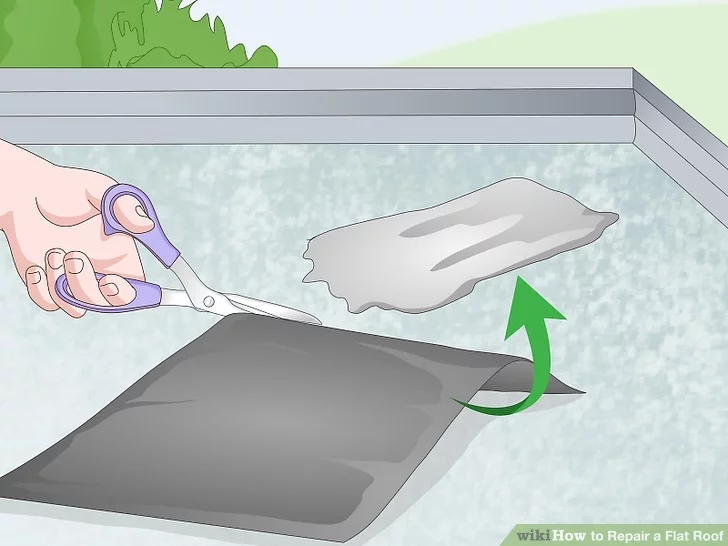
Cut a Patch to Fit the Cement
Double patching will add water resistance. Therefore, cut a patch to size, making it six inches longer and wider than the damaged area, equaling the cement layer you added in the last step. Be precise, using a tape measure and utility knife to get it right. The additional layer will make the spot more obvious, but it is worth it for the added strength.
Set the New Patch
Once again, place the new patch atop the damaged area, pressing it into the cement until it holds. It might be a bit larger than the existing roofing material, but you want it to be as level as possible. In fact, you want to spend extra time to make sure it is secure to the old roofing material to prevent water from getting underneath it. You might want to add more cement under the edges to weigh them down.
Lay Down a Final Layer of Cement
Finally, you will place a final layer of cement down, which should be level with the rest of the roof, as usual. You want the layer to be around half an inch thick and spread evenly with a trowel. Once the cement is down, clean the area and leave the patch alone. You might also consider adding gravel or using another method to prevent sun damage.
Resealing a Roof
There are times when a simple seal or patch will not be enough, such as when the waterproof seal needs to be replaced. In that case, you will want to reseal it, which means adding a primer, rolling out mesh, painting the sealant, and adding a reflective coat to finish things off. Though, one coat of sealant will not be enough.
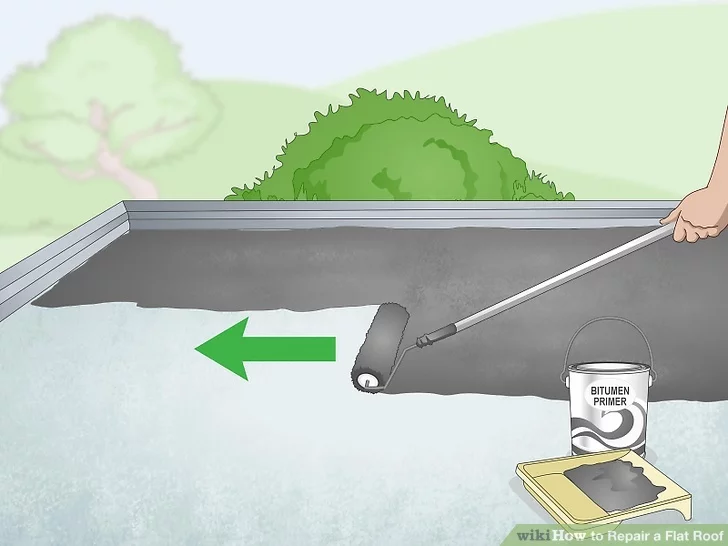
Apply a Bitumen Primer and Let It Dry
Before anything else, make sure to clean the roof. Only then can you pour some of your bitumen primer out, which you will then spread with a paint roller. By the end, you want a thin layer of about half an inch in thickness across the entire roof. Just keep in mind that you only need to use a small amount of primer, around a gallon per 100 square feet.
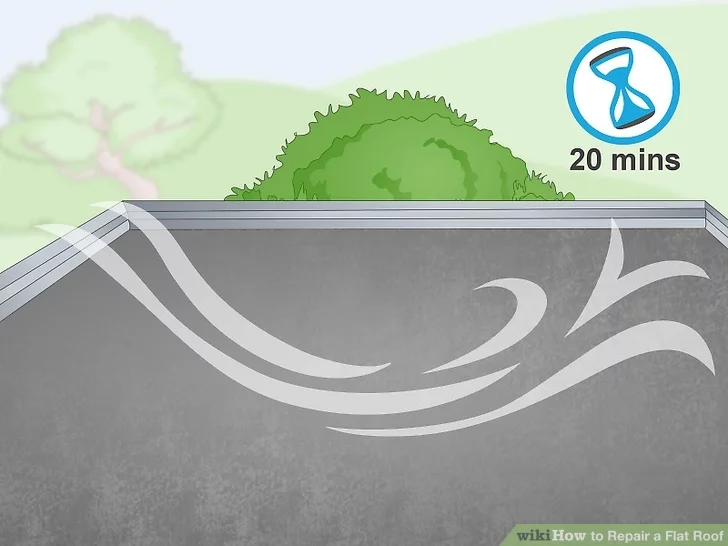
After application, let the primer dry for a minimum of 20 minutes. The exact time will depend on factors such as temperature and cloud coverage, but that should be covered in the manufacturer’s instructions. It is ready when it is dry to the touch. If you try to add sealant before then, it will not secure your roof properly.
Roll Out Fiberglass Mesh
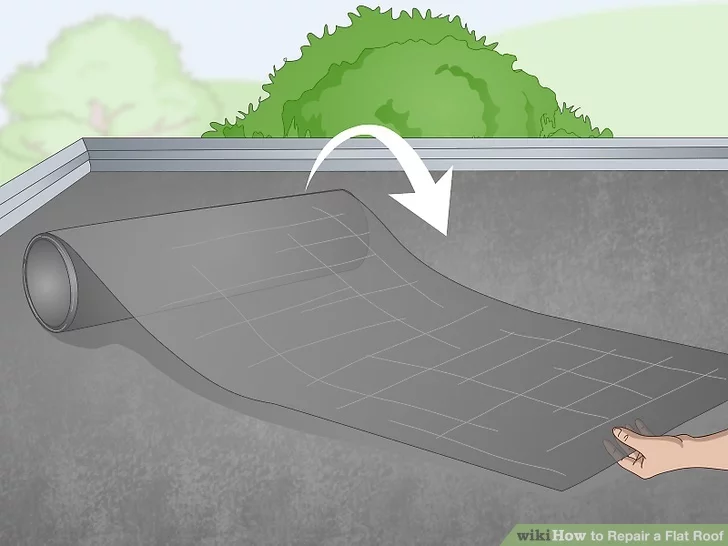
Fiberglass mesh comes in large rolls, which you will be rolling across the roof. At this point, you do not have to cover the entire roof since it is better to work bit by bit. Instead, roll the mesh out along the roof’s width from one end to the other, cutting it precisely so that it fits the edge. You should also ensure that it is level with the other parts of the roof.
When buying mesh, you will not need the giant rolls unless you are a professional or dealing with a massive roof. If anything, you want to avoid them since they cannot be lifted onto the roof easily. Instead, go with a roll around 40 inches wide, though the size can be adjusted for convenience.
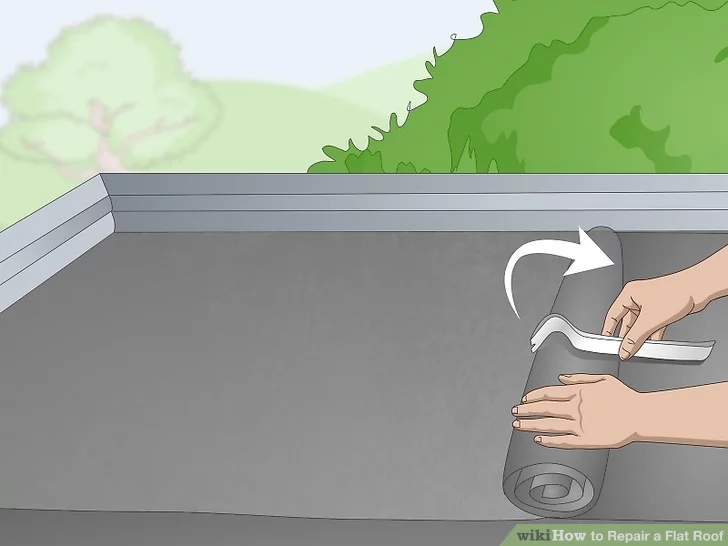
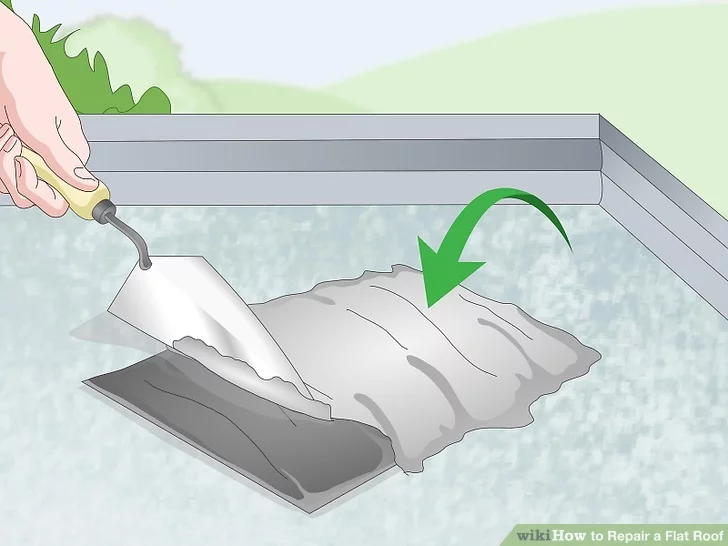
Curl the Mesh Ends Back
Once you have the mesh rolled out and cut, you want to start curling it back, bringing it to the center of the roof. You do this to seal the roof and mesh into place, which requires you to roll it back and hold it down to prevent unfurling. Try using a heavy object like a book or crowbar, avoiding sharp objects.
During the sealing process, you will work on one side of the mesh (curled) and then on the other. To avoid mishaps or difficulties, start with the more troublesome side, which is likely to be the side opposite your ladder or however you accessed the roof.
Mix Bitumen Roof Sealant and Paint the Roof
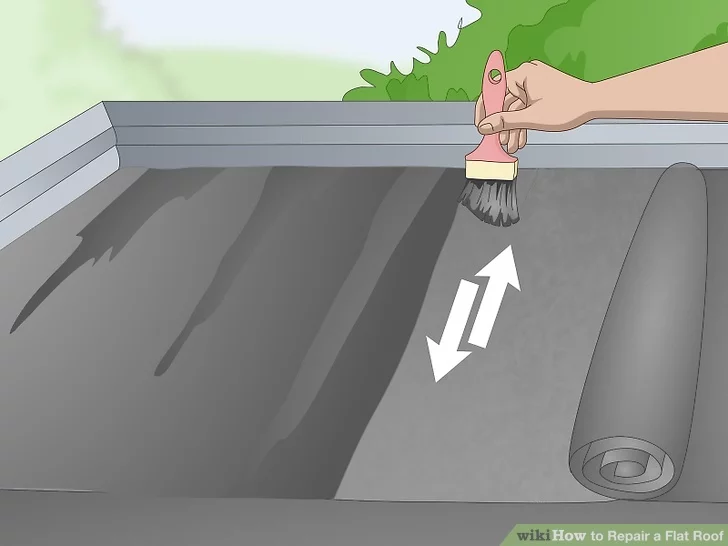
Before you can do anything else, you have to mix the sealant. It comes in a large can with the solid material on the bottom, so you have to stir it with a wooden mixing stick until it reaches an even, semi-liquid consistency. Doing this makes it easy to spread.
With the sealant ready to go, you can start painting it onto the roof, which is best done with a soft-bristle brush. Dip the brush into the sealant and spread it at the far end of the roof, working your way back toward the curled mesh. You only want to cover the area the mesh will cover once unfurled, leaving an even layer about half an inch thick.
When you are done, do the same under the other end of the mesh, which you can roll up if you have not done so already.
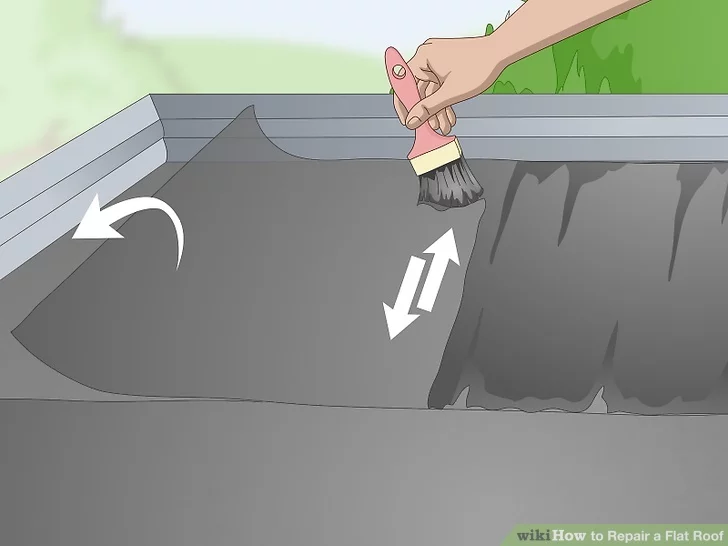
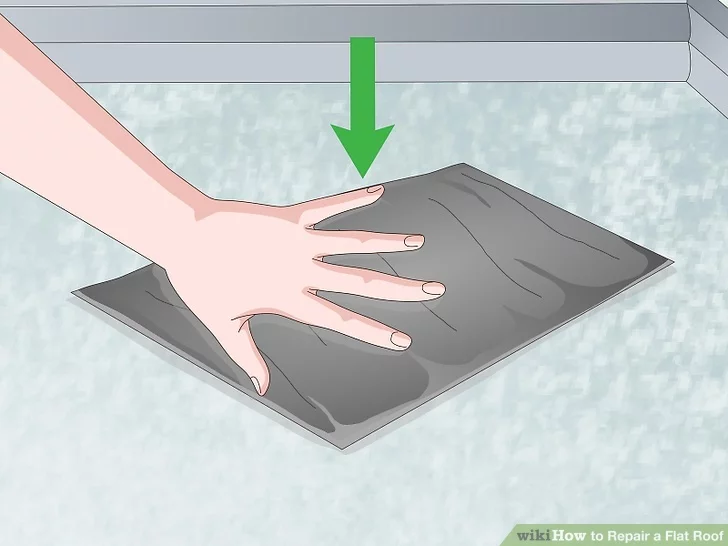
Coat the Mesh With Sealant
With the sealant spread on the roof, you can unfurl the mesh and press it flat against the roof using your feet. Then, brush another layer of sealant on top of the mesh, coating the entire thing in another half an inch of sealant. The additional coat keeps out moisture and keeps the mesh in place.

Cover the Entire Roof In Mesh
With one piece of mesh properly installed, you can move on to the next piece beside the one you just finished. Have them overlap by around two inches and keep each piece level with the others. Then, all you have to do is repeat the above steps until your entire roof is covered in mesh. The amount of mesh and sealant involved depends on your roof.
Add Another Coat of Sealant In 12 Hours
Wait for 12 hours to allow the sealant to dry, then take a look at the results. You will likely see dark holes that signify a lack of waterproofing. Apply another coat of around half an inch in thickness over the entire roof to fill in the small holes, giving it plenty of time to dry afterward. Then, do a final check to ensure the entire roof is properly sealed.
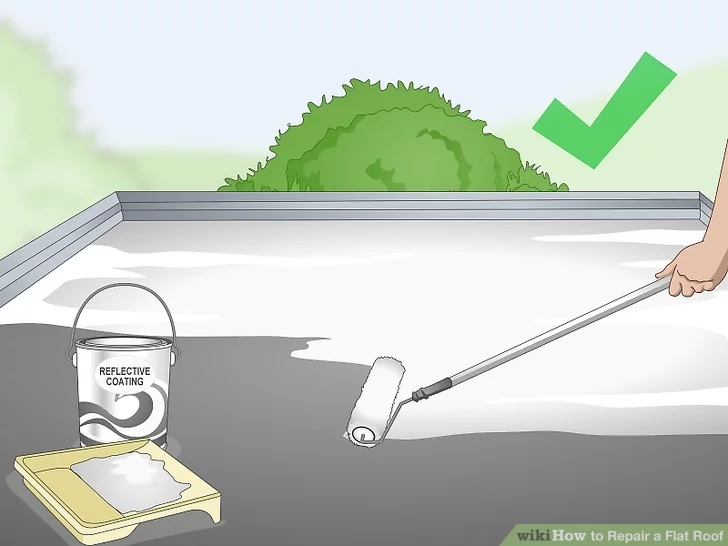
Finish With a Reflective Coat
The last thing you want to do is apply a reflective coat over the resealed roof to protect it. Buy some coating, mix it to an even consistency, and start applying it to the roof. It is best to use a brush to get the edges before finishing with a roller to spread the coating over the rest of the roof.
The key is to apply a smooth, even layer over the entirety of the roof, ensuring the entire surface has protection against the sun. Just keep in mind that it might take anywhere between 8 and 24 hours to dry, depending on the weather.

With over 12 years of construction industry experience, David Bitan specializes in restoring, inspecting, maintaining, and repairing roofs for residential, industrial, and commercial properties.
We Turn Every Project Into A Hive Of Excellence
-

Masterful Craftsmanship
Our skilled team merges art with function to ensure every roof is a testament to expert craftsmanship and quality.
-

Fast & Efficient
Time is of the essence, and we value yours. Count on our prompt and efficient service for all your roofing needs.
-

Guaranteed Satisfaction
Happiness is our benchmark. Experience peace of mind with our 100% Satisfaction Guarantee on every project.

Our mission at Bumble Roofing is to set new standards in quality by ensuring clients receive top-tier service, world-class materials, and an enduring roof over their heads.